
Use and Care Guide


Installation Instructions T & G Prefinished Engineered Plank
50 Year Residential Warranty
8 Rev.1RH-16HC
* Hardwood Flooring Cleaner
NOTE: Improper adapter plates and/ or staples/cleats can cause severe damage. Contact your Fastener
Manufacturer for the proper adapter as well as recommended staples, cleats and air pressure.
NOTE: Planks wider than 5” Glue down method is preferd.
Do not use staples or nails intended for 3/4” solid flooring.
When using air compressors
Adjust the regulator to ensure proper air pressure and setting of fasteners. Set air compressor to 70-80 PSI,
adjust as needed, do not exceed the nailer or air hose limitations. Make sure the fastening machine is
recommended for floor, is in good working condition, is fully adjustable, is at the appropriate angle, and that it
seat fasteners properly against the tongue of the board to prevent top edge and surface dimple damage.
● Avoid striking the edge of the prefinished flooring with the fasteners mallet. Edge crushing can occur causing
cracks and splinters. Use a block to hammer against if necessary. Use only a flooring nailer that engages the top
profile over the tongue at the appropriate angle. Make sure that the flooring nailer is flat against the board to
prevent top edge damage. The plate in contact with floor must be smooth and free from nicks or scratches.
Faceplates should be covered with protective materials to prevent damage to the surface of the flooring.
● For manual fasteners improper plate selection can cause severe edge damage. Check with the fasteners
manufacturer to ensure that the proper adapter has been used for this nominal 3/8” or ½” flooring (9, 9.5, or 12
mm).
● For pneumatic fasteners, improper air pressure settings, and failure to use the proper adapters can cause
damage to the flooring. The correct adapter and air pressure setting will properly set the fasteners in the nail
pocket. Set air compressor to the fastener manufacturers recommended PSI setting or an initial pressure of 75
PSI. Use a compressor with an in-line regulator with an air hose for proper adjustments. Adjust the air pressure to
insure proper setting of staples. If tongue damage occurs, lower the air pressure. If the staples do not set
properly increase the air pressure.
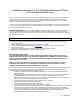
● If you need to remove a side nailed staple, do not pull straight up from the tongue. This will damage the surface
of the board. Instead, pull out the staple from the tongue at the front of the board with all pressure from the
hammer head directed into the sub floor.
● The manufacturer of the flooring is not responsible for any damage caused by the use of improper fasteners,
improper adapters as well as staples or cleats or tools or minor squeaking on mechanically fastened floors.
Step 1: ESTABLISH A STARTING POINT
● Before beginning the actual installation, provide proper layout of flooring by laying out several rows of flooring
end to end in a staggered pattern.
● Allow for a minimum 6” stagger of the end joints of the adjoining row, distributing short and long lengths equally
over the areas where the flooring is to be installed.
● Flooring is to be installed at right angles to the floor joists and, if possible, in the longest dimension of the room.
● Work out of several cartons at a time to insure proper color and shade mixture.
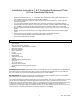
● To ensure that you have a good straight-line, place a mark 1” plus the width of the flooring on the end wall near a
corner of the starting wall. Repeat on the opposite corner wall and insert nails into each mark. Snap a chalk line
to provide a straight line to help align the planks