
Manual

13 | P a g e
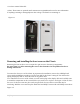
Classic has four one inch knock outs that are pre cast. The Classic has mounting locations and conduit
locations are similar to other brands of charge controllers to facilitate ease of upgrading older
technologies.
Mounting the Classic directly to the E Panel:
*Remove the front cover of the Classic.
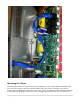
*Install the mounting bracket on the E Panel and start the upper mounting screw into the bracket
leaving it about half way out so you can hang the Classic on this screw.
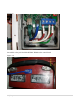
*Install the 1 inch close nipple into the E Panel as shown in the E-Panel directions. The 1‖ close nipple,
3 locknuts and 2 plastic bushings are included with each E-Panel. One locknut acts as a spacer.
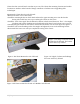
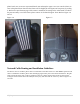
*Carefully hang the Classic on the screw in the bracket and slide it over the close nipple see figure 1.3.
*Install the lock nut and bushing on the close nipple and tighten the screw in the mounting bracket.
*Don't install the front cover until you complete the wiring of the Classic.
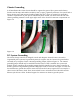
Figure 1.3B Classic Mounted to side of E-Panel Figure 1.3C Nipple, locknuts and bushings
that come with every E-Panel
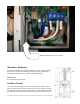
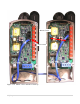
Figure 1.3D Classic mounted to the side of a MidNite Solar E-Panel
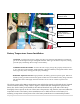
Figure 1.3A Charge controller bracket
mounted to the E-Panel. The bracket
comes with every E-Panel