AstraNET e3420 & AstraNET e3470 Color Scanner Quick Start Guide UMAX Data Systems, Inc. The Quick Start Guide is divided into three parts: Part 1 – UMAX scanner CD and software installation, Part 2 – hardware installation and Part 3 – how to scan your first image. Please follow the steps listed in this guide to install your scanner.
!! READ ME FIRST !! The Power Saving button on the front of scanner allows you to turn off the scanner lamp when the scanner is not in use, in order to reduce power consumption. However, the Power Saving button cannot shut down the power of the scanner. The Power Saving button works together with the UMAX VistaAccess program. If you follow the quick start guide to install the UMAX scanner CD and reboot the computer, UMAX VistaAccess will be running automatically.
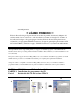
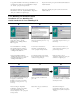
Insert the UMAX scanner CD into your CD-ROM drive. The installation program should start automatically. The installation program detects the language used on your system and selects it as the language to be installed. Please press the “Next” button and go to the next step. Note : If the installation program doesn’t start automatically, select StartèProgramsèWindows Explorer and then double-click on the VistaScan icon (your CD-ROM drive)èSetup icon (as shown in picture B).
NewSoft PageManager application includes two parts: PageManager – Image and document managing software and Presto! Page Type – Table editing software. Press “Next” and go to the next step. NewSoft PageManager inclut deux composants : PageManager – le logiciel de gestion d’images et de documents et Page Type – le logiciel d’édition de tables. Cliquez Suivant » pour passer à l’étape suivante. 0NewSoft PageManager tiene dos partes.
4 5 The installation program creates a new program group for VistaShuttle in the Start/Programs menu. Press “Next” to copy the files from the CD and install VistaShuttle. The installation of VistaShuttle is complete. The installation program will remind you to press the “Finish” button. Le programme d’installation crée un nouveau groupe de programmes pour VistaShuttle dans le menu Démarrer/Programmes. Cliquez sur « Suivant » pour copier les fichiers du CD et installer VistaShuttle.
Le programme d'installation offre deux types d'installation. Nous recommandons de selectionner " Typical Installation ". Cliquez sur " Suivant " pour passer a l'etape suivante. Cliquez sur " Install " pour copier les fichiers du CD VistaScan et installer VistaScan. El programa de instalación ofrece dos tipos de instalación. Recomendamos seleccionar “Typical Installation”. Haga clic en “Next” para continuar con el siguiente paso.
Aparecerá el diálogo “Registration Confirmation” para que pueda confirmar que la información introducida es correcta. Presione “Yes” para continuar con el siguiente paso. Seleccione el país en el que reside y haga Seleccione los idiomas que desee instalar en el sistema para utilizar la función de OCR y haga clic en “Next”. 7 8 9 Select the language of the Acrobat documentation you would like to install on your system and press “Next”.
The installation of OmniPage LE is complete. Please select “No, I will restart my computer later” and then press “Finish” to complete the software installation. All the software is installed. The installation program will remind you to press “Restart” to reboot your computer. L’installation de OmniPage LE est complétée. Sélectionnez « No, I will restart my computer later » et cliquez sur « Terminer » pour compléter l’installation. Tous les logiciels sont installés.
7 8 9 Click on Next to install PhotoShop LE with the Typical setup. Please key in your personal information and click on Next. You can find the serial number on the CD box. Click on Yes to continue. Cliquez sur Suivant pour installer PhotoShop LE avec l’installation typique. Entrez vos informations personnelles et cliquez sur Suivant. Vous pouvez trouver le numéro de série sur l’étui du CD. Cliquez sur Oui pour continuer. Haga clic en Siguiente para instalar PhotoShop LE con la instalación típica.
Insert the PhotoDeluxe CD into your CD-ROM drive. The installation program should starts automatically. Select the language to be installed and then press the “Next” button The “Adobe software license Agreement” window appears. Please press “Yes” to go to the next step. Note : If the installation program doesn’t start automatically, select StartèProgramsèWindows Explorer and then double-click on the PhotoDeluxe icon (your CD-ROM drive)èSetup icon Insérez le CD PhotoDeluxe dans votre lecteur CD-ROM.
Please input your name and the name of your company and press “Next” to go to the next step. Please press “Next” to go to the next step. The Setup Program will install the Acrobat reader to be able to read the online help manual. Press “Next” to go to the next step. Entrez votre nom et le nom de votre société Next » pour passer à l’étape suivante. Cliquez sur «Next» pour passer à l’étape suivante. Le programme d’installation installera Acrobat Reader pour pouvoir lire le manuel d’aide en-ligne.
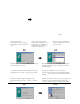
PART 2 Hardware Installation PARTIE 2 Installation du matériel TEIL 2 Instalación del hardware Connecting the transparency unit (For the AstraNET e3470 only) Connect the interface cable to the connector port on back of the scanner. Branchement du couvercle transparents Branchez le câble d’interface au connecteur du scanner. Conexi ón de la cubierta transparente Conecte el cable de interface en el conector del escáner . Connecting the USB Cable 1.
PART 3: How to get your first image with Presto! PageManager PARTIE 3 : Scanner votre première image De Presto! PageManager TEIL 3: Digitalización de la primera imagen Desde Presto PageManager 1 2 3 Double-click on the “Presto! PageManager” icon on your desktop. The PageManager window appears. Choose the “Select Source” command in the File menu. The “Select Source” dialogue box appears. Choose a scanner driver and then press the “Select” button.
7 You return to the PageManager window to edit the scanned image. Volverá a la ventana PageManager, donde podrá modificar la imagen digitalizada. Vous retournez à la fenêtre de PageManager pour éditer l’image scannée. How to get your first image with Caere OmniPage LE Scanner votre première image Caere OmniPage LE Digitalización de la primera imagen Desde Caere OmniPage LE 1 2 3 Select StartàProgramsàCaere ApplicationsàOmniPage Limited Edition to run the OmniPage LE program.
La imagen digitalizada aparecerá en la ventana de la aplicación OCR. Haga clic en el icono OCR para ejecutar la función OCR. El programa de reconocimiento de caracteres comenzará a procesar el archivo. Haga clic en “Stop Scanning” para salir del programa de OCR. 7 Input a name for the processed file and save it in a proper format for the word processor program (e.g. Microsoft Word) on your system.
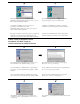
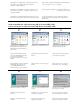
The UMAX VistaScan TWAIN driver window appears. Click on the “Preview” button to pre-scan the scanning material , Select the area to be scanned by clicking on the Frame tool and dragging the cursor diagonally to form a rectangle that best defines the area. As you drag, the borders of a frame encompassing the desired area will appear. Click on the “Color Photo” button to start the scanning process La fenêtre du gestionnaire TWAIN de UMAX VistaScan apparaît.
7 8 9 The UMAX VistaScan TWAIN driver window appears. Click on the “Preview” button to pre-scan the scanning material Select the area to be scanned by clicking You return to the PhotoDeluxe window to edit the scanned image or create cards, calendars… on the Frame tool , and dragging the cursor diagonally to form a rectangle that best defines the area. As you drag, the borders of a frame encompassing the desired area will appear.