
Product Manual

Page 8 of 13
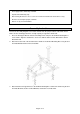
6. Attach the #4 Back Mounting Base to the Mounting Frame using the #8 Support Boards, the #10
Lock Nuts M10, and the #9 Hex Bolts M10x190.
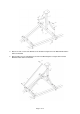
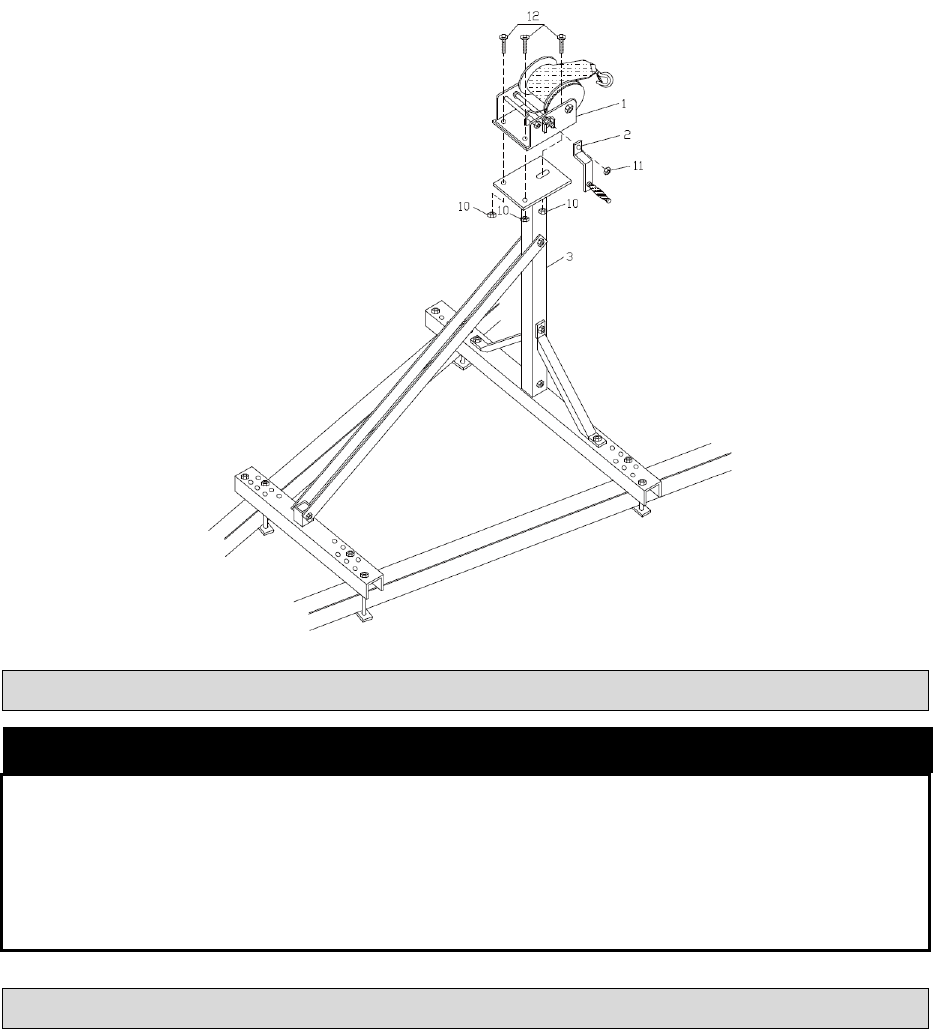
7. Attach the #2 Handle to the #1 Hand Winch Assembly using the #11 Lock Nut M12.
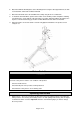
8. To install the #1 Hand Winch, put the ratchet switch on the middle position and pull the webbing
out until the holes on the bottom of the winch base are visible. Attach the Winch Assembly to the
top base of the #3 Stand using (3) the #12 Hex Bolt M10x25 and the #10 Lock Nut M10.
9. Adjust and make sure the #3 Stand is vertical. Fully tighten all hardware. The product is now
ready for use.
Before Each Use
⚠WARNING
CHECK BEFORE USE
Check the safety devices and the safe condition of the product.
Check for visible defects.
Check that all parts of the product are firmly attached.
Check that the safety devices are in working order.
Operating Instructions
1. Ratchet lever — There are 3 positions for this ratchet lever: The higher position is for pulling, the
lower position is for releasing, the middle position is for both pulling and releasing, but can only be
used when the winch is loaded. Important: Hold the crank handle tightly if you want to change
the lever position.