
Install guide


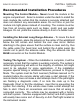

Recommended Installation Procedures
Remote car starters and alarms should be professionally
installed. Review the installation and owner manuals and acquire a
vehicle wiring diagram for the vehicle to be worked on. Take a few
moments to walk around the vehicle looking for any damages and
make note if any are found. Also check other functions such as the
lighting system, warning or check engine lights. Check if the vehicle
has a factory security or anti-theft system (Transponder or PASS-
LOCK). These systems will require additional parts and labor to
complete the installation. Use of the proper tools and testing
equipment is also very important. Never use a grounding style test
light. Use only a circuit safe test light or digital Volt/Ohm meter to
test for wires in the vehicle. It is the sole responsibility of the installer
to test and verify all connections.
Proper Connections - Remote Starters can handle loads of up to
30 amps for extended periods of time. It is critical to insure that all
high current connections are properly soldered and insulated with
quality electrical tape. Failing to insure proper connections will result
in warranty being VOID and can result in damage to the vehicle and
remote starter module. The manufacture is not responsible for any
such damages. It only takes a few more minutes to do the job right.
Under Hood Connections - Route the hood pin and tach wire
through the firewall into the engine compartment. If possible route
the wires through a factory rubber grommet. If drilling a hole through
the firewall, BE CAREFUL. Always check for obstructions on both
sides of the firewall. After drilling, use a snap in grommet to protect
the wires from sharp edges. Use split loom to insulate the wires, route
the wires clear of moving parts and extreme heat. The hood pin
switch must always be installed and the tach wire should always be
soldered and taped properly.
INSTALL MANUAL REMOTE VEHICLE STARTER
PAGE 4