
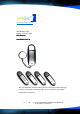
User manual


P a g e | 9 Copyright UltraDisk® Digital Voice Recorders
© All rights reserved 2011
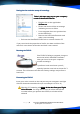
Setting the time and date
Setting the time and dateSetting the time and date
Setting the time and date
stamp of recordings.
stamp of recordings.stamp of recordings.
stamp of recordings.
Drive J (
Drive J (Drive J (
Drive J (this letter may vary on your computer
this letter may vary on your computerthis letter may vary on your computer
this letter may vary on your computer)
) )
)
contains UltraDisk® Software
contains UltraDisk® Software contains UltraDisk® Software
contains UltraDisk® Software
•
Double click on the application
SetTime.exe
SetTime.exeSetTime.exe
SetTime.exe
•
Please note there will be no message
indicating success or failure
•
Your computer time now synchronises
to the USB Device
•
Remove the USB Voice Recorder and
make a test recording
•
Re-insert the UltraDisk® DVR10 voice recorder into the PC
If you now check the properties of the file, the date and time of the
wav file is now shown as the date and time it was created.
Resetting the DVR10
Resetting the DVR10Resetting the DVR10
Resetting the DVR10
If the DVR10 is failing to respond, charge or
launch the built in UltraDisk® software
when you insert it into your computer
consider resetting it.
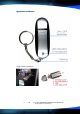
To perfom a hard reset insert a pencil /
paperclip into the reset hole as shown for 3
seconds. This will restore the unit to its factory settings and perform a
hard reset.
Formatting
FormattingFormatting
Formatting
the DVR10
the DVR10 the DVR10
the DVR10
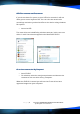
Insert your voice recorder to the usb port on your computer and right
click the detected removable drive (In our example it is Drive K).
Warning !! Formatting will delete
deletedelete
delete
all the data from your Digital
all the data from your Digital all the data from your Digital
all the data from your Digital
Voice Recorder
Voice RecorderVoice Recorder
Voice Recorder. You may wish to copy all of the data off the
recorder before you perform the format, as all data will be
deleted!