Smart Camera Quick Start Guide Copyright©2020 Ultimate IOT (Shanghai) Technology Ltd. All rights reserved. https://www.unisiot.
Statement Thank you for choosing UIOT, this user manual is intended for users of IP Camera(C0221100). It includes instructions on how to use the product. Before using the device, read the user manual carefully. Keep this manual for further clarifications. The descriptions, images and technical parameters may vary with the actual devices. The software embodied in the product is governed by the user license agreement covering that product.
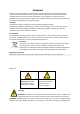
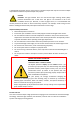
a separate PSU should be used for each camera. A multiple-output PSU may be used if the multiple output PSU has isolated and protected (2A max) outputs. Cautions CAUTION: The light emitted from the near-infrared light emitting diodes (LEDs) provides illumination over a wide area. This light is not considered a risk to the unshielded human eye. However, as with any light source, it is recommended that normal precautions be taken to avoid unnecessary exposure.
Overview Installation Before you start: 1. Please make sure that the camera is in good condition and all of the assembly parts are included. 2. Make sure that all related equipment is powered-off during the installation. 3. Check that the camera specification agrees with the installation environment. 4. To avoid damage, ensure the power supply voltage matches your camera requirements. 5.
2. Open the camera mounting base using the tool provided in the package. 3. Use the screws to fix the mounting base to the ceiling. 4. Route the cables properly and connect the corresponding cables. 5. Align the bottom of the camera with the groove on the base, and then rotate and clamp the camera.
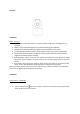
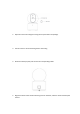
Network Configuration The IP system of all the cameras is in DHCP when leaving the factory. Access IP Camera over LAN Network Connection To view and configure the IP Camera via LAN, you need to connect the IP Camera in the same subnet with your local network, and install client software to search and access the IP Camera. Network Switch Indoor/Outdoor IP Cameras NVR PC Note: The above connection diagram is for connecting Non-PoE Cameras.
3. Click Devices at the bottom, the Devices Management dialog box will appear. Device information including Device Name, ID, IP Address, Channel Status are listed. Add selected Device Delete selected Device Add All Detected Devices Delete All Added Device Research Device Set IP for Camera Automatically Note: JNVR will automatically connect the added device with default IP Camera account (Username: abc Password: 123).
FCC Statement: Any Changes or modifications not expressly approved by the party responsible for compliance could void the user’s authority to operate the equipment. This device complies with part 15 of the FCC Rules. Operation is subject to the following two conditions: (1) This device may not cause harmful interference, and (2) This device must accept any interference received, including interference that may cause undesired operation.