
User guide
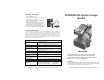

Shining Technology CitiDISK HD Quick Usage Guide v9.0 Shining Technology CitiDISK HD Quick Usage Guide v9.0
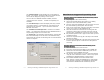
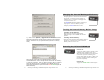
The “Capture format” column displays the current captured
format. For example, “QuickTime” MOV is the format selected.
User is able to change it by clicking on one of them.
There are two user-definable formats available, which are
“Canopus AVI2” and “P2-MXF”. “P2-MXF” is temporarily not
selectable.
The “Pre-Scene Loop” function will display how many seconds
user wants to choose. If it’s blanked out, such function is not
supported by this hardware. Up to 6 seconds is allowed for
FW1256C & H model.
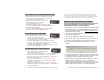
The “Continue record at tape end” is “checked” as a default
setting. Un-checking this item will force the CitiDISK HD unit to
stop recording at tape end or P2 Card is full.
The “Power off” is not checked as default setting. Checking this
item will automatically turn off the unit 30 seconds after being
ejected from the computer or after being left un-connected to the
camera or computer.
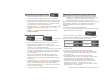
Manufacturer Suggested Operating Steps
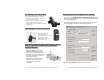
Shooting Video to the CitiDISK HD Simultaneously with or
without P2 Card
1. Fully charge the unit’s internal battery
2. Choose the favorable native file format for your editing
system and turn on the internal battery switch
3. Securely connect the CitiDISK HD to the camcorder or mount
the external battery/unit together with camcorder
4. Power on the camera first, select the “Recording” mode of the
camera; next, power on the CitiDISK HD unit
5. Insert the P2 Card and control the HD recording from the
camcorder’s “REC” button or manually record the video by
pressing “REC” of CitiDISK HD unit if no P2 Card is inserted
6. Play the last captured scene or play all scenes after you have
completed shooting
7. Connect to computer and copy all of the clips to the internal
hard disk for editing
8. Re-connect the CitiDISK HD to the camcorder and quick erase
all of the captured clips to re-claim the free disk space for
next usage
Shooting Video to P2 Card First Then Archiving to the
CitiDISK HD Later
1. Insert the P2 Card and record the video
2. Plug in the wall-mount power adapter to the CitiDISK HD.
3. Connect the camcorder & the CitiDISK HD, power on the
camera first, and the CitiDISK HD second
4. Set camera’s 1394( FireWire ) to “Host” mode and start the
“Copy P2 Card to Hard Disk” function. Camera may require
formatting the CitiDISK HD before copying process
5. Power off the CitiDISK HD first and camera second
Note: Need to re-format the CitiDISK HD by using Shining
Utility Program if shooting to the CitiDISK HD wanted next
time when the CitiDISK HD was formatted by camera.
P14 P3