INSTRUCTION MANUAL Indoor Air Quality Meter AQM4 HOLD MIN MAX AVG CO 2 CO TADPWBT CAL REC AM Re call PM O C F O %rh 1-800-547-5740 • Fax: (503) 643-6322 Email: info@ueitest.
INTRODUCTION Thank you for purchasing the UEi AQM4 IAQ meter. The meter measures CO² levels, CO levels, air temperature, dew point, wet bulb temperature, and humidity. The AQM4 is an ideal instrument for indoor air quality (IAQ) diagnosis. Poor indoor air quality causes tiredness, inability to concentrate, and even illness (ex. Sick Building Syndrome).
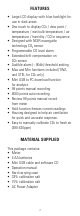
FEATURES • Large LCD display with blue backlight for use in dark areas • One touch to display CO² / dew point / temperature / wet bulb temperature / air temperature / humidity / CO in sequence • Designed with NDIR waveguide technology CO² sensor • Programmable CO level alarm • Extended drift compensation on CO² sensor • Audible alarm (~ 80db) threshold setting • Max and Min functions included (TWA and STEL for CO² only) • Mini USB to PC download function for analysis • 99 points manual recording
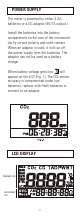
POWER SUPPLY The meter is powered by either 4 AA batteries or a DC adaptor (9V/1A output.) Install the batteries into the battery compartment on the rear of the instrument. Verify correct polarity and solid contact. When an adaptor is used, it will cut off the power supply from the batteries. The adaptor can not be used as a battery charger. When battery voltage gets low, will appear on the LCD (Fig. 1.
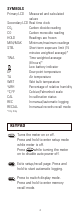
SYMBOLS Primary LCD Measured and calculated values Secondary LCD Real time clock CO² Carbon dioxide reading CO Carbon monoxide reading HOLD Readings are frozen MIN/MAX Minimum/maximum readings STEL Short-term exposure limit (15 minutes weighted average)* TWA Time weighted average (8 hours)* Low battery indicator DP Dew point temperature TA Air temperature WBT Wet bulb temperature %RH Percentage of relative humidity °C/°F Celsius/Fahrenheit scale CAL In calibration status REC In manual/automatic loggi
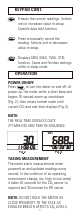
KEYPAD CONT. Freezes the current readings. Selects unit or increases value in setup. Cancels data hold function. Press to manually record the reading. Selects unit or decreases value in setup. Displays MIN, MAX, TWA, STEL function. Saves and finishes settings while in sleep mode. OPERATION POWER ON/OFF Press to turn the meter on and off. At power up, the meter emits a short beep and begins 30 second warm-up countdown (Fig. 2), then enters normal mode with current CO² and real time displays (Fig.3).
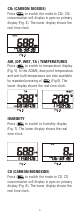
CO² (CARBON DIOXIDE) Press to switch the mode to CO². CO² concentration will display in ppm on primary display (Fig. 4). The lower display shows the real time clock. AIR, (DP, WBT, TA ) TEMPERATURES Press to switch to temperature display (Fig. 5). In the AQM4, dew point temperature and wet bulb temperature are also available by repeated pressing of (Fig 6). The lower display shows the real time clock. HUMIDITY Press to switch to humidity display (Fig. 7). The lower display shows the real time clock.
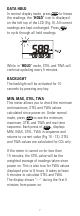
DATA HOLD In normal display mode, press to freeze the readings, the "HOLD" icon is displayed on the left top of the LCD (Fig. 9). All current readings are kept unchanged. Press to cycle through all held readings. While in "HOLD" mode, STEL and TWA will continue updating every 5 minutes. BACKLIGHT The backlight will be activated for 10 seconds by pressing any key. MIN, MAX, STEL, TWA This meter allows you to check the minimum and maximum, STEL and TWA values calculated since power on.
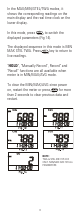
In the MAX/MIN/STEL/TWA modes, it shows the corresponding readings on the main display and the real time clock on the lower display. In this mode, press to switch the displayed parameters (Fig 14). The displayed sequence in this mode is MIN MAX STEL TWA. Press key to return to live readings. "HOLD", "Manually Record", Record" and "Recall" functions are all available when meter is in MIN/MAX/AVG mode.
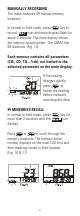
MANUALLY RECORDING The meter features 99 manual memory locations. In normal or hold mode, press key to record, icon and main display flash for about 3 seconds. The main display shows the memory serial number. The AQM4 has 99 locations. (Fig. 15) Each memory contains all parameters (CO², CO, TA....%rh), not limited to the selected parameter on the main display. If the reading changes quickly, press to freeze the reading before manually recording the data.
Press key to switch the display parameter. (Fig. 18) The time displayed in memory recall mode is the recording time of this memory. To escape the memory recall mode, press key to leave and return to normal display. ALARM The meter features an audible alarm to give warnings when CO concentration exceeds a pre-set limit. (See Pg 12, P20 for setting alarm threshold.) It emits beeps (Abt. 80dB) when CO level goes over the set value and stops only when the readings fall below the set value.
To terminate data logging, press for 2 seconds, until icon stops flashing. NOTE: The AQM4 will only record one session. If is activated all previous data is erased. Download logged data prior to starting another session. AUTO POWER OFF The meter turns off automatically after 20 minutes of inactivity. To override the function, hold down and for 2 seconds to turn on the meter until "n" appears. (Fig.
Press or to scroll through set-up options from the following: P10 - 99 Memory Clear P20 - CO Alarm P30 - Temperature Units P40 - Logging Sample Rate P50 - Pressure Compensation P60 - Real Time Clock P10: 99 MEMORIES CLEAR P10 and "CLR" (Fig. 21) are displayed on the LCD, press to enter into P11 and clear or keep all the manual records. The current setting will be blinking on the LCD. (Fig. 22) Press or to choose NO or YES and press to confirm.
P30 TEMPERATURE UNIT When P30 and "UNIT" (Fig 25) are displayed on the LCD, press to go into P31 to choose the temperature unit. The set value will display on LCD (Fig 26) Press press -OR- Press P30. or to choose C° or F° and to confirm. to escape and return to P40: LOGGING SAMPLING RATE P40 allows you to set sampling rate of data logging (Fig. 27). The range is from 1 second to 4 hours 59 minutes and 59 seconds. Press to display current setting and enter edit mode. The display is in the format [HH.
P50 PRESSURE COMPENSATION When P50 and "PRES" (Fig. 29) are displayed on the LCD, press to set pressure compensation value for CO² measurement. The current set will flash on LCD. (Fig. 30) The barometric pressure unit is kPa. Press to increase or to decrease barometric pressure. -OR- Press to escape and return to P50. NOTE: ONLY ENTER THIS MODE IF CURRENT BAROMETER PRESSURE IS KNOWN. MULTIPLY IN. Hg BY 3.39 TO OBTAIN kPa VALUE.
CALIBRATION MODE The AQM4 allows you to calibrate CO² and RH, for CO calibration please send unit to UEi. To enter calibration mode, place unit at suitable calibration site specified in the following sections. Press + , then also simultaneously for 3 seconds to turn on the meter and enter calibration mode (Fig. 33). Press or to select parameter to calibrate. To cancel or exit calibration at any time, turn meter off.
RH CALIBRATION To begin, enter calibration mode. Press or to select parameters for calibration and press enter. The meters default for calibration of humidity is 33% and 75% salt solution. The ambient condition is recommended at 70 ~ 75°F (25°C) and stable humidity. To cancel calibration, turn off the meter. CAUTION: Do not calibrate the humidity without default calibration salts. Contact UEi for calibration salt or for service 33% Calibration Plug the sensor probe into 33% salt bottle.
CO CALIBRATION When the accuracy becomes a concern, return to UEi for standard calibration. It is necessary to have standard CO gas for calibration. CAUTION: Do not calibrate the meter in the air with unknown CO concentration. It could be calibrated as 400ppm by default which leads to inaccurate measurements. TROUBLESHOOTING Will Not Power On - Press for more than 3 seconds. - Check that the adaptor is connected and on. - Check that battery level is sufficient and properly installed.
Error Messages Cont. E11: Retry humidity calibration E16: Retry CO calibration E31: Temperature sensor AD damaged E32: Memory IC damaged. E33: Humidity sensor or circuit damaged. PC CONNECTION The UEi AQM4 can be connected to a PC to download recorded data. Plug the USB cable into the socket at the right side of the meter and the other port to your PC. Next, install the software on your PC following these procedures. 1. Insert the CD ROM and run installation.
AUTO CONNECT Start the software and it will detect the logger connection automatically, indicating the COM port information at the bottom of the main screen as well as the COM Port setting column. LOGGER SETTINGS To set up logging plan, click "Setting" icon and select "Logger". The setting page is opened. Users can set up the logger identifier number. Click OK for setting and exit the screen to confirm the settings.
DATA TRANSMISSION To transmit auto recorded data from the meter, click "Download" icon on the left top side of the main screen. All auto-recorded data in the logger will be transmitted. The raw data with time stamp will display at the lower part of the screen and the graph in the middle. In the Graph display, the Y-axis indicates Temperature, RH, DP,WBT, CO2, and CO levels in different line colors. The X-axis can be switched to show Time or Recorded Number Stamp.
VIEW MENU The following functions help to view the GRAPH data in more detailed way. In the view menu, there are 4 tools to enlarge the Graph data for detailed data review. Zoom in: Hold down "Ctrl" key on the PC keyboard and left click any target point on the graph to zoom in. Right click at any point to zoom out. Zoom Window: Hold down "Ctrl" key and drag click the left button of the mouse to select an area on the Graph and the selected area will be enlarged.
Cursor Button: Switch cursor ON and it shows the raw data with the cursor. Click anywhere on the graph and the digital data will be displayed. Switch OFF to disable the function. DATA PROCESSING The downloaded data can be Saved or Printed via "File" processing function. Load: To retrieve saved files, just click "Load" and select a desired file and it will be loaded in the main screen with the file details at the left top side.
SPECIFICATION Measuring Range CO² 0 ~ 9999ppm CO 0 ~ 1000ppm Temperature -20 ~ 60˚C -5 ~ 140˚F Relative Humidity 0.1% ~ 99.9% Dew Point Temp. -20.0 ~ 59.9˚C Wet Bulb Temp -5.0 ~ 59.9˚C Resolution 1ppm, 0.1˚C/˚F, 0.1%RH Accuracy CO² ±30ppm ± 5% of reading (0 ~ 5000ppm) CO ±10ppm for less than 100ppm ±10% of reading for 101~500ppm ±20% of reading for 501ppm and above Temperature ±0.
CO² LEVELS AND GUIDELINES REGULATORY EXPOSURE LIMIT ASHRAE Standard 62.1-2004: CO² concentration in occupied building should not exceed 1000ppm. Building Bulletin 101 (BB101): 1500ppm UK standards for schools state that CO² averaged over the whole day (i.e. 9am to 3:30pm) should not exceed 1500ppm. OSHA: 5000ppm Time weighted average over five 8-hour work days should not exceed 5000ppm. Mak: Germany, Japan, Australia, UK: 5000ppm Eight hours weighted average in occupational exposure limit is 5000ppm.
CO LEVELS ppm Symptoms and Applicable Standards 0-1 Normal background levels 9 Maximum indoor air quality level: Maximum allowable concentration per ASHRAE Residential Standards 62-1989 for living area.
CE CERTIFICATE The product complies with EMC directive 2004/108/EC Technical standard: Emission EN 61326-1:2006 Class B EN 55011:2009/A1:2010 Group 1 Class B Immunity EN 61326-1:2006 EN 61000-4-2:2009 EN 61000-4-3:2006 A2:2010 26
LIMITED WARRANTY The AQM4 is warranted to be free from defects in materials and workmanship for a period of two years from the date of purchase. If within the warranty period your instrument should become inoperative from such defects, the unit will be repaired or replaced at UEi’s option. This warranty covers normal use and does not cover damage which occurs in shipment or failure which results from alteration, tampering, accident, misuse, abuse, neglect or improper maintenance.