
User's Manual

© 2010 - 2015 Persistent Systems, LLC – All Rights Reserved28
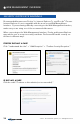
INITIAL NODE CONFIGURATION
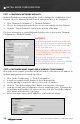
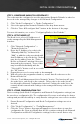
STEP 2: CUSTOMIZE NODE NAME AND IP ADDRESS TO BE UNIQUE
Each node in the network should be assigned a unique node name and IP address to
facilitate management and network operations.
1. Click “Node Configuration” > “Node Configuration.”
2. Insert the new name and IP Address in the indicated fields.
3. Set the gateway to match the subnet of the node’s IP address.
4. Click the “Save & Reconfigure Unit” button at the bottom of the page.
5. Load the key and saved configuration file into remaining nodes. Customize the
Node Name and IP address for each node, then click the “Save & Reconfigure
Unit” button at the bottom of the page.
6. Ensure that node names and IP addresses of all nodes are unique.
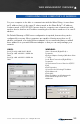
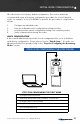
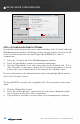
STEP 1: CONFIGURE NETWORK DEFAULTS
Network Defaults are settings that will be used to manage the configuration of the
network. Up to 16 different default Channel settings are able to be configured.
1. Click “Network Configuration” > “Network Defaults.”
2. Choose the settings you would like to use for your network for each Channel.
3. Click the “Save to Network” button at the bottom of the page.
For more information on setting Network Defaults, refer to the section “Network
Configuration > Network Defaults.”
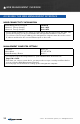
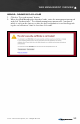
WARNING!
For units branded with an FCC label and FCC ID,
only the provided antenna or equivalent type and
gain can be used: this device must comply with
Part 15 of the FCC rules.
FCC branded devices will be limited so users can-
not set output power levels outside of those certi-
fied under the FCC rules.
FCC test results and reports can be provided by
Persistent Systems, LLC upon request.
For more information, please contact Persistent Sys-
tems, LLC Quality/Compliance personnel.