30-10008_E_WC_UM_Covers.qxd 3/2/05 2:26 PM Page 1 É c h e l o n™ P. O . B o x 2 4 5 0 4 0 Milwaukee, WI 53224-9540 ® Phone: 414.354.0300 Fax: 414.354.7905 U w w w . u - l i n e . c o m S E R M A N U A L P r i n t e d i n U . S . A .
30-10008_E_WC_UM_Covers.
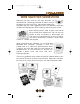
0_10008_E_WC_UM.qxd 3/2/05 2:23 PM Page 1 INTRODUCTION Congratulations on your purchase of U-Line ice making or refrigeration products. A pioneer in the field for more than 40 years, U-Line is the world’s number one manufacturer of built-in, under-counter ice making and specialty refrigeration products. U-Line dedicates 100% of its research and development to these products. The result: U-Line technology leads the market with innovation, design, depth of product line and peformance.
30_10008_E_WC_UM.qxd 3/2/05 2:23 PM Page 2 User’s Manual If you do not return your Warranty Registration Card, U-Line will use the date of sale to the U-Line distributor as the first date of warranty for your new Wine Captain® model. Please also record the purchase date of your U-Line unit and your dealer’s name, address and telephone number.
30_10008_E_WC_UM.qxd 3/2/05 2:23 PM Page 3 WINE SELECTION SUGGESTIONS Selecting the right wine for the right occasion can sometimes be a seemingly awkward or difficult task for the beginning wine enthusiast. We would therefore like to present you with a few suggestions which may provide a little more confidence and enjoyment when choosing and serving your wines. When selecting wines, keep an open mind and do not be afraid to be adventurous.
30_10008_E_WC_UM.qxd 3/2/05 2:23 PM Page 4 User’s Manual SUGGESTIONS FOR MATCHING FOOD AND WINE Although there are no hard fast rules for matching wine to food, some guidelines should be observed. Delicate dishes should be accompanied by lighter more delicate wines. Full flavored foods should be matched with fuller bodied wines. As a general rule one should aim to ascend in flavor and quality of wines served.
30_10008_E_WC_UM.
30_10008_E_WC_UM.qxd 3/2/05 2:23 PM Page 6 User’s Manual COMMON TASTING TERMS Acidity: A critical element of wine, preserves the wine’s freshness. In excess results in an overly tart and sour wine. Balance: A desired trait where tannin, fruit and acidity are in total harmony. Wines with good balance tend to age gracefully. Body: The weight and presence of wine in the mouth provided by the alcohol and tannin level. Full-bodied wines tend to have this strong concentration.
30_10008_E_WC_UM.qxd 3/2/05 2:23 PM Page 7 SAFETY PRECAUTIONS Do not attempt to install or operate your unit until you have read the safety precautions in this section. Safety items throughout this manual are labeled with a Danger, Warning or Caution based on the risk type. DEFINITIONS ! This is the safety alert symbol. It is used to alert you to potential personal injury hazards. Obey all safety messages that follow this symbol to avoid possible injury or death.
30_10008_E_WC_UM.qxd 3/2/05 2:23 PM Page 8 User’s Manual GENERAL PRECAUTIONS ! DANGER ! RISK OF CHILD ENTRAPMENT. Before you discard your Wine Captain, remove the door and leave shelves in place so that children may not easily climb inside. ! WARNING • Never attempt to repair or perform maintenance on the unit until the electricity has been disconnected.
30_10008_E_WC_UM.qxd 3/2/05 2:23 PM Page 9 INSTALLATION Wine Captain® models are manufactured in two different sizes. The 2015WC will accommodate 24 (750 ML size) wine bottles and the 2075WC will accommodate 48 (750 ML size) wine bottles. Unless otherwise noted, all documentation pertains to both units. SITE PREPARATION 1. Position the unit on a flat, level surface, capable of supporting the entire weight of the unit. Remember the unit will be significantly heavier once it is fully loaded. 2.
30_10008_E_WC_UM.qxd 3/2/05 2:23 PM Page 10 User’s Manual NOTE All U-Line units (except Stainless Steel models) have a zero clearance for the door to open (see Figure 1). See BUILT-IN INSTALLATION for additional clearance requirements. Stainless Steel models require a minimum of 21/2" door handle clearance when installed against a wall. CABINET OR WALL DOOR SWING 0" CLEARANCE NEEDED UL124A Figure 1 5. Position the unit to allow free air flow through the front grille (see Figure 2).
30_10008_E_WC_UM.qxd 3/2/05 2:23 PM Page 11 WOOD TRIM ON WINE RACKS Your U-Line Wine Captain® Model is equipped with a natural wood trim on the wine racks for appearance and durability. The wood trim has been coated at the factory with a clear vinyl sealer, which will adequately protect the wood in normal usage. ! WARNING To prevent permanent damage to the inner liner of your Wine Captain®, the wine rack wood trim MUST be removed from the unit for staining and/or finishing.
30_10008_E_WC_UM.qxd 3/2/05 2:23 PM Page 12 User’s Manual To stain for a different wood color: 1. Remove five racks with wood trim from unit, see RACK REMOVAL/INSTALLATION. 2. Remove screws securing wood trim to racks. 3. Apply Minwax® Water-Based Wood Stain to wood with a synthetic foam brush. Stain must penetrate approximately 3 minutes. After this period, while stain is still wet, take a stain dampened rag and remove all excess stain.
30_10008_E_WC_UM.qxd 3/2/05 2:23 PM Page 13 LEVELING THE UNIT Position the unit on a flat, level surface, capable of supporting the entire weight of the unit when full. This unit contains four adjustable leveling legs. Turn the legs clockwise to raise and counterclockwise to lower (see Figures 3 & 4).
30_10008_E_WC_UM.qxd 3/2/05 2:23 PM Page 14 User’s Manual 3. To reverse the door: 1. Remove top hinge screw pin (7/64" Allen wrench) from cabinet (see Figure 6). Remove door by tilting forward and lifting off bottom hinge pin. Remove top hinge (3 screws), reinstall hinge screw pin, and remount on opposite side BOTTOM (see Figure 8). HINGE SCREW PIN UL313 Figure 8 4. UL310 Figure 6 2.
30_10008_E_WC_UM.qxd 3/2/05 2:23 PM Page 15 5. Remove existing bottom hinge (3 screws) and remount on opposite side TOP. Remove top hinge screw pin. 6. With bottom of door facing up, remove pivot plate and bushings (2 screws), flip over, and remount on opposite side of door (see Figure 10). UL319a Figure 10 7. Holding door upright with top of door tilted forward, place hole of door pivot plate on bottom hinge screw pin (see Figure 11).
30_10008_E_WC_UM.qxd 3/2/05 2:23 PM Page 16 User’s Manual DOOR ADJUSTMENT Your Wine Captain doors were aligned at the factory before shipment. Occasional re-adjustment may be necessary. The following procedure will correct for up to 1/4" alignment. The door should never be flush with the top of the cabinet. Even when level, the top edge of the door will be 1/8" below the top of the cabinet (see Figure 12). TO ADJUST DOOR: 1.
30_10008_E_WC_UM.qxd 4. 3/2/05 2:23 PM Page 17 If door edge opposite the hinges needs to move up, move plate toward outside of door. If door edge needs to move down, move plate toward inside of door (see Figure 14). Repeat until top edge of door is parallel with top of cabinet and tighten screws securely. SLOTTED MOUNTING HOLES ALL WINE CAPTAIN MODELS RAISE OUTSIDE DOOR EDGE LOWER OUTSIDE DOOR EDGE DOOR003a Figure 14 5.
30_10008_E_WC_UM.qxd 3/2/05 2:23 PM Page 18 User’s Manual BUILT-IN INSTALLATION Your U-Line product has been designed for either free-standing or builtin installation. When built-in, your U-Line product does not require additional air space for top, sides, or rear. However, the front grille must NOT be obstructed. NOTE To ease unit installation and removal, it is recommended that the cabinet rough opening dimensions be increased by at least 1/4" over the dimensions given for your unit.
30_10008_E_WC_UM.qxd 3/2/05 2:23 PM Page 19 CONTROL SETTINGS ON/OFF/TEMPERATURE CONTROL KNOB Your Wine Captain is shipped in the ON position, however, you may turn it ON or OFF using the control knob located in the center of the grille. LIGHT ON/OFF SWITCH Turn the control knob UL316A clockwise for ON, counterclockwise for Figure 16 OFF. To turn the unit OFF, rotate the control knob counterclockwise all the way toward warmer until it stops (until “click” is heard).
30_10008_E_WC_UM.qxd 3/2/05 2:23 PM Page 20 User’s Manual ADJUSTING THE TEMPERATURE CONTROL CHECKING TEMPERATURE To accurately check the temperature, insert an accurate thermometer into a plastic (nonbreakable) bottle, partially filled with water. Tighten the bottle cap securely (see Figure 17). Place the bottle in the desired area for 24 hours. Refrain from opening the unit during the testing period. After 24 hours, check the temperature of the water. Adjust the control knob if necessary and retest.
30_10008_E_WC_UM.qxd 3/2/05 2:23 PM Page 21 DISPLAY RACK The bottom rack in your Wine Captain® model is designed for storage as well as for display purposes. The 2015WC holds four bottles in the display rack and the 2075WC holds eight bottles. STOCKING RECOMMENDATIONS 4 3 5 2 6 1 7 WARMER COLDER The wine racks allow for the propULWC001 er horizontal storage of wine.
30_10008_E_WC_UM.qxd 3/2/05 2:23 PM Page 22 User’s Manual MAINTENANCE Periodic cleaning and proper maintenance will ensure efficiency, top performance, and long life. The maintenance intervals listed are based on normal conditions. You may want to shorten the intervals if you have pets or other special considerations. EXTERIOR CLEANING — AS REQUIRED The door, grille and cabinet may be cleaned with a mild detergent and warm water solution. Do not use solvent based or abrasive cleaners.
30_10008_E_WC_UM.qxd 3/2/05 2:23 PM Page 23 CAUTION Stainless steel models exposed to chlorine gas and moisture, such as areas with spas or swimming pools, may have some discoloration of the stainless steel. Discoloration from chlorine gas is normal. INTERIOR CLEANING — AS REQUIRED 1. 2. 3. 4. 5. Disconnect power to the Wine Captain®. Remove racks if desired, see WINE RACK REMOVAL/ INSTALLATION. Wipe down the interior with a solution of non-abrasive mild detergent and warm water.
30_10008_E_WC_UM.qxd 3/2/05 2:23 PM Page 24 User’s Manual 1. 2. 3. Remove the control knob by grasping the knob and pulling straight off (see Figure 22). Remove the screws at each end of the grille. Remove the grille. ! WARNING DO NOT touch the condenser fins. The condenser fins are SHARP and can be easily damaged. 4. Clean the condenser coil using a brush or vacuum cleaner. Do not touch. 5. Position the grille to align the screw holes with the cabinet. 6.
30_10008_E_WC_UM.qxd 3/2/05 2:23 PM Page 25 BULB REPLACEMENT To replace the light bulb in your Wine Captain®: 1. Remove the light housing cover by sliding the cover towards the tab, swinging the end opposite of the tab down and pulling down and away (see Figure 24). 1 TAB 2. Replace bulb with genuine U-Line replacement. 3. Replace the light housing cover by inserting the tab FIRST and pushing up the other end. You should hear a snap/click.
30_10008_E_WC_UM.qxd 3/2/05 2:23 PM Page 26 User’s Manual TROUBLESHOOTING BEFORE CALLING FOR SERVICE If the unit appears to be malfunctioning, read through NORMAL OPERATION first. If the problem persists, check the TROUBLESHOOTING GUIDE. Locate the problem in the guide and refer to the cause and its remedy before calling for service. The problem could be something very simple which can be solved without a service call. Some remedies listed in the TROUBLESHOOTING GUIDE are very complex.
30_10008_E_WC_UM.qxd 3/2/05 2:23 PM Page 27 TROUBLESHOOTING GUIDE ! DANGER ! ELECTROCUTION HAZARD NEVER attempt to repair or perform maintenance on the unit until the main electrical power has been disconnected. Troubleshooting — What to check when problems occur Problem Possible Cause Unit not cold enough. Control set too warm Check temperatures (see introduction for Light staying on specific temperatures) Airflow to front grille blocked Dirty condenser coils Unit too cold.
_10008_E_WC_UM.
30-10008_E_WC_UM_Covers.
30-10008_E_WC_UM_Covers.qxd 3/2/05 2:26 PM Page 1 É c h e l o n™ P. O . B o x 2 4 5 0 4 0 Milwaukee, WI 53224-9540 ® Phone: 414.354.0300 Fax: 414.354.7905 U w w w . u - l i n e . c o m S E R M A N U A L P r i n t e d i n U . S . A .