
User guide

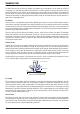
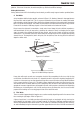
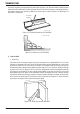


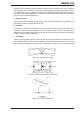


Table Of Contents
- 0-5143-CCr
- SECTION 1: ARC WELDING SAFETY INSTRUCTIONS AND WARNINGS
- SECTION 2: INTRODUCTION
- SECTION 3: INSTALLATION, OPERATION AND SETUP
- 3.01 Environment
- 3.02 Location
- 3.03 Ventilation
- 3.04 Mains Supply Voltage Requirements
- 3.05 Electromagnetic Compatibility
- 3.06 Transtig 170Pi Power Source Controls, Indicators and Features
- 3.07 Shielding Gas Regulator Operating Instructions
- 3.08 Setup for TIG (GTAW) Welding
- 3.09 Foot Control Part No. W4015800 (Optional Accessory)
- 3.10 Setup for Manual Arc (MMAW) Welding
- SECTION 4: BASIC WELDING GUIDE
- SECTION 5: POWER SOURCE PROBLEMS AND ROUTINE SERVICE REQUIREMENTS
- SECTION 6: KEY SPARE PARTS
- APPENDIX: TRANSTIG 170Pi CIRCUIT DIAGRAM
- CIGWELD - LIMITED WARRANTY TERMS
- TERMS OF WARRANTY – January 2013
- WARRANTY SCHEDULE – January 2013
- GLOBAL CUSTOMER SERVICE CONTACT INFORMATION
- SECTION 1: ARC WELDING SAFETY INSTRUCTIONS AND WARNINGS
- SECTION 2: INTRODUCTION
- SECTION 3: INSTALLATION, OPERATION AND SETUP
- 3.01 Environment
- 3.02 Location
- 3.03 Ventilation
- 3.04 Mains Supply Voltage Requirements
- 3.05 Electromagnetic Compatibility
- 3.06 Transmig 175i Power Source Controls, Indicators and Features
- 3.14 Shielding Gas Regulator Operating Instructions
- 3.17 Setup for TIG (GTAW) Welding
- 3.18 Setup for Manual Arc (MMAW) Welding
- SECTION 4: BASIC WELDING GUIDE
- SECTION 5: POWER SOURCE PROBLEMS AND ROUTINE SERVICE REQUIREMENTS
- AP0-5143-APENDIX
- CIGWELD - LIMITED WARRANTY TERMS
- TERMS OF WARRANTY - JULY 2010
- WARRANTY SCHEDULE - JULY 2010
- GLOBAL CUSTOMER SERVICE CONTACT INFORMATION
TRANSTIG 170Pi
Manual 0-5241 4-7 BASIC WELDING GUIDE
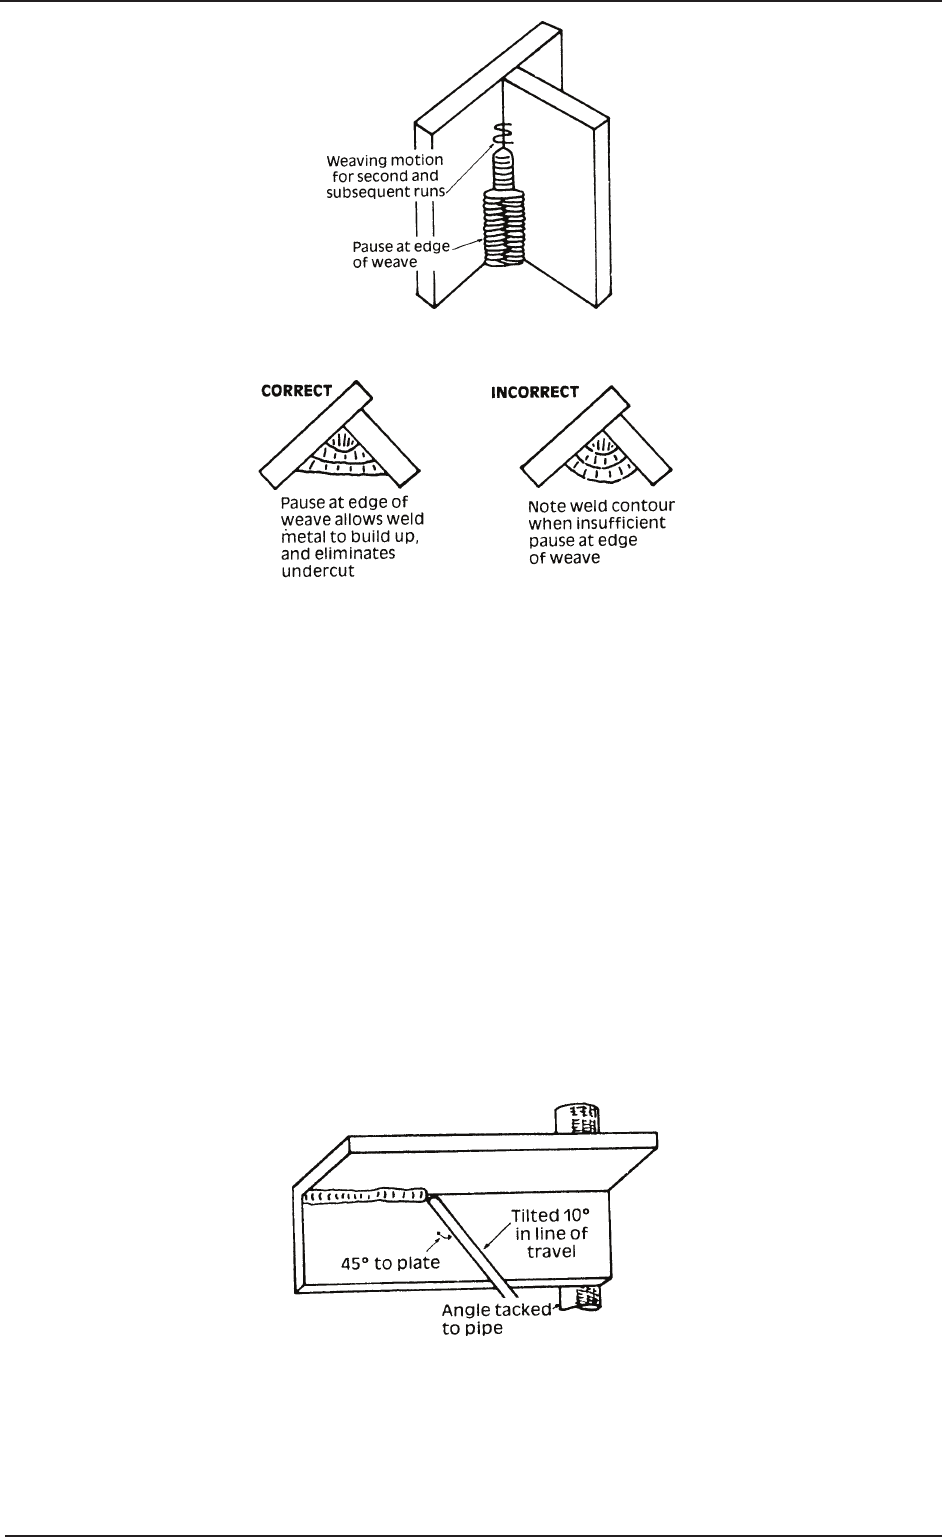
Art # A-07702
Figure 4-16: Multi Run Vertical Fillet Weld
Art # A-07703
Figure 4-17: Examples of Vertical Fillet Welds
2. Vertical Down
The Ferrocraft 21 electrode makes welding in this position particularly easy. Use a 3.2mm electrode at
100 amps. The tip of the electrode is held in light contact with the work and the speed of downward
travel is regulated so that the tip of the electrode just keeps ahead of the slag. The electrode should
point upwards at an angle of about 45º.
3. Overhead Welds
Apart from the rather awkward position necessary, overhead welding is not much more difficult that
downhand welding. Set up a specimen for overhead welding by first tacking a length of angle iron at
right angles to another piece of angle iron or a length of waste pipe. Then tack this to the work bench
or hold in a vice so that the specimen is positioned in the overhead position as shown in the sketch.
The electrode is held at 45º to the horizontal and tilted 10º in the line of travel (Figure 4-18). The tip of
the electrode may be touched lightly on the metal, which helps to give a steady run. A weave technique
is not advisable for overhead fillet welds. Use a 3.2mm Ferrocraft 12XP electrode at 100 amps, and
deposit the first run by simply drawing the electrode along at a steady rate. You will notice that the
weld deposit is rather convex, due to the effect of gravity before the metal freezes.
Art # A-07704
Figure 4-18: Overhead Fillet Weld