
User Manual

Model Setup
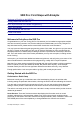
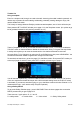
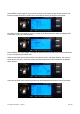
Press SHORT RIGHT and you will be at page 1 of 13, Setup 01. Take a quick look at the whole
page but you don’t need to change it yet. All of the default settings should work for now. You can
come back later and fill in the blanks for Name, Timer and other settings using the details provided
in the manual Ersky9x for the 9XR Pro Explained. At this point, we just want to get our first model
in the air!
Mixer
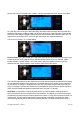
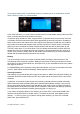
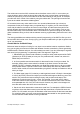
Make sure the cursor is at the top of the page (press EXIT if it isn’t), then press SHORT RIGHT
repeatedly until you get to page 5/13, Mixers. As you will learn in detail later, this screen is the key
to setting up Ersky9x to assign the available control inputs (stick positions, switch settings, pots,
etc.) to the various servos and other types of output.
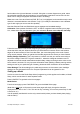
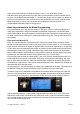
What you will see is the first four channels assigned to the four stick inputs in the order chosen
earlier under Radio Setup (here RETA, but yours might be TAER, AETR, etc.). The 100 means that
full movement of the stick will produce 100% movement of the corresponding servo.
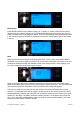
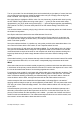
This is all you need to fly a simple four channel model. In this case, the Rudder stick controls
channel 1, so the rudder servo will be plugged into the first slot on the receiver (even if the slot is
labelled differently). Elevator gets channel 2 and Throttle (the speed control or throttle servo) gets
channel 3 in this setup. The Aileron stick here controls channel 4, so the aileron servo plugs into
slot 4. If you are using a DSM2/DSMX module and receiver (such as the OrangeRX), your order
should be Throttle, Aileron, Elevator, Rudder.
First Steps with Ersky9X – Version 1 4 of 13