
User Manual
The rudder servo now has 20% movement when the aileron moves 100%. In a turn when you
move the aileron stick to bank the aircraft the rudder will move to give a better coordinated turn
without the pilot having to move the rudder at all. But when steering on the ground, for example,
you still have 100% control of the rudder by using the rudder stick. The plus sign means the two
inputs to the rudder channel are added together.
Of course there are many other useful mixes. You can add a little elevator (up or down) to
compensate for the pitch change when you operate flaps. On a glider, you can have the flaps
move with the ailerons to enhance roll control in normal flight, and then have them perform an
entirely different role with both ailerons up and both flaps down for “crow” braking. And you can
have the radio slowly move the elevator down a small amount to prevent looping as your electric
glider accelerates during a climb, with the elevator returning to glide setting when the motor is shut
down.
The mixing possibilities are endless with the powerful programming of the 9XR Pro. But you don’t
have to learn all this all at once. So enjoy flying your simpler models while you plan to get the most
out of your transmitter.
General Advice for Model Setup
Before we leave the subject of mixing for now, here is some advice based on experience. Before
long you are going to have lots of models with different functions controlled by various generically
identified sticks, switches and pots. You will inevitably lose track if you don’t take steps to organize
and record your programming. It’s particularly bad if this happens in flight! So….
1. Standardize your channel order. Whether you adopt a widely used sequence like TAER
(Spektrum) or AETR (Futaba) or have your own preferred order, choose one, select it in
Radio Setup and stick to it.
2. As far as possible use the same switch for the same function for all your models. For
example, always use the same switch for throttle cut (it doesn’t have to be the switch
labeled THR.CUT). Likewise, standardize your Dual Rate switch setup on all your models,
except where there is a specific reason not to. Glider setups are often very different from
those of other models, but at least standardize your gliders. And keep a notebook to refer to
when you forget.
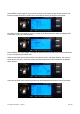
3. The Mixer page (page 5/13) is the key to well organized control in Ersky9x. Use weights
of 100 for all primary controls and adjust your mechanical linkages to allow long servo arm
travels. This produces the best centering accuracy and provides small steps of fine
adjustment for trimming and for sub – mixes. For example, if you need just 3% aileron
mixed with rudder for knife edge flight, 3% of full servo travel will be much more accurate
and repeatable than 3% of say 40% servo travel. Likewise, any slack in the linkages will
have less effect when the servo arm moves full travel.
4. Set the mix which demands the most servo travel first. For example the CROW function
on gliders, where the ailerons travel up and the flaps travel down, requires full servo arm
travel. For a 3D model, set up the 3D aerobatic mode first and then set the lower rates later.
For a hotliner glider or as pylon racer set the large travels needed for slow speed landing
first and then the smaller travels for racing mode later.
First Steps with Ersky9X – Version 1 10 of 13