
User Manual


Part 2: Making Your Own Voice Files
While a ready-made voice file set is provided with the 9XR Pro, and others are available, you will
probably want to make some of your own voice files, if only for such purposes as naming models.
You have several options, depending on your preferences and equipment.
You will need an audio editor which is user friendly. Audacity is recommended. It is free and is
more than adequate. Search for ‘Audacity Audio Editor' and download the appropriate version for
your computer. Audacity supports drag and drop to open files.
Start by creating a “script” listing the voice clips you wish to create.
Option 1: Using your own Voice
In either a Mac or a Windows computer, open QuickTime Player (you may have to download and
install it first – it’s free).
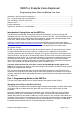
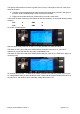
In the drop down menu 'File' select 'New Audio Recording'. A graphic similar to an audio playback
graphic will appear. It will have a red dot in the middle.
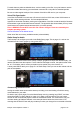
Click on that dot and speak the first voice clip into the computer microphone (on a Mac it’s at the
top of the screen, on a PC you may have to plug one into the sound card). When finished, click on
the black square (which replaces the red dot) to stop.
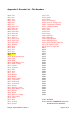
Save the file to the desktop, using as the file name the appropriate four digit number corresponding
to the list in Appendix A. Select a number which is vacant and not reserved for the system (unless
you want to replace a system file).
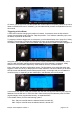
Open Switch Audio Converter or similar audio conversion utility.
Drag and drop the .mov file into the big space in the middle of the application.
At the bottom left corner select .wav as the output format.
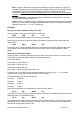
Press Encoder Options at the bottom of the page. Select 'Custom' as the 'Settings' option.
Select 16 bit for ErSky9x use and click OK. It doesn't matter what else you select, they will revert to
'auto' anyway. (No; I don't know why!)
Select the location where you want the file to end up (such as a folder ‘9XR Pro Voice’) and then
click on the 'Convert' button.
That's your .wav file finished. You can play it in QuickTime to check it out before adding it to the
Voice folder on the card.
Option 2: Using a Mac Voice
Mac computers have built-in text-to-speech conversion capability. Highlight any text or list of
names and numbers and press the appropriate keyboard shortcut (in my case, it’s 'apple' + 'esc'
but your Mac may be different - see later) The computer will speak the text.
To record a .wav file for your SD card: open iTunes, TextEdit and Audacity.
Write your text items (e.g., model names or switch events) each on a single line in TextEdit,
highlight it and press 'ctrl' + click the mouse (or "Right Click" on your trackpad),
From the menu select 'Add to iTunes as a spoken track'.
Go to iTunes page 'Recently Added'. Drag and drop the resulting .mp4 file into the Audacity
window. Select the .wav format, then select the Custom Encoder option and 16000 Hz (as
explained in the notes regarding Audacity on page 8 below).
Press Convert and Export the file as 'WAV (Microsoft) signed 16 bit PCM'.
Rename the file with a four digit number corresponding to the list in Appendix A. Select one which
is vacant and not reserved for the system (unless you wish to replace a system file). You are done.
Ersky9x Voice Explained: Version 1 page 7 of 12