
User Manual


© D Bird 2014 Page 5
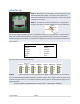
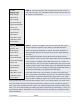
STEP-5 Turn on the power and press the ‘Menu’ button, then using
the ‘Up’ and ‘Down’ buttons highlight ‘Receiver Test sub-menu and
press Enter. Now move each channel on your transmitter and check
that the displayed direction corresponds with the stick movements on
the Flight Controller, if any are reversed, then go to your Transmitter
and reverse that channel. Check that the AUX channel is showing "ON"
when you activate the AUX Switch on your transmitter, if not, reverse
the AUX channel on your transmitter.
Use the trim or sub-trim controls on your transmitter to adjust the
channel values shown on the LCD to zero.
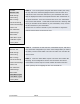
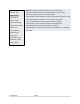
STEP-6 Scroll down to and enter the "Load Motor Layout" sub-menu
and choose the configuration you want. If the configuration you want is
not listed, use the "Mixer Editor" sub-menu to make one. See later for
more on that.
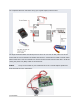
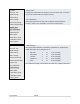
STEP-7 Enter the "Show Motor Layout" sub-menu and confirm the
following. Is the configuration correct? Are the motors and servos
connected the correct output? Correct rotation direction? Does the
motor speed up when dropping the arm it is mounted on?
PI Editor
Receiver Test
Mode Settings
Stick Scaling
Misc. Settings
Self-Level Settings
Camera Stab Settings
Sensor Test
ACC Calibration
CPPM Settings
Mixer Editor
Show Motor Layout
Load Motor Layout
Factory Reset
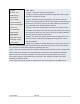
PI Editor
Receiver Test
Mode Settings
Stick Scaling
Misc. Settings
Self-Level Settings
Camera Stab Settings
Sensor Test
ACC Calibration
CPPM Settings
Mixer Editor
Show Motor Layout
Load Motor Layout
Factory Reset