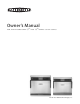
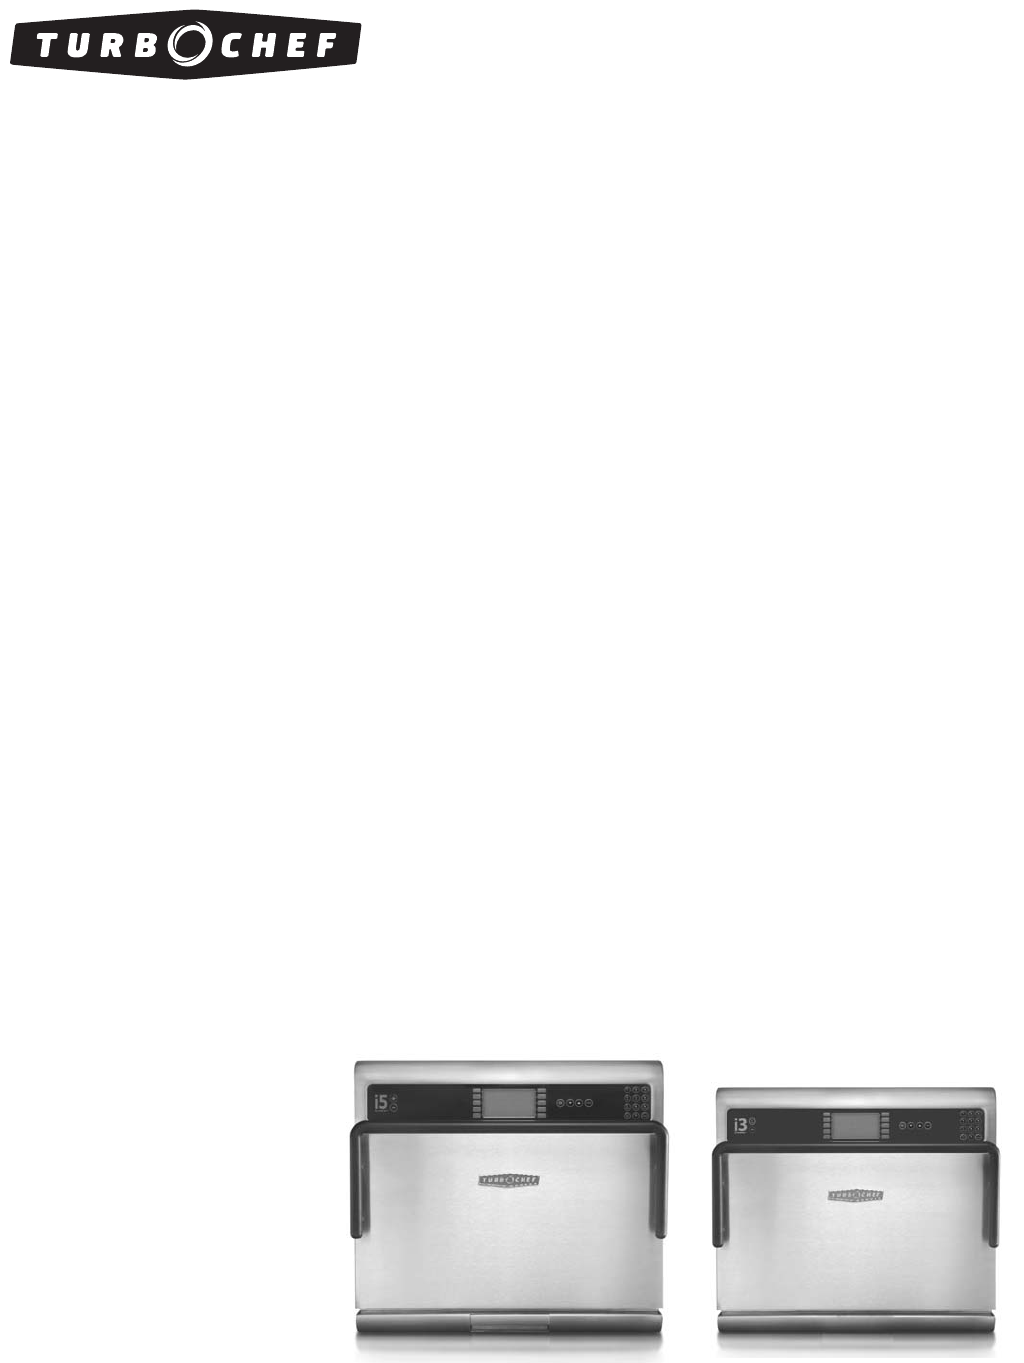
TM Owner’s Manual FOR THE TURBOCHEF i5 TM A N D i3 TM R A P I D COOK OVENS © 2008-2009 TurboChef Technologies, Inc.
For further information, call 800.90TURBO or +1 214.379.
The information contained in this manual is important for the proper installation, use, maintenance, and repair of this oven. Follow these procedures and instructions to help ensure satisfactory baking results and years of trouble-free service. Errors – descriptive, typographic, or pictorial – are subject to correction. Specifications are subject to change without notice. Please carefully read this manual and retain it for future reference.
Table of Contents Safety Instructions General Safety Information Reducing Fire Risk Grounding Instructions Power Cord Replacement Precautions to Avoid Possible Exposure to Excessive Microwave Energy RF Interference Considerations i i ii ii ii ii General Oven Information Theory of Operation Certifications Dimensions Electrical Specifications - i5 Oven Electrical Specifications - i3 Oven Oven Construction 1 1 1 2 3 4 Installation Unpacking Instructions Lifting and Placing the Oven Installation Near Open H
The Info Mode Overview of the Info Mode Viewing Cook Counts/Time Logs Viewing the Fault Log Viewing the Service Numbers Turning Oven Options On/Off Setting the Date/Time Resetting the Oven Updating the Oven Menu Making a Copy of the Oven Menu Updating the Oven Firmware 14 14 15 15 15 15 15 15 16 16 The Edit Mode Overview of the Edit Mode Changing Set Temperatures Changing Food Group/Recipe Name Changing Recipe Settings 17 17 18 18 Troubleshooting 19 North America Limited Warranty 21 International Li
i Safety Instructions Strictly adhere to the following safety precautions to reduce the risk of burns, electric shock, fire, injury, damage to oven or property near oven, or possible exposure to excessive microwave energy. General Safety Information Read all instructions before using this appliance. Read and follow the specific "Precautions to Avoid Possible Exposure to Excessive Microwave Energy" found on page ii. This appliance must be grounded. Connect only to properly grounded outlet.
ii SAFETY INSTRUCTIONS Grounding Instructions This appliance must be grounded. In the event of an electrical short circuit, grounding reduces the risk of electric shock by providing an escape wire for the electric current. This oven is equipped with a cord that has a grounding wire with a grounding plug, which must be plugged into an outlet that is properly installed and grounded.
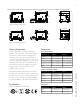
1 27.2” (691 mm) 28.25” (718 mm) PLUG 24.3” (618 mm) 31.1” (790 mm) 15.15” (385mm) 25.75” (654 mm) 28.1” (714 mm) 2.5” (64 mm) Figure 1: i5 Oven Dimensions 23.5” (597 mm) 28.25” (718 mm) 21.25” (540 mm) PLUG PLUG PLUG 31.25” (794 mm) 11.4” (290 mm) 25.75” (654 mm) 24.5” (622 mm) 2.
2 G E N E R A L O V E N I N F O R MAT I O N Electrical Specifications - i5 Oven TurboChef recommends a Type D circuit breaker for all installations outside the US.
3 Electrical Specifications - i3 Oven TurboChef recommends a Type D circuit breaker for all installations outside the US.
4 G E N E R A L O V E N I N F O R MAT I O N / I N S TA L L AT I O N Oven Construction Exterior - Two-tone stainless steel front, top, and sides - 304 stainless steel removable grease pan - Ergonomic door handle - Rubber seal for surface mounting - Side handles for lifting Interior - 304 stainless steel interior - Fully-insulated cook chamber - Removable rack - Top and bottom jetplates Installation Install or locate this appliance only in accordance with the instructions below.
5 Installation Near Open Heat Source See Figure 5. When placing a TurboChef oven near an open heat source, strictly adhere to the following: - If the oven is being placed near a grill or stove, a divider must exist between the oven and the open heat source, with a minimum of 6” (152 mm) between the oven and the divider. - If the oven is being placed near a fryer, a divider must exist between the oven and fryer, with a minimum of 12” (305 mm) between the oven and the divider.
6 I N S TA L L AT I O N ChefComm Pro Part Number: CON-7006 Optional Installation Items See Figure 6, below and Figure 7, page 7. ChefComm Pro empowers any user of a TurboChef oven to easily and efficiently create menu settings on your computer and transfer them to your oven via smart card or USB device. For more information, call TurboChef Service at 800.90TURBO or +1 214.379.6000. TurboChef Oven Cart - Part Number: NGC-1217-2 - Height: 17.3” (439 mm) - Width: 27.8” (706 mm) - Depth: 26.
7 i3 21.25” (540 mm) 4.5” (114 mm) 59.7” (1516 mm) (handle) i3 44.6” (1133 mm) 32.5” (826 mm) (handle) 20.5” (521 mm) 35.5” (706 mm) 17.3” (439 mm) 15.8” (401 mm) 26.5” (673 mm) 28.6” (726 mm) 30.0” (762 mm) 31.5” (800 mm) 32.5” (826 mm) Figure 7: i3 Oven Cart and Stacking Stand Dimensions Daily Maintenance The following steps will help maintain your oven. Use only TurboChef Oven Cleaner and Oven Guard.
8 MA I N T E N A N C E Step 3: Remove and Clean the Lower Jetplate - Unscrew the two thumb screws on the lower jetplate. Lift the lower jetplate by gripping the thumb screws. Remove the lower jetplate. Wash, rinse, and sanitize the lower jetplate. CAUTION: DO NOT remove the top ceramic jetplate; breakage will result in a non-warranty service call. Step 3 Step 4: Remove and Clean the Lower Air Diverter - Remove the lower air diverter. - Wash, rinse, and sanitize the lower air diverter.
9 Step 9: Apply TurboChef Oven Guard - Spray Oven Guard onto a clean towel. - Wipe the interior oven walls and the inside of the oven door. CAUTION: DO NOT apply Oven Guard to the oven door gasket. Doing so may damage the gasket, resulting in a non-warranty service call. Step 9 Step 10: Reinstall Components - Reinstall the lower air diverter. - Reinstall the lower jetplate. Screw in the two thumb screws to lock the lower jetplate in place. - Reinstall the wire rack and close the oven door.
10 O V E N CO N T R O L S 1 4 4 BACK 2 3 ABC DEF 4 5 6 GHI JKL MNO E NT E R S TO P 7 8 9 PQRS TUV WXYZ BACK 0 E NT E R S TOP 1 2 3 5 6 7 8 Figure 8: Oven Controls Oven Controls 1. Info Key When the oven is off or cooling down, press to access the INFO MODE (see page 14). 2. On/Off Key Press to turn the oven on (begin warmup) or off (cool down), or to exit INFO MODE (page 14). 3.
11 Cooking The oven is preprogrammed with recipe settings at the time of manufacture and is ready to operate out of the box. If these settings are erased, new menu settings must be either loaded via smart card/USB drive (page 15) or programmed manually (pages 17-18). The oven will not cook unless settings are present. Note that the steps below are not always sequential. Typically, multiple items will be cooked before cooling the oven (Step 10).
12 CO O K I N G Step 4: Soaking Once the oven temperature reaches the set point, the oven will continue to warm for eight minutes to ensure the cook cavity surfaces absorb enough heat so as to not affect cooking results. This process is called “soaking.” WARMING UP 08:00 OVEN TCC = 500F SET POINT= 500F Figure 12: Soaking Step 5: Ready to Cook WARNING: Inside of oven and oven door are hot! Use extreme caution.
13 Step 8: Remove Food from Oven WARNING: Dish and inside of oven/oven door are hot! Use extreme caution. COOKING DONE PLEASE REMOVE FOOD FROM OVEN Open the oven door and check/remove food. Figure 17: Cooking Done Step 9: Cook More Option The “Additional Cooking Options” screen is turned off by default. If you want the ability to cook a product a little beyond the standard cook time, you can enable this feature from the “Options” screen (see page 15).
14 THE INFO MODE - Overview of the Info Mode The INFO MODE serves four main purposes: 1. To display general oven information. 2. To provide access to TEST MODE and additional diagnostic tools for service technicians. 3. To turn oven options and features on/off. 4. To update oven settings. To access the INFO MODE, simply press the Info key when the oven is either off or cooling down. To toggle between the Info screen 1 and 2, press the Up or Down key.
15 Viewing the Fault Log From the INFO MODE (Figure 20), press the R3 soft key to view the fault log (Figure 22). To view a detailed log of each fault occurrence (Figure 23), press the soft key adjacent to the fault code. NOTE: The clock is a 24-hour clock (e.g., 20:30 = 8:30 PM). 3. Select “Save” to save your changes or “Cancel” to cancel and exit the screen. NOTE: The oven will not retain the time if it is left unplugged for two or more weeks.
16 THE INFO MODE Smart Card Making a Copy of the Oven Menu USB Port To save a copy of the oven menu to a smart card, 1. Insert the smart card (Figure 26). Smart Card Reader Slot 2. Press the L2 soft key (Figure 27). 3. Verify the oven beeps and reads “FINISHED”. To save a copy of the oven menu to a USB drive, 1. Insert the USB drive (Figure 26). 2. Press the L5 soft key (Figure 27). 3. Verify the oven beeps and reads “FINISHED”.
17 Overview of the Edit Mode The EDIT MODE serves three main purposes: 1. To edit cook temperatures. 2. To edit names of food groups and items. 3. To edit food item settings. To access the EDIT MODE, 1. Enable it from the “Options” screen (page 15). 2. Press the On/Off key to return the oven to the “Cooling Down” or “Off ” screen. 3. Press the On/Off key again to enter EDIT MODE. Changing Set Temperatures The oven can store two set temperatures. By default, both temperatures are set to 450°F (232°C).
18 THE EDIT MODE Changing Food Group/Recipe Name Changing Recipe Settings To change a food group or recipe name, 1. Place the oven in EDIT MODE (see page 17). To change food item settings, 1. Place the oven in EDIT MODE (see page 17). 2. Select a “block” of food groups by pressing the corresponding right-side soft key (Figure 29, page 17). 2. Select a “block” of food groups by pressing the corresponding right-side soft key (Figure 29, page 17). 3.
19 Troubleshooting The following is a list of fault codes and error messages, along with the possible problem(s) that the oven may be experiencing. Please attempt the recommended action before calling Customer Support (800.90TURBO, +1 214.379.6000) or your Authorized Distributor. NOTE: Any fault codes listed in bold will terminate a cook cycle upon discovery. F6 will not terminate a cook cycle; however, it will alert the user of a possible air circulation problem.
20 T R O U B L E S H O OT I N G Issue Po s s i b l e Ca u s e ( s ) Resolution F1: Blower Running Status Bad - Oven power interrupted. - Verify wall circuit breaker is on. Reset breaker and then power the oven on. - Place the oven in the OFF state and unplug the oven – leave for two minutes. Re-plug in the oven, switch on the isolator/main power supply, and press the “On/Off ” soft key. F2: Cook Temperature Low - Oven power interrupted. - Verify wall circuit breaker is on.
21 North America Limited Warranty TurboChef “i5” and “i3” Rapid Cook Oven – North America The TurboChef rapid cook oven Limited Warranty outlined below is activated upon shipment of your oven. Should you require additional assistance after reviewing the warranty outlined below, please call TurboChef Customer Support at 800.90TURBO. Limited Warranty TurboChef Technologies, Inc.
22 N O R T H A M E R I C A L I M I T E D WA R R A N T Y Warranty Service, Exclusive Remedy TurboChef will be solely responsible for determining whether or not the Equipment or any component thereof is defective. Defective components covered by this warranty will be repaired or replaced at TurboChef ’s option without charge to you and such repaired or replacement components will be covered by this warranty for the balance of the Warranty Period.
23 International Limited Warranty This Limited Warranty shall apply to the sales of all TurboChef “i5” and “i3” Series ovens (the “Equipment”) manufactured by TurboChef Technologies, Inc. (“TurboChef ”), and sold to purchasers outside of the United States, Canada, Puerto Rico, Central and South America by an Authorized Distributor of TurboChef International (the “Authorized Distributor”).
24 I N T E R N AT I O N A L L I M I T E D WA R R A N T Y 6. You have not used any non-approved devices, accessories, consumables or parts in conjunction with the Equipment; and 7. Repairs, modifications or alterations have not been attempted other than by TurboChef, an Authorized Distributor or its authorized service agent.
25 Severability: If any item or provision contained in this Limited Warranty or any part of them (“an offending provision”) is declared to be or becomes unenforceable, invalid or illegal for any reason whatsoever in any jurisdiction, the other terms and provisions of this Limited Warranty shall remain in full force and effect in that jurisdiction as if it had been executed without the offending provision appearing in it and the entire Limited Warranty shall remain in full force and effect in all other juri
For service or information: W I T H I N N O RT H A M E R I C A C A L L Customer Support at 800.90 T U R B O O U T S I D E N O RT H A M E R I C A C A L L +1 214.379.6000 or Your Authorized Distributor TM Part Number: i5-9227 / Revision F / May 2009 Country Code: NA/EU Global Operations Customer Support 4240 International Pkwy, Suite 1 0 5 Carrollton, Texas 75007 U S A +1 214-379-6000 P H O N E +1 214-379-6073 FA X 1-800-90 T U R B O +1 214-379-6000 turbochef.