
Manual


Section4: Operation
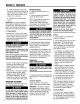
Figure4-3: SmartBagTM indicateswhenbagisfull(F)andnotfull(G),
2. With the engineand blade stopped,
hold open the discharge outlet guard (C,
Figure 4-2). With the other hand, grasp
the wire-formed handleand guide the bag
up and off the discharge outlet.
Mulching Mode
The mulching mode cuts and recutsgrass
clippings within the mower housing
before recycling the finely cut clippings
into the lawn. Mulching makes it easier
for the the lawn to absorb the grass
nutrients back into the soil.
SettingUpMulchingMode
1. With the engineand blade stopped,
removethe Grass Catcheror the optional
Side-Dischargeattachment.
2. Lift open the discharge outlet guard
(K, Figure4-1).
3. Position the plug with the word "TOP"
facing up and push the Mulching Plug
firmly into the discharge outlet (Figure
4-4).
4. The plug's flange (rim) must fit snugly
against the edge of thedischarge outlet to
ensure efficient mulching (Figure4-4).
Figure4-4: Installed MulchingPlug,
2. Graspthe Mulching Plug's hand-grip
with one handand pull back until the plug
clears the discharge outlet.
PREPARATION FOR MOWING
ReviewSection 1: Safetyand Section 3:
Featuresand Controls. Then readthis
Section completely before starting the
mower.
1. Move lawn mowerto a clear, level
area - If on a grassy area, make surethe
grass is low enough as to not interfere
with blade rotation when starting.
2. Inspectareato be cut - Checkfor and
remove debris such as rocks, toys, wire,
bones, sticks, etc., which could be picked
up and thrown by the blade. Also inspect
the terrain for holes or other obstacles.
3. Checkmower-
• Checkthe mower for loose or missing
hardware. Tighten or replace before
starting the mower.
• Checkthe Operator PresenceControl
Bailfor freedom of movement.
• Checkthe Wheel Drive Control Bail for
freedom of movement.
• Checkbladefor excessivewear or
damage. Do not operatethe mower
with a damagedblade.
• Securelyconnect the spark plug wire to
the spark plug.
4. Adjusthandlebarheight- The mower
has three handlebarheights which can be
adjusted as follows:
a. Loosen one ofthe lower handlebar
adjustment knobs (H, Figure 4-5) and
give the knob atap to free the
handlebarstrut (K) for adjustment.
Repeatfor the other side.
Removingthe MulchingPlug
1. With the engineand blade stopped, lift
openthe discharge outlet guard.
Figure 4-5: Adjustinghandlebarheight.
b. Adjust the handlebarsto the
desired height and then tighten the
handlebaradjustment knobs. Make
sure that the square shank onthe
screw (J, Figure4-5) seatssquarely
into one of the square slots (I).
5. Set cuttingheight - You can set the
mower to any of eight cutting heights.
Cutting heights rangefrom 3/4" to 4-1/4".
To avoid personal injury, never adjust
cutting height while engine is running.
Release all handlebar controlsand wait
for all motion to stop before adjusting
cuttingheight.
NOTE: Actual cutting height will vary
according to grass, terrain, and soil con-
ditions.
a. To adjust cutting height, pull the
Cutting Height Lever (A, Figure4-6)
away from the mower to releasethe
tab from the slot. Besure to grip the
lever firmly to preventthe mower deck
from dropping down rapidly.
Figure4-6:CuMngheightadjustmenL
11