
manual

Terminal ConfiguraTion
115
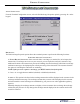
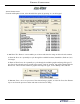
iso properTies
5. allow only isos lisTed Below as “aCCepT”- When this option is enabled (checked), it ensures that
only cards with ISO number in the ISO list are accepted.
D Press <5> to toggle between enabled (checked) and disabled (unchecked).
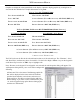
6. Add New- To add an ISO to the ISO list, the user must enter the new ISO number and “Action” for
that number. The “Action” option will be applied to transactions that use the displayed ISO numbers.
Some available options are:
BloCk surCharge- This allows free surcharge transactions for customers with the displayed ISO
numbers.
deCline Card- This declines transactions for customers with the displayed ISO number.
use defined surCharge- This allows the applicable surcharge to be charged for customers with the
displayed ISO numbers.
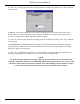
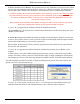
D Press <6> on the keypad. This screen at right
will appear:
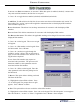
D Press <1> (ISO number) on the keypad. Enter
the ISO number. Press <
enTer>.
D Press <2> (Action) to toggle through the
available “Action” choices. Stop on the action to
apply it to the ISO number. Press <enTer> on the
keypad when completed.
value- Some ISO numbers may require an
associated value parameter. The processor will
determine whether a value parameter must be
associated with an ISO number.
D Press <3> (Value) on the keypad. Enter the
value parameter in the data entry dialog box for
the ISO listed.
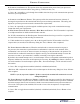
7. deleTe- This option allows deleting a selected
ISO from the ISO list.
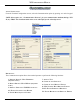
D Highlight the selected ISO to delete. Press
<7> on the keypad. The prompt shown at right
appears. Press <enTer> to delete.
8. ediT- This option allows the user to edit the selected ISO number.
D Highlight the selected ISO to delete. Press <8> on the keypad. The “ISO Properties” screen appears.
Edit “ISO Number”, “Action” or “Value”, if applicable. Press <enTer> when complete.