
manual

Triton Systems ©
131
4. DCC Conguration. Option currently unavailable. Only available for custom DCC solutions.
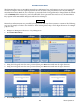
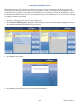
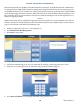
5. Press EMV Conguration to view or congure the EMV settings.
— Press EMV Processing to toggle on (check mark) or o (no check mark). is option enables the EMV
card reader to read chips on cards.
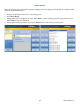
— Press EMV Application Settings to view a list of all EMV AIDs loaded on the terminal. A check mark
indicates that an AID is enabled. Use Page Up and Page Down buttons to navigate through the options.
Press the Enable/Disable button or touch the desired le to toggle on (check mark) or o (no check
mark), then press Save and Return.
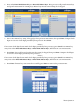
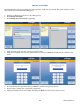
— Press ICC Latching to toggle on (check mark) or o (no check mark). is option enables latching in the
EMV card reader, and is only available when EMV Processing is enabled.
— Press Non-ICC Transactions to toggle on (check mark) or o (no check mark). is option allows termi-
nal to process magnetic stripe-only transactions while EMV Processing is enabled.
— Press ICC Fallback to Magnetic Stripe to toggle on (check mark) or o (no check mark). is option
allows the terminal to process a card as a magnetic stripe transaction if the IC on the card fails when EMV
Processing is enabled.
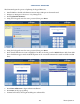
— Press EMV Journal Entries to toggle on (check mark) or o (no check mark). is option directs the
terminal to record extra data that is received/transmitted during an EMV transaction to the journal for
dispute resolution.
— Press Terminal EMV Conguration to generate a management report that contains current EMV kernel
settings and terminal EMV conguration. Report is displayed on screen. Use Page Up and Page Down
buttons to navigate through report. Press Print to print a hard copy via the receipt printer, or press Save
To File to save on a USB drive. Press Back to return to previous screen.
— Press Last Transaction’s EMV Data to generate a management report that contains current EMV kernel
settings and EMV data from the last transaction. Report is displayed on screen. Use Page Up and Page
Down buttons to navigate through report. Press Print to print a hard copy via the receipt printer, or press
Save To File to save on a USB drive. Press Back to return to previous screen. is data will not be available
if terminal has been rebooted since last EMV transaction.
6. Press Electronic Receipt Host Cong to view or congure the electronic receipt settings. is option is only
available for touch-screen ATMs.
— Press Enable Electronic Receipts to toggle on (check mark) or o (no check mark) to activate electronic
receipt features.
— Press Host Address. Users should not change this option. Using the on-screen keyboard, enter the host
address used to contact the electronic receipt host for transaction requests. is information is provided
by the electronic receipt host.
— Press Host Port. Users should not change this option. Using the on-screen keyboard, enter the port num-
ber used to contact the electronic receipt host for transaction requests. is information is provided by
the electronic receipt host.
— Press Enable SMS to toggle on (check mark) or o (no check mark). is function allows electronic re-
ceipts to be sent via text message to a customer’s cellular phone. Data rates and other charges may apply.
— Press Host Response Timeout. is function determines how long the terminal will await response from