MANAGEMENT FUNCTIONS Model 91XX/97XX Configuration Manual VERSION 3.0 07100-00015 01/05 CORPORATE HEADQUARTERS: 522 East Railroad Street Long Beach, MS 39560 PHONE: (228) 868-1317 FAX: (228) 868-0437 RMA (RETURN MATERIAL AUTHORIZATION) RETURN ADDRESS: 21405 B Street Long Beach, MS 39560 COPYRIGHT NOTICE © Delaware Capital Formation, Inc., 2003, 2004 and 2005. All rights reserved.
MODEL 91XX/97XX CONFIGURATION MANUAL 2
MANAGEMENT FUNCTIONS DISCLAIMER The manufacturer of the Automated Teller Machine product(s) described herein makes no representations or warranties, either expressed or implied, by or with respect to anything in this manual, and shall not be liable for any implied warranties of fitness for a particular purpose or for any indirect, special or consequential damages. Information in this document is subject to change without notice and does not represent a commitment on the part of the manufacturer.
MODEL 91XX/97XX CONFIGURATION MANUAL Notification of Changes in Telephone Company Equipment: The telephone company may make changes in its facilities, equipment, operations or procedures that could affect the operation of the equipment. If this happens, the telephone company will provide advanced notice in order for you to make necessary modifications to maintain uninterrupted service.
MANAGEMENT FUNCTIONS designated by the supplier. Any repairs or alterations made by the user to this equipment, or equipment malfunctions, may give the telecommunications company cause to request the user to disconnect the equipment. Users should ensure for their own protection that the electrical ground connections of the power utility, telephone lines and internal metallic water pipe system, if present, are connected together. This precaution may be particularly important in rural areas.
MODEL 91XX/97XX CONFIGURATION MANUAL lui-même; il doit avoir recours à an service d’inspection des installations électriques, ou à un électricien, selon le cas. AVIS: L’indice d’équivalence de la sonnerie (IES) assigné à chaque dispositif terminal indique le nombre maximal de terminaux qui peuvent étre raccordés à une interface.
MANAGEMENT FUNCTIONS responsible for compliance could void the user’s authority to operate the equipment. CANADIAN EMISSION REQUIREMENTS This digital apparatus does not exceed the Class A limits for radio noise emissions from digital apparatus set in the Radio Interference Regulations of the Canadian Department of Communications. This Class A digital apparatus complies with Canadian ICES-003.
MODEL 91XX/97XX CONFIGURATION MANUAL Trademark Acknowledgements Microsoft Windows is a registered trademark of Microsoft Corporation in the United States and/or other countries. Triton Connect is a trademark of Triton Systems, Inc. CashWorks is a trademark of CashWorks,Inc. PaySpot is a trademark of Euronet Worldwide. Western Union is a registered trademark of Western Union Holdings, Inc.
MANAGEMENT FUNCTIONS out of any breach of this contract or obligations under this contract.
MODEL 91XX/97XX CONFIGURATION MANUAL of creditors or of a receiver or of a liquidator, then Manufacturer shall be entitled to cancel any unfilled part of these terms and conditions without any liability whatsoever. Parts Only Limited Manufacturer’s Warranty Triton Systems of Delaware, Inc. warrants the components of each FT5000 series Automated Teller Machine, excluding software and related documentation, against any defect in materials and/or workmanship for a period of 13 months from the shipping date.
MANAGEMENT FUNCTIONS warranty, breach of contract, negligence, strict liability, or any other legal theory. Such damages include, but are not limited to, loss of profits, loss of revenue, loss of data, loss of use of the equipment or any associated equipment, cost of capital, cost of substitute or replacement equipment, facilities or services, down time, purchaser’s time, the claims of third parties, including customers, and injury to property.
MODEL 91XX/97XX CONFIGURATION MANUAL to be shipped as soon as possible. The purchaser will be billed for the replacement unit. Triton’s Repair Technicians will. repair the damaged unit after it is returned to our facilities. We will credit the purchaser’s account for the full purchase price of the damaged unit, minus the cost of returning the unit to ‘like new” condition. Under no circumstances does Triton authorize anyone to complete structural damage repairs in the field.
MANAGEMENT FUNCTIONS should state: • their name • the organization for which they work • the serial number of the equipment they are calling about • detailed description of the problem that they are experiencing • phone number where they can be reached, including area code. As Technical Support Specialists become available, they check for voice mail messages and return calls in the order in. which they were received.
MODEL 91XX/97XX CONFIGURATION MANUAL CONTACT INFORMATION TRITON SYSTEMS 21405 B STREET LONG BEACH, MS 39560 Sales: (800) 367-7191 (228) 868-1317 (228) 868-0437 FAX Service: (800) 259-6672 (Technical Support) (228) 575-3229 FAX (Technical Support) (228) 575-3383 FAX (Training) (228) 868-0859 FAX (Parts) 14
INTRODUCTION TABLE OF CONTENTS INTRODUCTION ............................................................................................21 MENU-BASED OPERATION ............................................................................21 KEYPAD OPERATION ............................................................................22 ACCESSING MANAGEMENT FUNCTIONS ..................................................23 FUNCTION: MANAGEMENT FUNCTIONS .......................................................
MODEL 91XX/97XX CONFIGURATION MANUAL FUNCTION: LANGUAGE/IDIOMA ............................................................67 FUNCTION: SPANISH/ESPANOL ......................................................68 FUNCTION: ENGLISH/INGLES .........................................................69 FUNCTION: ENABLE/DISABLE CUST. OPTION..................................70 FUNCTION: LANGUAGE (UK) .......................................................71 FUNCTION: JOURNAL ...........................................
MANAGEMENT FUNCTIONS FUNCTION: STORE MESSAGE ................................................112 FUNCTION: TERMINAL OWNER .............................................113 FUNCTION: TERMINAL PARAMETERS ............................................114 FUNCTION: SET TERMINAL # ...............................................115 FUNCTION: RESET SEQ # ...................................................116 FUNCTION: SURCHARGE MODE ............................................117 FUNCTION: SURCHARGE PERCENT ........
MODEL 91XX/97XX CONFIGURATION MANUAL FUNCTION: DATAPAK ACCESS CODE (CANADA ONLY) ..................169 FUNCTION: CARDWAY (UK) ......................................................170 FUNCTION: PREDIAL ON/OFF ......................................................179 FUNCTION: COMPUSERVE ID ......................................................180 FUNCTION: MODEM SETUP .........................................................181 FUNCTION: DIAL MODE ......................................................
INTRODUCTION FUNCTION: ACCOUNT TYPES .......................................................223 APPENDIX A - ADDENDUM TO THE MODEL 91XX/97XX CONFIGURATION MANUAL ..................................................................................................
MODEL 91XX/97XX CONFIGURATION MANUAL 20
MANAGEMENT FUNCTIONS INTRODUCTION This chapter describes the basic operation of the terminal. The following topics are covered: 1.) Menu-Based Operation - This section gives a general overview of the terminal display interface. 2.) Keypad Operation - Describes the layout and use of the display and alphanumeric keypads. 3.) Changing Management Functions - Describes how to access and change the terminal’s Management Functions. Figure 1.
MODEL 91XX/97XX CONFIGURATION MANUAL begin accepting customer transactions shortly after power is restored). KEYPAD OPERATION Menu Keys See Figure 2. The user interface of the terminal consists of the LCD display and 24 rubber keys on three keypads. The primary menu navigation keys are arranged in two four-key groups, one group on either side of the LCD display.
MANAGEMENT FUNCTIONS + % 90!$ # (!2 !# 4% 2 3 8 8 8 8 8 1 : 3 PACE ^ ! " # $ % & > ? ' ( ) \ * + , < - . / 0 2 3 4 5 6 ; = Ø 7 8 9 [ ] 8 g 3 INGLE 1UOTE /PEN g 3 INGLE 1UOTE # LOS E Table 1. Keypad Characters Keypad, and Table 1, Keypad Characters.
MODEL 91XX/97XX CONFIGURATION MANUAL 1. If the Customer Welcome screen is being displayed, press and hold down the key while holding down the key, press the <1> key. Release both keys. After a moment the Top Menu screen (shown in Figure 4) will be displayed. Select the MANAGEMENT FUNCTIONS option. 2. Reset the terminal by removing and reapplying power to the terminal. When the Top Menu is displayed select MANAGEMENT FUNCTIONS. 3. Figure 4. The Top Menu screen.
MANAGEMENT FUNCTIONS The Top Menu serves an alternative purpose in the event of a machine malfunction or other error condition. Such conditions are normally reported by an “OUT OF SERVICE” message screen. The typical response to this message is to reset the terminal. After resetting the terminal the Top Menu screen will display any applicable status messages and error code numbers. The two options presented in such instances will be RESET ERROR and MANAGEMENT FUNCTIONS.
MODEL 91XX/97XX CONFIGURATION MANUAL THIS COMMAND IS USED IN THE: 9100 9110 9700 9705 9710 9750 FUNCTION: MANAGEMENT FUNCTIONS FACTORY DEFAULT: N/A ACCESS INSTRUCTIONS: 1.) Select the MANAGEMENT FUNCTIONS option from the Top Menu. DESCRIPTION: TheMANAGEMENTFUNCTIONS menu allows the terminal operator to access the following functions: 1.) 2.) 3.) 4.) 5.) 6.
MANAGEMENT FUNCTIONS THIS COMMAND IS USED IN THE: 9100 9110 9700 9705 9710 9750 FUNCTION: MANAGEMENT FUNCTIONS (UK) FACTORY DEFAULT: N/A ACCESS INSTRUCTIONS: 1.) Select the MANAGEMENT FUNCTIONS option from the Top Menu. DESCRIPTION: TheMANAGEMENTFUNCTIONS menu allows the terminal operator to access the following functions: 1.) 2.) 3.) 4.) 5.) 6.
MODEL 91XX/97XX CONFIGURATION MANUAL THIS COMMAND IS USED IN THE: 9100 9110 9700 9705 9710 9750 FUNCTION: MANAGEMENT FUNCTIONS (9750) FACTORY DEFAULT: N/A ACCESS INSTRUCTIONS: 1.) Select the MANAGEMENT FUNCTIONS option from the Top Menu. DESCRIPTION: The MANAGEMENT FUNCTIONS menu allows the terminal operator to access the following functions: 1.) 2.) 3.) 4.) 5.) 6.
MANAGEMENT FUNCTIONS THIS COMMAND IS USED IN THE: 9100 9110 9700 9705 9710 9750 FUNCTION: CLOSE FACTORY DEFAULT: N/A ACCESS INSTRUCTIONS: 1.) Select the CLOSE option from the MANAGEMENT FUNCTIONS screen to view the options available from the SELECT CLOSE FUNCTION menu. DESCRIPTION: The SELECT CLOSE FUNCTION menu allows the terminal operator to perform the following functions: 1.) 2.) 3.) 4.) 5.) 6.) 7.) SCHEDULE CLOSE TRIAL CASSETTE BALANCE TRIAL CLOSE DAY CLOSE SEND TERMINAL TOTALS ENTER QTY.
MODEL 91XX/97XX CONFIGURATION MANUAL THIS COMMAND IS USED IN THE: 9100 9110 9700 9705 9710 9750 FUNCTION: CLOSE (9750) FACTORY DEFAULT: N/A ACCESS INSTRUCTIONS: 1.) Select the CLOSE option from the MANAGEMENT FUNCTIONS screen to view the options available from the SELECT CLOSE FUNCTION menu. DESCRIPTION: The SELECT CLOSE FUNCTION menu allows the terminal operator to perform the following functions: 1.) 2.) 3.) 4.) 5.) 6.
MANAGEMENT FUNCTIONS THIS COMMAND IS USED IN THE: 9100 9110 9700 9705 9710 9750 FUNCTION: SCHEDULE CLOSE FACTORY DEFAULT: OFF ACCESS INSTRUCTIONS: 1.) Select CLOSE from the MANAGEMENT FUNCTION screen. 2.) Select SCHEDULE CLOSE. DESCRIPTION: This function allows you to turn on or off the SCHEDULE CLOSE feature.
MODEL 91XX/97XX CONFIGURATION MANUAL THIS COMMAND IS USED IN THE: 9100 9110 9700 9705 9710 9750 FUNCTION: CHANGE SCHEDULE FACTORY DEFAULT: N/A ACCESS INSTRUCTIONS: 1.) Select CLOSE from the MANAGEMENT FUNCTION screen. 2.) Select SCHEDULE CLOSE. 3.) Select CHANGE SCHEDULE. DESCRIPTION: This function is used to set the time, in hours and minutes, at which the terminal will automatically initiate contact with the processor and perform a close operation.
MANAGEMENT FUNCTIONS THIS COMMAND IS USED IN THE: 9100 9110 9700 9705 9710 9750 FUNCTION: TRIAL CASSETTE BALANCE FACTORY DEFAULT: N/A ACCESS INSTRUCTIONS: 1.) Select CLOSE from the MANAGEMENT FUNCTION screen. 2.) Select TRIAL CASSETTE BALANCE. DESCRIPTION: Selecting this function prints a receipt summarizing activity on the cassette since the last CASSETTE CLOSE was performed. The totals are not cleared (set to zero) or reported to the host during a trial cassette close.
MODEL 91XX/97XX CONFIGURATION MANUAL THIS COMMAND IS USED IN THE: 9100 9110 9700 9705 9710 9750 FUNCTION: TRAIL CLOSE FACTORY DEFAULT: N/A ACCESS INSTRUCTIONS: 1.) Select CLOSE from the MANAGEMENT FUNCTIONS screen. 2.) Select TRIAL CLOSE. DESCRIPTION: The TRIAL CLOSE function is used during the daily close procedure. It does the same thing as DAY CLOSE, except that the totals are not cleared.
MANAGEMENT FUNCTIONS THIS COMMAND IS USED IN THE: 9100 9110 9700 9705 9710 9750 FUNCTION: DAY CLOSE FACTORY DEFAULT: N/A ACCESS INSTRUCTIONS: 1.) Select CLOSE from the MANAGEMENT FUNCTIONS screen. 2.) Select DAY CLOSE. DESCRIPTION: The DAY CLOSE Function is used to complete daily balancing of the Cash Dispenser with the processor. The DAY CLOSE is performed to clear the totals and switch to the next business day.
MODEL 91XX/97XX CONFIGURATION MANUAL THIS COMMAND IS USED IN THE: 9100 9110 9700 9705 9710 9750 FUNCTION: SEND TERMINAL TOTALS FACTORY DEFAULT: OFF ACCESS INSTRUCTIONS: 1.) Select CLOSE from the MANAGEMENT FUNCTION screen. 2.) Select SEND TERMINAL TOTALS. DESCRIPTION: This function allows you to turn on or off the REPORT TERMINAL TOTALS feature. When the feature is turned ON, the terminal will send accumulated totals information to the processor during the close operation.
MANAGEMENT FUNCTIONS THIS COMMAND IS USED IN THE: 9100 9110 9700 9705 9710 9750 FUNCTION: ENTER QTY IN CASSETTE FACTORY DEFAULT: ‘0’ ACCESS INSTRUCTIONS: 1.) Select CLOSE from the MANAGEMENT FUNCTION screen. 2.) Select ENTER QTY. IN CASSETTE. DESCRIPTION: The ENTER QTY. IN CASSETTE function allows entry of the number of documents in the cassette.
MODEL 91XX/97XX CONFIGURATION MANUAL THIS COMMAND IS USED IN THE: 9100 9110 9700 9705 9710 9750 FUNCTION: CASSETTE CLOSE FACTORY DEFAULT: N/A ACCESS INSTRUCTIONS: 1.) Select CLOSE from the MANAGEMENT FUNCTION screen. 2.) Select CASSETTE CLOSE. DESCRIPTION: The CASSETTE CLOSE function is used to complete the balancing of a specific currency cassette of the Cash Dispenser.
MANAGEMENT FUNCTIONS THIS COMMAND IS USED IN THE: 9100 F UNCTION : (9750) 9110 9700 9705 9710 9750 C LOSE C ASSETTE FACTORY DEFAULT: N/A ACCESS INSTRUCTIONS: 1.) Select CLOSE from the MANAGEMENT FUNCTION screen. 2.) Select CASSETTE CLOSE. Choose a cassette (A, B, C, or D). 3.) Select CASSETTE CLOSE. DESCRIPTION: The CASSETTE CLOSE function is used to complete the balancing of a specific currency cassette of the Cash Dispenser.
MODEL 91XX/97XX CONFIGURATION MANUAL THIS COMMAND IS USED IN THE: 9100 9110 9700 9705 9710 9750 FUNCTION: TRIAL CASSETTE CLOSE (9750) FACTORY DEFAULT: N/A ACCESS INSTRUCTIONS: 1.) Select CLOSE from the MANAGEMENT FUNCTION screen. 2.) Select CASSETTE CLOSE. Choose a cassette (A, B, C, or D). 3.) Select TRIAL CASSETTE CLOSE. DESCRIPTION: Selecting this function prints a receipt summarizing activity on the cassette since the last CASSETTE CLOSE was performed.
MANAGEMENT FUNCTIONS THIS COMMAND IS USED IN THE: 9100 F UNCTION : (9750) 9110 9700 9705 9710 9750 S ELECT C ASSETTE FACTORY DEFAULT: N/A ACCESS INSTRUCTIONS: 1.) Select CLOSE from the MANAGEMENT FUNCTION screen. 2.) Select CASSETTE CLOSE. Choose a cassette (A, B, C, or D). 3.) Choose the SELECT CASSETTE option. DESCRIPTION: This option provides a convenient way to switch between cassettes when performing cassette-specific close operations.
MODEL 91XX/97XX CONFIGURATION MANUAL THIS COMMAND IS USED IN THE: 9100 9110 9700 9705 9710 9750 FUNCTION: ENTER QTY. IN CASSETTE (9750) FACTORY DEFAULT: ‘0’ ACCESS INSTRUCTIONS: 1.) Select CLOSE from the MANAGEMENT FUNCTION screen. 2.) Select CASSETTE CLOSE. Choose a cassette (A, B, C, or D). 3.) Select ENTER QTY. IN CASSETTE. DESCRIPTION: The ENTER QTY. IN CASSETTE function allows entry of the number of documents in the cassette. This number is used as a starting point for the cassette close report.
MANAGEMENT FUNCTIONS THIS COMMAND IS USED IN THE: 9100 9110 9700 9705 9710 9750 FUNCTION: TRIAL CASSETTE CLOSE (9750) FACTORY DEFAULT: N/A ACCESS INSTRUCTIONS: 1.) Select CLOSE from the MANAGEMENT FUNCTIONS screen. 2.) Select TRIAL CASSETTE CLOSE (ALL). DESCRIPTION: Selecting the TRIAL CASSETTE CLOSE (ALL) function prints a summary of all cassettes present with out clearing any totals. The host is not contacted. ERROR CONDITIONS: There are no error conditions directly associated with this function.
MODEL 91XX/97XX CONFIGURATION MANUAL THIS COMMAND IS USED IN THE: 9100 9110 9700 9705 9710 9750 FUNCTION: DIAGNOSTICS FACTORY DEFAULT: N/A ACCESS INSTRUCTIONS: 1.) Select DIAGNOSTICS from the MANAGEMENT FUNCTIONS screen. DESCRIPTION: Select one of the following to per- *NOTE* The diagnostics options do not have a time-out associated with them. You must manually exit the diagnostics mode when you are finished. form the appropriate DIAGNOSTICS test: 1.
MANAGEMENT FUNCTIONS is installed and that it is capable of being configured. b. SCAN CARD. Select this option to verify that a customer’s ATM or credit card can be read by the terminal card reader. c. MODEM SPEAKER ON/OFF. Allows the modem signal to be routed to the speaker when ON. ERROR CONDITIONS: There are no error conditions directly associated with this function.
MODEL 91XX/97XX CONFIGURATION MANUAL THIS COMMAND IS USED IN THE: 9100 9110 9700 9705 9710 9750 FUNCTION: STATUS FACTORY DEFAULT: N/A ACCESS INSTRUCTIONS: 1.) Select DIAGNOSTICS from the MANAGEMENT FUNCTIONS screen. 2.) Select the STATUS option. DESCRIPTION: The STATUS command is used to check the status of four functional areas of the dispensing mechanism.
MANAGEMENT FUNCTIONS THIS COMMAND IS USED IN THE: 9100 9110 9700 9705 9710 9750 FUNCTION: STATUS (9750) FACTORY DEFAULT: N/A ACCESS INSTRUCTIONS: 1.) Select DIAGNOSTICS from the MANAGEMENT FUNCTIONS screen 2.) Select the STATUS option. DESCRIPTION: The STATUS feature presents a screen with options for initiating status checks on the primary functional areas of the dispensing mechanism. These areas are the four Feed Channels, the Reject Channel and the Transport Channel.
MODEL 91XX/97XX CONFIGURATION MANUAL THIS COMMAND IS USED IN THE: 9100 9110 9700 9705 9710 9750 FUNCTION: PURGE FACTORY DEFAULT: N/A ACCESS INSTRUCTIONS: 1.) Select DIAGNOSTICS from the MANAGEMENT FUNCTIONS screen. 2.) Select the PURGE option. DESCRIPTION: The purge command instructs the dispenser to remove all documents from the feed path.
MANAGEMENT FUNCTIONS THIS COMMAND IS USED IN THE: 9100 9110 9700 9705 9710 9750 FUNCTION: TEST DISPENSE FACTORY DEFAULT: N/A ACCESS INSTRUCTIONS: 1.) Select DIAGNOSTICS from the MANAGEMENT FUNCTIONS screen. 2.) Select the TEST DISPENSE option. DESCRIPTION: NOTE: The diagnostics options do not have a time-out associated with them. You must manually exit the diagnostics mode when you are finished. This command instructs the dispensing mechanism to dispense one note from the cassette into the reject box.
MODEL 91XX/97XX CONFIGURATION MANUAL THIS COMMAND IS USED IN THE: 9100 9110 9700 9705 9710 9750 FUNCTION: PURGE (9750) FACTORY DEFAULT: N/A ACCESS INSTRUCTIONS: 1.) Select DIAGNOSTICS from the MANAGEMENT FUNCTIONS screen 2.) Select the PURGE option. DESCRIPTION: When the PURGE option is selected, a PURGE command is sent to the dispenser, instructing it to exercise its note transport system.
MANAGEMENT FUNCTIONS THIS COMMAND IS USED IN THE: 9100 9110 9700 9705 9710 9750 FUNCTION: TEST DISPENSE (9750) FACTORY DEFAULT: N/A ACCESS INSTRUCTIONS: 1.) Select DIAGNOSTICS from the MANAGEMENT FUNCTIONS screen 2.) Select the TEST DISPENSE option. DESCRIPTION: The TEST DISPENSE command instructs the dispensing mechanism in the Cash Dispenser to dispense a single note from each Note Cassette, sending each note into the Reject Cassette.
MODEL 91XX/97XX CONFIGURATION MANUAL THIS COMMAND IS USED IN THE: 9100 9110 9700 9705 9710 9750 FUNCTION: FORMAT MEMORY EXP. CARD FACTORY DEFAULT: N/A ACCESS INSTRUCTIONS: 1.) Select DIAGNOSTICS from the MANAGEMENT FUNCTIONS screen. 2.) Select the FORMAT GRAPHIC MEMORY option. **CAUTION** Formatting a Memory Expansion Card will erase all files stored on the card. Do not format a Memory Expansion Card unless you have the capability to download files to the terminal.
MANAGEMENT FUNCTIONS THIS COMMAND IS USED IN THE: 9100 9110 9700 9705 9710 9750 FUNCTION: TEST RECEIPT PRINTER (9750) FACTORY DEFAULT: N/A ACCESS INSTRUCTIONS: 1.) Select DIAGNOSTICS from the MANAGEMENT FUNCTIONS screen. 2.) Select the TEST RECEIPT PRINTER option. DESCRIPTION: This command will print two lines of text on the receipt printer and then advance and cut the paper. The text should be 42 characters wide.
MODEL 91XX/97XX CONFIGURATION MANUAL THIS COMMAND IS USED IN THE: 9100 9110 9700 9705 9710 9750 FUNCTION: TEST RECEIPT PRINTER FACTORY DEFAULT: N/A ACCESS INSTRUCTIONS: 1.) Select DIAGNOSTICS from the MANAGEMENT FUNCTIONS screen. 2.) Select the TEST RECEIPT PRINTER option. DESCRIPTION: This command will print two lines of text on the receipt printer and then advance and cut the paper. The text should be 42 characters wide.
MANAGEMENT FUNCTIONS THIS COMMAND IS USED IN THE: 9100 9110 9700 9705 9710 9750 FUNCTION: VERSIONS #’S FACTORY DEFAULT: N/A ACCESS INSTRUCTIONS: 1.) Select DIAGNOSTICS from the MANAGEMENT FUNCTIONS screen. 2.) Select the VERSION #’S option. DESCRIPTION: This function displays the version information for the terminal software that is running in the Cash Dispenser. Normally you do not need to access this function unless you are asked to by service personnel.
MODEL 91XX/97XX CONFIGURATION MANUAL THIS COMMAND IS USED IN THE: 9100 9110 9700 9705 9710 9750 FUNCTION: MORE DIAGNOSTIC FACTORY DEFAULT: N/A ACCESS INSTRUCTIONS: 1.) Select DIAGNOSTICS from the MANAGEMENT FUNCTIONS screen. 2.) Select the MORE DIAGNOSTICS option. DESCRIPTION: This screen allows you to select additional diagnostics functions.
MANAGEMENT FUNCTIONS THIS COMMAND IS USED IN THE: 9100 9110 9700 9705 9710 9750 F UNCTION : M ORE D IAGNOSTICS (9750) FACTORY DEFAULT: N/A ACCESS INSTRUCTIONS: 1.) Select DIAGNOSTICS from the MANAGEMENT FUNCTIONS screen. 2.) Select the MORE DIAGNOSTICS option. DESCRIPTION: This screen allows you to select additional diagnostics functions. The functions available are: 1.) INJECT NEW CASSETTE ID, which enables you to change the identification code of a cassette. 2.
MODEL 91XX/97XX CONFIGURATION MANUAL THIS COMMAND IS USED IN THE: 9100 9110 9700 9705 9710 9750 FUNCTION: INJECT NEW CASSETTE ID (9750) FACTORY DEFAULT: N/A ACCESS INSTRUCTIONS: 1.) Select DIAGNOSTICS from the MANAGEMENT FUNCTIONS screen. 2.) Select the MORE DIAGNOSTICS option. 3.) Select the INJECT NEW CASSETTE ID option. DESCRIPTION: Each Note Cassette contains on board memory that enables it to store it’s own identification code. This option allows you to inject a new ID into a Note Cassette.
MANAGEMENT FUNCTIONS THIS COMMAND IS USED IN THE: 9100 9110 9700 9705 9710 FUNCTION: RESET/TEST MODEM FACTORY DEFAULT: N/A ACCESS INSTRUCTIONS: 1.) Select DIAGNOSTICS from the MANAGEMENT FUNCTIONS screen. 2.) Select MORE DIAGNOSTICS. 3.) Select the RESET/TEST MODEM option. DESCRIPTION: This test confirms that the CPU Module can communicate with the modem and that the modem can be configured. This test does not test the ability of the modem to communicate on the phone line.
MODEL 91XX/97XX CONFIGURATION MANUAL THIS COMMAND IS USED IN THE: 9100 9110 9700 9705 9710 9750 FUNCTION: FORCE UNLOCK CASSETTES (9750) ACCESS INSTRUCTIONS: 1.) Select the DIAGNOSTICS option from the MANAGEMENT FUNCTIONS menu. 2.) Select MORE DIAGNOSTICS. 3.) Select FORCE UNLOCK CASSETTE. DESCRIPTION: This function provides a means of overriding the unlocking mechanism associated with a particular cassette. It is only to be used immediately after failure of a normal cassette unlock operation.
MANAGEMENT FUNCTIONS unlock operation is to use the FORCE UNLOCK function to attempt to release the applicable cassette from the mechanism. To initiate a FORCE UNLOCK operation on a specific cassette, select the option button on the menu that corresponds to the location of the affected cassette. Once the cassette has been removed from the dispensing mechanism, gently remove any notes that are sticking out of the cassette.
MODEL 91XX/97XX CONFIGURATION MANUAL THIS COMMAND IS USED IN THE: 9100 9110 9700 F UNCTION : M ORE D IAGNOSTICS (9100/9705) FACTORY DEFAULT: N/A ACCESS INSTRUCTIONS: 1.) Select DIAGNOSTICS from the MANAGEMENT FUNCTIONS screen. 2.) Select the MORE DIAGNOSTICS option. DESCRIPTION: This screen allows you to select additional diagnostics functions. The functions available are: 1.) RESET/TEST MODEM 2.) SCAN CARD 4.
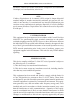
MANAGEMENT FUNCTIONS THIS COMMAND IS USED IN THE: 9100 9110 9700 9705 9710 9750 FUNCTION: ADVANCED (9100/9705) FACTORY DEFAULT: N/A ACCESS INSTRUCTIONS: 1.) Select DIAGNOSTICS from the MANAGE-MENT FUNCTIONS screen. 2.) Select MORE DIAGNOSTICS. 3.) Select the ADVANCED option. The ADVANCED menu makes three options available that are only used when a TDM-100 dispensing mechanism is installed in the cash dispenser. PRINT DISPENSER DATA REPORT - Selecting this function prints the “TDM STATUS” report.
MODEL 91XX/97XX CONFIGURATION MANUAL 8. Since Reset - Indicates the number of times a documented TDM-100 error has occurred since the last time the CLEAR DISPENSER REPORT option was activated. 1 2 9. 3 4 5 5a 5b 6 5c 8 7 Bills Picked = The total number of bills the dispenser has picked during its life cycle. 10. Thickness Array data a. The low threshold is = b. The high threshold is = c. The middle is = d. The peak value is = e.
MANAGEMENT FUNCTIONS following data: 1. The low threshold is = 2. The high threshold is = 3. The middle is = 1 4. The peak value is = 2 5. Reserved for doubles.
MODEL 91XX/97XX CONFIGURATION MANUAL THIS COMMAND IS USED IN THE: 9100 9110 9700 9705 9710 9750 FUNCTION: SCAN CARD FACTORY DEFAULT: N/A ACCESS INSTRUCTIONS: 1.) Select DIAGNOSTICS from the MANAGEMENT FUNCTIONS screen. 2.) Select MORE DIAGNOSTICS. 3.) Select the SCAN CARD option. DESCRIPTION: The SCAN CARD function reads a card and displays the information imprinted on its magnetic strip. This can be done on a customer card that doesn’t seem to work in the Cash Dispenser.
MANAGEMENT FUNCTIONS THIS COMMAND IS USED IN THE: 9100 9110 9700 9705 9710 9750 FUNCTION: LANGUAGE/IDIOMA FACTORY DEFAULT: COUNTRY-SPECIFIC ACCESS INSTRUCTIONS: 1.) Select the LANGUAGE/ IDIOMA option from the MANAGEMENT FUNCTIONS screen to view the additional options available. DESCRIPTION: This function provides access to the options that control the language that is displayed on the Cash Dispenser LCD Display.
MODEL 91XX/97XX CONFIGURATION MANUAL THIS COMMAND IS USED IN THE: 9100 9110 9700 9705 9710 9750 FUNCTION: SPANISH/ESPANOL FACTORY DEFAULT: N/A ACCESS INSTRUCTIONS: 1.) Select the LANGUAGE/IDIOMA option from the MANAGEMENT FUNCTIONS screen. 2.) Select the SPANISH/ESPANOL option. *NOTE* Some versions of international software replace the Spanish language option with French. DESCRIPTION: Choosing this option when the DISABLE CUST. OPTION is selected will display only Spanish text during a transaction.
MANAGEMENT FUNCTIONS THIS COMMAND IS USED IN THE: 9100 9110 9700 9705 9710 9750 FUNCTION: ENGLISH/INGLES FACTORY DEFAULT: N/A ACCESS INSTRUCTIONS: 1.) Select the LANGUAGE/IDIOMA option from the MANAGEMENT FUNCTIONS screen. 2.) Select the ENGLISH/INGLES option. DESCRIPTION: Choosing this function when the DISABLE CUST. OPTION is selected will set the LCD screen to display only English text during a transaction. Choosing this function when the ENABLE CUST.
MODEL 91XX/97XX CONFIGURATION MANUAL THIS COMMAND IS USED IN THE: 9100 9110 9700 9705 9710 9750 FUNCTION: ENABLE/DISABLE CUST. OPTION FACTORY DEFAULT: ‘OPTION IS: DISABLED’ ACCESS INSTRUCTIONS: 1.) Select the LANGUAGE/IDIOMA option from the MANAGEMENT FUNCTIONS screen. 2.) Select either option, as appropriate: ENABLE CUST. OPTION. DISABLE CUST. OPTION.
MANAGEMENT FUNCTIONS THIS COMMAND IS USED IN THE: 9100 9110 9700 9705 9710 9750 FUNCTION: LANGUAGE (UK) FACTORY DEFAULT: COUNTRY-SPECIFIC ACCESS INSTRUCTIONS: 1.) Select the LANGUAGE option from the MANAGEMENT FUNCTIONS screen to view the additional options available. DESCRIPTION: This function provides access to the options that control the language that is displayed on the Cash Dispenser LCD Display.
MODEL 91XX/97XX CONFIGURATION MANUAL THIS COMMAND IS USED IN THE: 9100 9110 9700 9705 9710 9750 FUNCTION: JOURNAL FACTORY DEFAULT: N/A ACCESS INSTRUCTIONS: 1.) Select JOURNAL from the options available at the MANAGEMENT FUNCTIONS screen. DESCRIPTION: Select the JOURNAL function from the MANAGEMENT FUNCTIONS screen to: 1.) PRINT THE JOURNAL 2.) CLEAR JOURNAL 3.) PRINT THE LAST X ENTRIES ERROR CONDITIONS: There are no error conditions directly associated with this function.
MANAGEMENT FUNCTIONS THIS COMMAND IS USED IN THE: 9100 9110 9700 9705 9710 9750 FUNCTION: CLEAR JOURNAL FACTORY DEFAULT: N/A ACCESS INSTRUCTIONS: 1.) Select JOURNAL from the options available at the MANAGEMENT FUNCTIONS screen. 2.) Select the CLEAR JOURNAL option to mark all journal entries stored in the Electronic Journal since the last time the CLEAR JOURNAL or PRINT JOURNAL functions were completed.
MODEL 91XX/97XX CONFIGURATION MANUAL THIS COMMAND IS USED IN THE: 9100 9110 9700 9705 9710 9750 FUNCTION: PRINT JOURNAL FACTORY DEFAULT: N/A ACCESS INSTRUCTIONS: 1.) Select JOURNAL from the options available at the MANAGEMENT FUNCTIONS screen. 2.) Select the PRINT JOURNAL option to print all unaudited records stored in the Electronic Journal. DESCRIPTION: The PRINT JOURNAL command is used to automatically print out any journal entries collected since the last time the journal was printed.
MANAGEMENT FUNCTIONS THIS COMMAND IS USED IN THE: 9100 9110 9700 9705 9710 9750 FUNCTION: PRINT LAST X ENTRIES FACTORY DEFAULT: N/A ACCESS INSTRUCTIONS: 1.) Select JOURNAL from the options available at the MANAGEMENT FUNCTIONS screen. 2.) Select the PRINT LAST X ENTRIES option to print the last X (where ‘X’ is a number from 1 to 2045) entries stored in the Electronic Journal.
MODEL 91XX/97XX CONFIGURATION MANUAL THIS COMMAND IS USED IN THE: 9100 9110 9700 9705 9710 9750 F UNCTION : C ASSETTE S ERVICE (9750) FACTORY DEFAULT: N/A ACCESS INSTRUCTIONS: 1.) Select the CASSETTE SERVICE option from the MANAGEMENT FUNCTIONS screen. DESCRIPTION: The CASSETTE SERVICE option provides the terminal operator with the ability to quickly lock and unlock cassettes, or to place selected cassettes into service.
MANAGEMENT FUNCTIONS THIS COMMAND IS USED IN THE: 9100 9110 9700 9705 9710 9750 FUNCTION: PASSWORD MAINTENANCE FACTORY DEFAULT: N/A ACCESS INSTRUCTIONS: 1.) Select the PASSWORD MAINTENANCE option from the MANAGEMENT FUNCTIONS screen. DESCRIPTION: The PASSWORD MAINTENANCE Function of MANAGEMENT FUNCTIONS menu allows access to menus for viewing and changing the following: 1.) MASTER PASSWORD 2.
MODEL 91XX/97XX CONFIGURATION MANUAL THIS COMMAND IS USED IN THE: 9100 9110 9700 9705 9710 9750 FUNCTION: MASTER PASSWORD FACTORY DEFAULT: ‘123456’ ACCESS INSTRUCTIONS: 1.) Select the PASSWORD MAINTENANCE option from the MANAGEMENT FUNCTIONS screen. 2.) Select the MASTER PASSWORD option. DESCRIPTION: The MASTER PASSWORD is the highest level password on the Cash Dispenser. It allows access to all functions except downloading of new software.
MANAGEMENT FUNCTIONS THIS COMMAND IS USED IN THE: 9100 9110 9700 9705 9710 9750 FUNCTION: ADMINSITRATION PASSWORD FACTORY DEFAULT: ‘987654’ ACCESS INSTRUCTIONS: 1.) Select the PASSWORD MAINTENANCE option from the MANAGEMENT FUNCTIONS screen. 2.) Select the ADMINISTRATION PASSWORD option. DESCRIPTION: The ADMINISTRATION PASSWORD is used to perform daily management functions. This password DOES NOT allow access to the TERMINAL CONFIGURATION menu.
MODEL 91XX/97XX CONFIGURATION MANUAL THIS COMMAND IS USED IN THE: 9100 9110 9700 9705 9710 9750 FUNCTION: TERMINAL CONFIGURATION FACTORY DEFAULT: N/A ACCESS INSTRUCTIONS: Select the TERMINAL CONFIGURATION option from the MANAGEMENT FUNCTIONS screen. DESCRIPTION: The TERMINAL CONFIGURATION option provides access to functions that allow the following parameters to be viewed and changed: 1.) 2.) 3.) 4.) 5.) 6.) 7.
MANAGEMENT FUNCTIONS THIS COMMAND IS USED IN THE: 9100 9110 9700 9705 9710 9750 FUNCTION: PRINTER SETTINGS FACTORY DEFAULT: N/A ACCESS INSTRUCTIONS: 1.) Select the TERMINAL CONFIGURATION option from the MANAGEMENT FUNCTIONS screen. 2.) Select the PRINTER SETTINGS option. DESCRIPTION: This menu provides access to the following functions: 1.) SET PRINT LENGTH 2.) LOW RECEIPT PAPER 3.) PRINTER GRAPHICS ERROR CONDITIONS: There are no error conditions directly associated with this function.
MODEL 91XX/97XX CONFIGURATION MANUAL THIS COMMAND IS USED IN THE: 9100 9110 9700 9705 9710 9750 FUNCTION: SET PRINT LENGTH FACTORY DEFAULT: ‘35’ ACCESS INSTRUCTIONS: 1.) Select the TERMINAL CONFIGURATION option from the MANAGEMENT FUNCTIONS screen. 2.) Select the PRINTER SETTINGS option. 3.) Select SET PRINT LENGTH. DESCRIPTION: This function sets the minimum length of the receipt provided to the customer after each transaction.
MANAGEMENT FUNCTIONS THIS COMMAND IS USED IN THE: 9100 9110 9700 9705 9710 9750 FUNCTION: LOW RECEIPT PAPER F ACTORY D EFAULT : ‘OUT OF SERVICE’ ACCESS INSTRUCTIONS: 1.) Select TERMINAL CONFIGURATION from the MANAGEMENT FUNCTIONS menu. 2.) Select the PRINTER SETTINGS option. 3.) Choose the LOW RECEIPT PAPER option.
MODEL 91XX/97XX CONFIGURATION MANUAL THIS COMMAND IS USED IN THE: 9100 9110 9700 9705 9710 9750 FUNCTION: PRINTER GRAPHICS FACTORY DEFAULT: ENABLED ACCESS INSTRUCTIONS: 1.) Select TERMINAL CONFIGURATION option from the MANAGEMENT FUNCTIONS screen. 2.) Select the PRINTER SETTINGS option. 3.) Select PRINTER GRAPHICS. DESCRIPTION: Triton Connect Software Release 1.8 (or above) allows bit mapped graphics (in ‘.bmp’ format) to be downloaded to the terminal.
MANAGEMENT FUNCTIONS THIS COMMAND IS USED IN THE: 9100 9110 9700 9705 9710 9750 FUNCTION: RANDOM/LEVEL PRIZE COUPONS FACTORY DEFAULT: N/A ACCESS INSTRUCTIONS: 1.) Select TERMINAL CONFIGURATION from the MANAGEMENT FUNCTIONS menu. 2.) Select RANDOM/LEVEL PRIZE COUPONS from the TERMINAL CONFIGURATION menu. DESCRIPTION: This function provides access to the following options, which will set up terminal operations for issuing printed and dispensed prize coupons: 1.) 2.) 3.) 4.) 5.
MODEL 91XX/97XX CONFIGURATION MANUAL THIS COMMAND IS USED IN THE: 9100 9110 9700 9705 9710 9750 FUNCTION: ENTER LEVEL PRIZE MSG. FACTORY DEFAULT: NONE ACCESS INSTRUCTIONS: 1.) Select TERMINAL CONFIGURATION from the MANAGEMENT FUNCTIONS menu. 2.) Select RANDOM/LEVEL PRIZE COUPONS from the TERMINAL CONFIGURATION menu. + %9 3.) Select ENTER LEVEL PRIZE MSG. & 500%2 .
MANAGEMENT FUNCTIONS THIS COMMAND IS USED IN THE: 9100 9110 9700 9705 9710 9750 FUNCTION: ENTER RANDOM PRIZE MSG. FACTORY DEFAULT: NONE ACCESS INSTRUCTIONS: 1.) Select TERMINAL CONFIGURATION from the MANAGEMENT FUNCTIONS menu. 2.) Select RANDOM/LEVEL PRIZE COUPONS from the TERMINAL CONFIGURATION menu. + %9 3.) Select ENTER RANDOM PRIZE MSG. & 500%2 .O 3HIFT DESCRIPTION: & ,EFT 1 ! $ ' * - 0 4 7 & #ENTER : " % ( + .
MODEL 91XX/97XX CONFIGURATION MANUAL THIS COMMAND IS USED IN THE: 9100 9110 9700 9705 9710 9750 FUNCTION: ENABLE/DISABLE COUPON AWARD DISABLED FACTORY DEFAULT: DISABLED ACCESS INSTRUCTIONS: 1.) Select TERMINAL CONFIGURATION from the MANAGEMENT FUNCTIONS menu. 2.) Select RANDOM/LEVEL PRIZE COUPONS from the TERMINAL CONFIGURATION menu. 3.) Select the ENABLE/DISABLE COUPON AWARDS option. 4.) Select ENABLE OR DISABLE from the menu displayed.
MANAGEMENT FUNCTIONS THIS COMMAND IS USED IN THE: 9100 F UNCTION AMOUNT 9110 9700 9705 9710 9750 S ET L EVEL P RIZE FACTORY DEFAULT: ‘$0.00’ ACCESS INSTRUCTIONS: 1.) Select TERMINAL CONFIGURATION from the MANAGEMENT FUNCTIONS menu. 2.) Select RANDOM/LEVEL PRIZE COUPONS from the TERMINAL CONFIGURATION menu. 3.) Select the SET LEVEL PRIZE AMOUNT option. 4.) Enter the amount in dollars and press “”. DESCRIPTION: This function sets the threshold level at which the level prize coupon will be printed.
MODEL 91XX/97XX CONFIGURATION MANUAL THIS COMMAND IS USED IN THE: 9100 9110 9700 9705 9710 9750 FUNCTION: SET RANDOM WINNING % FACTORY DEFAULT: ‘0%’ ACCESS INSTRUCTIONS: 1.) Select TERMINAL CONFIGURATION from the MANAGEMENT FUNCTIONS menu. 2.) Select RANDOM/LEVEL PRIZE COUPONS from the TERMINAL CONFIGURATION menu. 3.) Select the SET RANDOM WINNING % option. 4.) Select the CHANGE option. 5.) Enter the new random percentage and press .
MANAGEMENT FUNCTIONS THIS COMMAND IS USED IN THE: 9100 9110 9700 9705 9710 9750 FUNCTION: RANDOM/LEVEL COUPONS (9750) FACTORY DEFAULT: N/A ACCESS INSTRUCTIONS: 1.) Select TERMINAL CONFIGURATION from the MANAGEMENT FUNCTIONS menu. 2.) Select RANDOM/LEVEL PRIZE COUPONS from the TERMINAL CONFIGURATION menu. DESCRIPTION: The SELECT COUPON TYPE screen allows the operator to access the functions specific to managing either printed or dispensed prize coupons. The following options are available: 1.
MODEL 91XX/97XX CONFIGURATION MANUAL THIS COMMAND IS USED IN THE: 9100 F UNCTION : (9750) 9110 9700 9705 9710 9750 P RINTER C OUPONS FACTORY DEFAULT: N/A ACCESS INSTRUCTIONS: 1.) Select TERMINAL CONFIGURATION from the MANAGEMENT FUNCTIONS menu. 2.) Select RANDOM/LEVEL PRIZE COUPONS from the TERMINAL CONFIGURATION menu. 3.) Select PRINTED COUPONS. DESCRIPTION: This function provides access to the following options, which will set up terminal operations for issuing printed prize coupons: 1.) 2.) 3.
MANAGEMENT FUNCTIONS THIS COMMAND IS USED IN THE: 9100 9110 9700 9705 9710 9750 F UNCTION : E NTER L EVEL P RIZE MSG. (9750) FACTORY DEFAULT: NONE ACCESS INSTRUCTIONS: 1.) Select TERMINAL CONFIGURATION from the M A NAGEMENT FUNCTIONS menu. 2.) Select RANDOM/LEVEL PRIZE COUPONS from the TERMINAL CONFIGURATION menu. + %9 3.) Select PRINTED COUPONS. & 4.) Select ENTER LEVEL PRIZE 500%2 .O 3HIFT MSG. & ,EFT 1 ! $ ' * - 0 4 7 DESCRIPTION: & #ENTER : " % ( + .
MODEL 91XX/97XX CONFIGURATION MANUAL THIS COMMAND IS USED IN THE: 9100 9110 9700 9705 9710 9750 FUNCTION: ENTER RANDOM PRIZE MSG. (9750) FACTORY DEFAULT: NONE ACCESS INSTRUCTIONS: 1.) Select TERMINAL CONFIGURATION from the MANAGEMENT FUNCTIONS menu. 2.) Select RANDOM/LEVEL PRIZE COUPONS from the TERMINAL CONFIGURATION menu. 3.) Select PRINTED COUPONS. +%9 4.) Select ENTER RANDOM & 500%2 PRIZE MSG. .
MANAGEMENT FUNCTIONS THIS COMMAND IS USED IN THE: 9100 9110 9700 9705 9710 9750 FUNCTION: ENABLE/DISABLE COUPON AWARDS (9750) DISABLED FACTORY DEFAULT: DISABLED ACCESS INSTRUCTIONS: 1.) Select TERMINAL CONFIGURATION from the MANAGEMENT FUNCTIONS menu. 2.) Select RANDOM/LEVEL PRIZE COUPONS from the TERMINAL CONFIGURATION menu. 3.) Select PRINTED COUPONS. 4.) Select the ENABLE/DISABLE COUPON AWARDS option. 5.) Select ENABLE OR DISABLE from the menu displayed.
MODEL 91XX/97XX CONFIGURATION MANUAL THIS COMMAND IS USED IN THE: 9100 9110 9700 9705 9710 9750 F UNCTION : S ET L EVEL P RIZE AMOUNT (9750) FACTORY DEFAULT: ‘$0.00’ ACCESS INSTRUCTIONS: 1.) Select TERMINAL CONFIGURATION from the MANAGEMENT FUNCTIONS menu. 2.) Select RANDOM/LEVEL PRIZE COUPONS from the TERMINAL CONFIGURATION menu. 3.) Select PRINTED COUPONS. 4.) Select the SET LEVEL PRIZE AMOUNT option.
MANAGEMENT FUNCTIONS THIS COMMAND IS USED IN THE: 9100 9110 9700 9705 9710 9750 FUNCTION: SET RANDOM WINNING % (9750) FACTORY DEFAULT: ‘0%’ ACCESS INSTRUCTIONS: 1.) Select TERMINAL CONFIGURATION from the MANAGEMENT FUNCTIONS menu. 2.) Select RANDOM/LEVEL PRIZE COUPONS from the TERMINAL CONFIGURATION menu. 3.) Select PRINTED COUPONS. 4.) Select the SET RANDOM WINNING % option. DESCRIPTION: This function sets the frequency at which the random prize coupons will be printed.
MODEL 91XX/97XX CONFIGURATION MANUAL THIS COMMAND IS USED IN THE: 9100 9110 9700 9705 9710 9750 F UNCTION : D ISPENSE C OUPONS (9750) FACTORY DEFAULT: N/A ACCESS INSTRUCTIONS: 1.) Select TERMINAL CONFIGURATION from the MANAGEMENT FUNCTIONS menu. 2.) Select RANDOM/LEVEL PRIZE COUPONS from the TERMINAL CONFIGURATION menu. 3.) Select DISPENSED COUPONS. DESCRIPTION: This function provides access to the following options, which will set up terminal operations for issuing dispensed prize coupons: 1.) 2.) 3.
MANAGEMENT FUNCTIONS THIS COMMAND IS USED IN THE: 9100 9110 9700 9705 9710 9750 FUNCTION: SELECT LEVEL COUPON CASS. (9750) FACTORY DEFAULT: N/A LEVEL ACCESS INSTRUCTIONS: 1.) Select TERMINAL CONFIGURATION from the MANAGEMENT FUNCTIONS menu. 2.) Select RANDOM/LEVEL PRIZE COUPONS from the TERMINAL CONFIGURATION menu. 3.) Select DISPENSED COUPONS. 4.) Choose SELECT LEVEL COUPON CASS.
MODEL 91XX/97XX CONFIGURATION MANUAL THIS COMMAND IS USED IN THE: 9100 9110 9700 9705 9710 9750 FUNCTION: SELECT RANDOM COUPON CASS. (9750) FACTORY DEFAULT: N/A RANDOM ACCESS INSTRUCTIONS: 1.) Select TERMINAL CONFIGURATION from the MANAGEMENT FUNCTIONS menu. 2.) Select RANDOM/LEVEL PRIZE COUPONS from the TERMINAL CONFIGURATION menu. 3.) Select DISPENSED COUPONS. 4.) Choose SELECT RANDOM COUPON CASS.
MANAGEMENT FUNCTIONS THIS COMMAND IS USED IN THE: 9100 9110 9700 9705 9710 9750 FUNCTION: ENALBE/DISABLE COUPON AWARD (9750) FACTORY DEFAULT: DISABLED ACCESS INSTRUCTIONS: 1.) Select TERMINAL CONFIGURATION from the MANAGEMENT FUNCTIONS menu. 2.) Select RANDOM/LEVEL PRIZE COUPONS from the TERMINAL CONFIGURATION menu. 3.) Select DISPENSED COUPONS. 3.) Select the ENABLE/DISABLE COUPON AWARDS option.
MODEL 91XX/97XX CONFIGURATION MANUAL THIS COMMAND IS USED IN THE: 9100 9110 9700 9705 9710 9750 F UNCTION : S ET L EVEL P RIZE AMOUNT (9750) FACTORY DEFAULT: ‘$0.00’ ACCESS INSTRUCTIONS: 1.) Select TERMINAL CONFIGURATION from the MANAGEMENT FUNCTIONS menu. 2.) Select RANDOM/LEVEL PRIZE COUPONS from the TERMINAL CONFIGURATION menu. 3.) Select DISPENSED COUPONS. 4.) Select the SET LEVEL PRIZE AMOUNT option.
MANAGEMENT FUNCTIONS THIS COMMAND IS USED IN THE: 9100 9110 9700 9705 9710 9750 FUNCTION: SET RANDOM WINNING % (9750) FACTORY DEFAULT: ‘0%’ ACCESS INSTRUCTIONS: 1.) Select TERMINAL CONFIGURATION from the MANAGEMENT FUNCTIONS menu. 2.) Select RANDOM/LEVEL PRIZE COUPONS from the TERMINAL CONFIGURATION menu. 3.) Select DISPENSED COUPONS. 3.) Select the SET RANDOM WINNING % option. DESCRIPTION: This function sets the frequency at which the random prize coupons will be dispensed.
MODEL 91XX/97XX CONFIGURATION MANUAL THIS COMMAND IS USED IN THE: 9100 9110 9700 9705 9710 9750 FUNCTION: CHANGE MESSAGE FACTORY DEFAULT: N/A ACCESS INSTRUCTIONS: 1.) Select TERMINAL CONFIGURATION from the MANAGEMENT FUNCTIONS menu. 2.) Select CHANGE MESSAGES. DESCRIPTION: The CHANGE MESSAGES option of the TERMINAL CONFIGURATION menu allows information for the following screens to be changed by the terminal operator or a service technician: 1.) 2.) 3.) 4.) 5.) 6.) 7.
MANAGEMENT FUNCTIONS THIS COMMAND IS USED IN THE: 9100 9110 9700 9705 9710 9750 F UNCTION : C HANGE M ESSAGES (UK) FACTORY DEFAULT: N/A ACCESS INSTRUCTIONS: 1.) Select TERMINAL CONFIGURATION from the MANAGEMENT FUNCTIONS menu. 2.) Select CHANGE MESSAGES. DESCRIPTION: The CHANGE MESSAGES option of the TERMINAL CONFIGURATION menu allows information for the following screens to be changed by the terminal operator or a service technician: 1.) 2.) 3.) 4.) 5.) 6.
MODEL 91XX/97XX CONFIGURATION MANUAL THIS COMMAND IS USED IN THE: 9100 9110 9700 9705 9710 9750 FUNCTION: MARKETING MESSAGE FACTORY DEFAULT: NONE ACCESS INSTRUCTIONS: 1.) Select TERMINAL CONFIGURATION from the MANAGEMENT FUNCTIONS menu. 2.) Select CHANGE MESSAGES. 3.) Select MARKETING MESSAGE. + %9 DESCRIPTION: The MARKETING MESSAGE function allows you to compose a message that will appear on any printed products that include the store message (e.g. customer receipts, day closes, coupons, etc.).
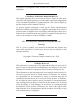
MANAGEMENT FUNCTIONS THIS COMMAND IS USED IN THE: 9100 9110 9700 9705 9710 9750 FUNCTION: SURCHARGE MESSAGE FACTORY DEFAULT: ‘STANDARD’ ACCESS INSTRUCTIONS: 1.) Select TERMINAL CONFIGURATION from the MANAGEMENT FUNCTIONS menu. 2.) Select CHANGE MESSAGES. 3.) Select SURCHARGE MESSAGES DESCRIPTION: This function is used to select the surcharge message that will be displayed to the customer. Press the button next to the desired message to select it.
MODEL 91XX/97XX CONFIGURATION MANUAL Custom C Custom F Custom D Custom G Custom E Custom H 108
MANAGEMENT FUNCTIONS THIS COMMAND IS USED IN THE: 9100 9110 9700 9705 9710 9750 FUNCTION: WELCOME MESSAGE FACTORY DEFAULT: ‘WELCOME TO MINIATM’ ACCESS INSTRUCTIONS: 1.) Select TERMINAL CONFIGURATION from the MANAGEMENT FUNCTIONS menu. 2.) Select CHANGE MESSAGES. 3.) Select Welcome Message. DESCRIPTION: + %9 The Welcome Message consists of three lines of text that are printed at the top of the customer welcome screen. The text can be full alphanumeric text.
MODEL 91XX/97XX CONFIGURATION MANUAL THIS COMMAND IS USED IN THE: 9100 9110 9700 9705 9710 9750 FUNCTION: SURCHARGE OWNER FACTORY DEFAULT: NONE ACCESS INSTRUCTIONS: 1.) Select TERMINAL CONFIGURATION from the MANAGEMENT FUNCTIONS menu. 2.) Select CHANGE MESSAGES. 3.) Select SURCHARGE OWNER. DESCRIPTION: The name of the SURCHARGE OWNER is stored in the terminal and printed on the Receipt Printer Test Report. The name of the SURCHARGE OWNER is entered directly into the terminal.
MANAGEMENT FUNCTIONS THIS COMMAND IS USED IN THE: 9100 9110 9700 9705 9710 9750 FUNCTION: EXIT MESSAGE FACTORY DEFAULT: ‘THANK’S FOR USING MINIATM’ ACCESS INSTRUCTIONS: 1.) Select TERMINAL CONFIGURATION from the MANAGEMENT FUNCTIONS menu. 2.) Select CHANGE SAGES. MES- 3.) Select EXIT MESSAGE. DESCRIPTION: + %9 The Exit Message consists of three lines of text that are printed on the terminal display at the conclusion of a transaction. The text can be full alphanumeric text.
MODEL 91XX/97XX CONFIGURATION MANUAL THIS COMMAND IS USED IN THE: 9100 9110 9700 9705 9710 9750 FUNCTION: STORE MESSAGE FACTORY DEFAULT: *THIS IS LINE (1-4) OF THE STORE MESSAGE* *THIS IS LINE (1-4) OF THE STORE MESSAGE* *THIS IS LINE (1-4) OF THE STORE MESSAGE* *THIS IS LINE (1-4) OF THE STORE MESSAGE* ACCESS INSTRUCTIONS: 1.) Select TERMINAL CONFIGURATION from the MANAGEMENT FUNCTIONS menu. 2.) Select CHANGE MESSAGES. 3.) Select STORE MESSAGE.
MANAGEMENT FUNCTIONS THIS COMMAND IS USED IN THE: 9100 9110 9700 9705 9710 9750 FUNCTION: TERMINAL OWNER FACTORY DEFAULT: NONE ACCESS INSTRUCTIONS: 1.) Select TERMINAL CONFIGURATION from the MANAGEMENT FUNCTIONS menu. 2.) Select CHANGE MESSAGES. 3.) Select TERMINAL OWNER. DESCRIPTION: The name of the TERMINAL OWNER is stored in the terminal and displayed to the customer in the surcharge warning message. The name is entered directly into the terminal.
MODEL 91XX/97XX CONFIGURATION MANUAL THIS COMMAND IS USED IN THE: 9100 9110 9700 9705 9710 9750 FUNCTION: TERMINAL PARAMETERS FACTORY DEFAULT: N/A ACCESS INSTRUCTIONS: 1.) Select TERMINAL CONFIGURATION from the MANAGEMENT FUNCTIONS menu. 2.) Select SET TERMINAL PARAMETERS. DESCRIPTION: Selecting SET TERMINAL PARAMETERS from the TERMINAL CONFIGURATION menu allows the following Cash Dispenser operating parameters to be viewed or changed: 1.) 2.) 3.) 4.) 5.) 6.) 7.
MANAGEMENT FUNCTIONS THIS COMMAND IS USED IN THE: 9100 9110 9700 9705 9710 9750 FUNCTION: SET TERMINAL # FACTORY DEFAULT: NONE ACCESS INSTRUCTIONS: 1.) Select TERMINAL CONFIGURATION from the MANAGEMENT FUNCTIONS menu. 2.) Select SET TERMINAL PARAMETERS. 3.) Choose the SET TERMINAL # option. DESCRIPTION: The TERMINAL # is a unique string of characters provided by your processor to identify the Cash Dispenser when a transaction is taking place. It can contain numbers and letters.
MODEL 91XX/97XX CONFIGURATION MANUAL THIS COMMAND IS USED IN THE: 9100 9110 9700 9705 9710 9750 FUNCTION: RESET SEQ # FACTORY DEFAULT: N/A ACCESS INSTRUCTIONS: 1.) Select TERMINAL CONFIGURATION from the MANAGEMENT FUNCTIONS menu. 2.) Select SET TERMINAL PARAMETERS. 3.) Choose the RESET SEQ # option. DESCRIPTION: *NOTE* This feature is not supported by all processors. Select the RESET SEQ.
MANAGEMENT FUNCTIONS THIS COMMAND IS USED IN THE: 9100 9110 9700 9705 9710 9750 FUNCTION: SURCHARGE MODE FACTORY DEFAULT: N/A ACCESS INSTRUCTIONS: 1.) Select TERMINAL CONFIGURATION from the MANAGEMENT FUNCTIONS menu. 2.) Select SET TERMINAL PARAMETERS. 3.) Choose the SURCHARGE MODE option. DESCRIPTION: Selecting the SURCHARGE MODE option from the SET TERMINAL PARAMETERS menu allows the terminal operator or service technician to change the following surcharge options: 1.) 2.) 3.) 4.) 5.
MODEL 91XX/97XX CONFIGURATION MANUAL THIS COMMAND IS USED IN THE: 9100 9110 9700 9705 9710 9750 FUNCTION: SURCHARGE PERCENT FACTORY DEFAULT: N/A ACCESS INSTRUCTIONS: 1.) Select TERMINAL CONFIGURATION from the MANAGEMENT FUNCTIONS menu. 2.) Select SET TERMINAL PARAMETERS. 3.) Choose the SURCHARGE MODE option. 4.) Select SURCHARGE PERCENT.
MANAGEMENT FUNCTIONS THIS COMMAND IS USED IN THE: 9100 9110 9700 9705 9710 9750 FUNCTION: ENABLE/DISABLE SURCHARGE FACTORY DEFAULT: DISABLED ACCESS INSTRUCTIONS: 1.) Select TERMINAL CONFIGURATION from the MANAGEMENT FUNCTIONS menu. 2.) Select SET TERMINAL PARAMETERS. 3.) Choose the SURCHARGE MODE option. 4.) Select ENABLE or DISABLE, as appropriate. DESCRIPTION: Some networks allow a surcharge, or terminal fee, to be imposed on withdrawal transactions.
MODEL 91XX/97XX CONFIGURATION MANUAL THIS COMMAND IS USED IN THE: 9100 9110 9700 9705 9710 9750 FUNCTION: SURCHARGE LOCATION FACTORY DEFAULT: BEGINNING ACCESS INSTRUCTIONS: BEGINNING 1.) Select TERMINAL CONFIGURATION from the MANAGEMENT FUNCTIONS menu. 2.) Select SET TERMINAL PARAMETERS. 3.) Choose the SURCHARGE MODE option. 4.) Choose the SURCHARGE LOCATION option. DESCRIPTION: The SURCHARGE LOCATION function determines where the terminal user is presented with the surcharge notification message.
MANAGEMENT FUNCTIONS THIS COMMAND IS USED IN THE: 9100 9110 9700 9705 9710 9750 FUNCTION: BLOCK ISO’S FACTORY DEFAULT: NONE ACCESS INSTRUCTIONS: 1.) Select TERMINAL CONFIGURATION from the MANAGEMENT FUNCTIONS menu. 2.) Select SET TERMINAL PARAMETERS. 3.) Choose the SURCHARGE MODE option. 4.) Choose the BLOCK ISO’S option.
MODEL 91XX/97XX CONFIGURATION MANUAL enabling this feature, check to make sure your particular processor supports it. Otherwise, your terminal could be in violation of network rules and be sanctioned. To enter or change an ISO go to the SELECT ISO TO CHANGE screen and perform the following: 1.) Press the Screen Key next to the block where the new ISO will be entered or an ISO changed. 2.) Enter the ISO number (up to six digits in length). 3.) Press the “” key.
MANAGEMENT FUNCTIONS THIS COMMAND IS USED IN THE: 9100 9110 9700 9705 9710 9750 FUNCTION: SRECHARGE AMOUNT FACTORY DEFAULT: ‘$0.00’ ACCESS INSTRUCTIONS: 1.) Select TERMINAL CONFIGURATION from the MANAGEMENT FUNCTIONS menu. 2.) Select SET TERMINAL PARAMETERS. 3.) Choose the SURCHARGE MODE option. 4.) Choose the SURCHARGE AMOUNT option. DESCRIPTION: The surcharge amount will be entered directly on the SURCHARGE MODE screen.
MODEL 91XX/97XX CONFIGURATION MANUAL THIS COMMAND IS USED IN THE: 9100 9110 9700 9705 9710 9750 FUNCTION: SURCHARGE MODE (UK) FACTORY DEFAULT: N/A ACCESS INSTRUCTIONS: 1.) Select TERMINAL CONFIGURATION from the MANAGEMENT FUNCTIONS menu. 2.) Select SET TERMINAL PARAMETERS. 3.) Choose the SURCHARGE MODE option. DESCRIPTION: Selecting the SURCHARGE MODE option from the SET TERMINAL PARAMETERS menu allows the terminal operator or service technician to change the following surcharge options: 1.) 2.) 3.
MANAGEMENT FUNCTIONS THIS COMMAND IS USED IN THE: 9100 9110 9700 9705 9710 9750 FUNCTION: SURCHARGE ON/OFF (UK) FACTORY DEFAULT: OFF ACCESS INSTRUCTIONS: 1.) Select TERMINAL CONFIGURATION from the MANAGEMENT FUNCTIONS menu. 2.) Select SET TERMINAL PARAMETERS. 3.) Choose the SURCHARGE MODE option. 4.) Toggle SURCHARGE to appropriate setting (ON or OFF) as determined by setup instructions.
MODEL 91XX/97XX CONFIGURATION MANUAL THIS COMMAND IS USED IN THE: 9100 9110 9700 9705 9710 9750 FUNCTION: BINGO ON/OFF (UK) FACTORY DEFAULT: OFF ACCESS INSTRUCTIONS: 1.) Select TERMINAL CONFIGURATION from the MANAGEMENT FUNCTIONS menu. 2.) Select SET TERMINAL PARAMETERS. 3.) Choose the SURCHARGE MODE option. 4.) Toggle BINGO to appropriate setting (ON or OFF) as determined by setup instructions. DESCRIPTION: TBD ERROR CONDITIONS: Be sure to ENABLE this mode if your network allows surcharges.
MANAGEMENT FUNCTIONS THIS COMMAND IS USED IN THE: 9100 9110 9700 9705 9710 9750 FUNCTION: METHOD LIS5/ STANDARD (UK) FACTORY DEFAULT: OFF ACCESS INSTRUCTIONS: 1.) Select TERMINAL CONFIGURATION from the MANAGEMENT FUNCTIONS menu. 2.) Select SET TERMINAL PARAMETERS. 3.) Choose the SURCHARGE MODE option. 4.) Toggle METHOD to appropriate setting (LIS5 or STANDARD) as determined by setup instructions. DESCRIPTION: TBD ERROR CONDITIONS: Be sure to ENABLE this mode if your network allows surcharges.
MODEL 91XX/97XX CONFIGURATION MANUAL THIS COMMAND IS USED IN THE: 9100 9110 9700 9705 9710 9750 FUNCTION: CASSETTE SETUP FACTORY DEFAULT: N/A ACCESS INSTRUCTIONS: 1.) Select TERMINAL CONFIGURATION from the MANAGEMENT FUNCTIONS menu. 2.) Select SET TERMINAL PARAMETERS. 3.) Select CASSETTE SETUP. DESCRIPTION: Selecting CASSETTE SETUP at the TERMINAL PARAMETERS menu allows the terminal operator to view and change the following parameters: 1.) 2.) 3.) 4.) 5.) 6.
MANAGEMENT FUNCTIONS THIS COMMAND IS USED IN THE: 9100 9110 9700 9705 9710 9750 FUNCTION: LOW CURRENCY (9700) FACTORY DEFAULT: ENABLED ACCESS INSTRUCTIONS: 1.) Select TERMINAL CONFIGURATION from the MANAGEMENT FUNCTIONS menu. 2.) Select SET TERMINAL PARAMETERS. 3.) Select CASSETTE SETUP. 4.) Choose the LOW CURRENCY option. DESCRIPTION: This function is used to enable or disable low currency checking on the dispenser mechanism.
MODEL 91XX/97XX CONFIGURATION MANUAL THIS COMMAND IS USED IN THE: 9100 9110 9700 9705 9710 9750 FUNCTION: INTERNATIONAL CURRENCY FACTORY DEFAULT: COUNTRYSPECIFIC ACCESS INSTRUCTIONS: 1.) Select TERMINAL CONFIGURATION from the MANAGEMENT FUNCTIONS menu. 2.) Select SET TERMINAL PARAMETERS. 3.) Select CASSETTE SETUP. 4.) Choose the INTERNATIONAL CURRENCY option. DESCRIPTION: This feature will allow operator personnel to select one of nine possible monetary symbols (C, ¢, $, ƒ, L, Pt.
MANAGEMENT FUNCTIONS THIS COMMAND IS USED IN THE: 9100 9110 9700 9705 9710 9750 FUNCTION: MAXIMUM AMOUNT FACTORY DEFAULT: ‘$500.00’ ACCESS INSTRUCTIONS: 1.) Select TERMINAL CONFIGURATION from the MANAGEMENT FUNCTIONS menu. 2.) Select SET TERMINAL PARAMETERS. 3.) Select CASSETTE SETUP. 4.) Choose the MAXIMUM AMOUNT option. DESCRIPTION: The maximum cash withdrawal limit must be set in the Cash Dispenser before any transactions can be completed.
MODEL 91XX/97XX CONFIGURATION MANUAL THIS COMMAND IS USED IN THE: 9100 9110 9700 9705 9710 9750 FUNCTION: MULTIPLE AMOUNT FACTORY DEFAULT: ‘$0.00’ ACCESS INSTRUCTIONS: 1.) Select TERMINAL CONFIGURATION from the MANAGEMENT FUNCTIONS menu. 2.) Select SET TERMINAL PARAMETERS. 3.) Select CASSETTE SETUP. 4.) Choose the MULTIPLE AMOUNT option. DESCRIPTION: The MULTIPLE AMOUNT must be set in the Cash Dispenser before any transactions can be processed.
MANAGEMENT FUNCTIONS THIS COMMAND IS USED IN THE: 9100 9110 9700 9705 9710 9750 FUNCTION: EXTENDED AMOUNT FACTORY DEFAULT: DISABLED ACCESS INSTRUCTIONS: 1.) Select TERMINAL CONFIGURATION from the MANAGEMENT FUNCTIONS menu. 2.) Select SET TERMINAL PARAMETERS. 3.) Select CASSETTE SETUP. 4.) Choose the EXTENDED AMOUNT option. DESCRIPTION: The standard length of a currency amount entry field is 8 digits.
MODEL 91XX/97XX CONFIGURATION MANUAL THIS COMMAND IS USED IN THE: 9100 9110 9700 9705 9710 9750 FUNCTION: FAST CASH AMOUNTS FACTORY DEFAULT: PROCESSORSPECIFIC ACCESS INSTRUCTIONS: 1.) Select TERMINAL CONFIGURATION from the MANAGEMENT FUNCTIONS menu. 2.) Select SET TERMINAL PARAMETERS. 3.) Select CASSETTE SETUP. 4.) Choose the FAST CASH AMOUNT option.
MANAGEMENT FUNCTIONS THIS COMMAND IS USED IN THE: 9100 9110 9700 9705 9710 9750 FUNCTION: CASSETTE SETUP (9750) FACTORY DEFAULT: N/A ACCESS INSTRUCTIONS: 1.) Select TERMINAL CONFIGURATION from the MANAGEMENT FUNCTIONS menu. 2.) Select SET TERMINAL PARAMETERS. 3.) Select CASSETTE SETUP. DESCRIPTION: Selecting CASSETTE SETUP at the TERMINAL PARAMETERS menu allows the terminal operator to view and change the following parameters: 1.) 2.) 3.) 4.) 5.) 6.) 7.
MODEL 91XX/97XX CONFIGURATION MANUAL THIS COMMAND IS USED IN THE: 9100 9110 9700 9705 9710 9750 FUNCTION: RELEARN BILL THICKNESS (9750) FACTORY DEFAULT: N/A ACCESS INSTRUCTIONS: 1.) Select TERMINAL CONFIGURATION from the MANAGEMENT FUNCTIONS menu. 2.) Select SET TERMINAL PARAMETERS. 3.) Select CASSETTE SETUP. 4.) Choose the RELEARN BILL THICKNESS option.
MANAGEMENT FUNCTIONS THIS COMMAND IS USED IN THE: 9100 F UNCTION : (9750) 9110 9700 9705 9710 9750 M AX . N ON -C ASH FACTORY DEFAULT: $500.00 Access Instructions: 1.) Select TERMINAL CONFIGURATION from the MANAGEMENT FUNCTIONS menu. 2.) Select SET TERMINAL PARAMETERS. 3.) Select CASSETTE SETUP. 4.) Choose MAX. NON-CASH. DESCRIPTION: The maximum non-cash purchase limit must be set in the Cash Dispenser before any purchases of non-cash items can be completed.
MODEL 91XX/97XX CONFIGURATION MANUAL THIS COMMAND IS USED IN THE: 9100 9110 9700 9705 9710 9750 FUNCTION: CASSETTE ( 9750) FACTORY DEFAULT: N/A ACCESS INSTRUCTIONS: 1.) Select TERMINAL CONFIGURATION from the MANAGEMENT FUNCTIONS menu. 2.) Select SET TERMINAL PARAMETERS. 3.) Select CASSETTE SETUP. 4.) Select CASSETTE PARAMETERS. DESCRIPTION: The CASSETTE PARAMETERS option is used to perform cassette-specific configuration and setup operations.
MANAGEMENT FUNCTIONS THIS COMMAND IS USED IN THE: 9100 9110 9700 9705 9710 9750 FUNCTION: SET BILL DIMENSIONS (9750) FACTORY DEFAULT: COUNTRYSPECIFIC ACCESS INSTRUCTIONS: 1.) Select TERMINAL CONFIGURATION from the MANAGEMENT FUNCTIONS menu. 2.) Select SET TERMINAL PARAMETERS. 3.) Select CASSETTE SETUP. 4.) Choose the CASSETTE PARAMETERS option. 5.) Select a cassette (A, B, C, or D). 6.) Choose SET BILL DIMENSION.
MODEL 91XX/97XX CONFIGURATION MANUAL THIS COMMAND IS USED IN THE: 9100 9110 9700 9705 9710 9750 FUNCTION: VALUE (9750) FACTORY DEFAULT: ‘$0.00’ ACCESS INSTRUCTIONS: 1.) Select TERMINAL CONFIGURATION from the MANAGEMENT FUNCTIONS menu. ENTER NEW AMOUNT THEN PRESS “ENTER” 2.) Select SET TERMINAL PARAMETERS. 3.) Select CASSETTE SETUP. 4.) Choose the CASSETTE PARAMETERS option. 5.) Choose a cassette (A, B, C, or D). 6.) Select the VALUE option.
MANAGEMENT FUNCTIONS THIS COMMAND IS USED IN THE: 9100 9110 9700 9705 9710 9750 FUNCTION: TYPE (9750) FACTORY DEFAULT: CASH ACCESS INSTRUCTIONS: 1.) Select TERMINAL CONFIGURATION from the MANAGEMENT FUNCTIONS menu. 2.) Select SET TERMINAL PARAMETERS. 3.) Select CASSETTE SETUP. 4.) Choose the CASSETTE PARAMETERS option. 5.) Choose a cassette (A, B, C, or D). 6.) Select the TYPE option. DESCRIPTION: This function allows the user to set what type of item is currently installed within the cassette.
MODEL 91XX/97XX CONFIGURATION MANUAL THIS COMMAND IS USED IN THE: 9100 9110 9700 9705 9710 9750 FUNCTION: SERVICE (9750) FACTORY DEFAULT: IN SERVICE ACCESS INSTRUCTIONS: 1.) Select TERMINAL CONFIGURATION from the MANAGEMENT FUNCTIONS menu. 2.) Select SET TERMINAL PARAMETERS. 3.) Select CASSETTE SETUP. 4.) Choose the CASSETTE PARAMETERS option. 5.) Choose a cassette (A, B, C, or D). 6.) Select the SERVICE option.
MANAGEMENT FUNCTIONS THIS COMMAND IS USED IN THE: 9100 9110 9700 9705 9710 9750 FUNCTION: CURRENCY DATA (9750) FACTORY DEFAULT: COUNTRYSPECIFIC ACCESS INSTRUCTIONS: 1.) Select TERMINAL CONFIGURATION from the MANAGEMENT FUNCTIONS menu. 2.) Select SET TERMINAL PARAMETERS. 3.) Select CASSETTE SETUP. 4.) Choose the CASSETTE PARAMETERS option. 5.) Choose a cassette (A, B, C, or D). 6.) Select the CURRENCY DATA option.
MODEL 91XX/97XX CONFIGURATION MANUAL of the screen as a string of seven characters. When the CHANGE button is pressed, an input field appears, allowing you to enter new data. To enter a digit 0-9, simply press the key that has that digit. To enter a letter, first press the key, then press the key that has the letter you want on it. The first press of the key will display the first character above the number. Subsequent presses will display the characters in sequence.
MANAGEMENT FUNCTIONS THIS COMMAND IS USED IN THE: 9100 F UNCTION : (9750) 9110 9700 9705 9710 9750 S ELECT C ASSETTE FACTORY DEFAULT: N/A ACCESS INSTRUCTIONS: 1.) Select TERMINAL CONFIGURATION from the MANAGEMENT FUNCTIONS menu. 2.) Select SET TERMINAL PARAMETERS. 3.) Select CASSETTE SETUP. 4.) Choose the CASSETTE PARAMETERS option. 5.) Select the CASSETTE option. DESCRIPTION: This option provides a convenient way to switch between cassettes when performing cassette-specific operations.
MODEL 91XX/97XX CONFIGURATION MANUAL THIS COMMAND IS USED IN THE: 9100 9110 9700 9705 9710 9750 FUNCTION: DESCRIPTION (9750) FACTORY DEFAULT: N/A ACCESS INSTRUCTIONS: 1.) Select TERMINAL CONFIGURATION from the MANAGEMENT FUNCTIONS menu. 2.) Select SET TERMINAL PARAMETERS. 3.) Select CASSETTE SETUP. 4.) Choose the CASSETTE PARAMETERS option. 5.) Choose a cassette (A, B, C, or D). 6.) Select the DESCRIPTION option.
MANAGEMENT FUNCTIONS THIS COMMAND IS USED IN THE: 9100 9110 9700 9705 9710 9750 FUNCTION: PRIMARY DESCRIPTION (9750) FACTORY DEFAULT: NONE ACCESS INSTRUCTIONS: 1.) Select TERMINAL CONFIGURATION from the MANAGEMENT FUNCTIONS menu. 2.) Select SET TERMINAL PARAMETERS. 3.) Select CASSETTE SETUP. 4.) Choose the CASSETTE PARAMETERS option. 5.) Choose a cassette (A, B, C, or D). 6.) Select the DESCRIPTION option. 7.) Choose the PRIMARY DESCRIPTION option.
MODEL 91XX/97XX CONFIGURATION MANUAL THIS COMMAND IS USED IN THE: 9100 9110 9700 9705 9710 9750 FUNCTION: SECONDARY DESCRIPTION (9750) FACTORY DEFAULT: ‘NONE ACCESS INSTRUCTIONS: 1.) Select TERMINAL CONFIGURATION from the MANAGEMENT FUNCTIONS menu. 2.) Select SET TERMINAL PARAMETERS. 3.) Select CASSETTE SETUP. 4.) Choose the CASSETTE PARAMETERS option. 5.) Choose a cassette (A, B, C, or D). 6.) Select the DESCRIPTION option. 7.) Choose the SECONDARY DESCRIPTION option.
MANAGEMENT FUNCTIONS THIS COMMAND IS USED IN THE: 9100 9110 9700 9705 9710 9750 FUNCTION: KEY MANAGEMENT FACTORY DEFAULT: N/A ACCESS INSTRUCTIONS: 1. Select TERMINAL CONFIGURATION from the MANAGEMENT FUNCTIONS menu. 2. Select SET TERMINAL PARAMETERS. 3. Choose the KEY MANAGEMENT option. DESCRIPTION: *NOTE* The MAC MASTER KEY must be entered before the MAC Working key. Likewise, the PIN MASTER KEY must be entered before the PIN Working key.
MODEL 91XX/97XX CONFIGURATION MANUAL THIS COMMAND IS USED IN THE: 9100 9110 9700 9705 9710 9750 FUNCTION: ENTER MAC MASTER KEY FACTORY DEFAULT: PROCESSORSPECIFIC ACCESS INSTRUCTIONS: 1. Select TERMINAL CONFIGURATION from the MANAGEMENT FUNCTIONS menu. 2. Select SET TERMINAL PARAMETERS. 3. Select KEY MANAGEMENT. 4. Choose the ENTER MAC MASTER KEY option. 5. Select YES at the warning screen.
MANAGEMENT FUNCTIONS When entering the key, an asterisk (‘*’) is displayed in place of each character. Since you cannot view the key while it is entered, you must enter the key twice to make sure it was entered properly. Follow these steps to enter the MAC MASTER KEY: 1. If you have not already done so, select the ENTER MAC MASTER KEY option at the KEY MANAGEMENT main menu. At the warning message, select YES to continue. 2. Select the LEFT KEY BLOCK option to display the applicable data entry screen.
MODEL 91XX/97XX CONFIGURATION MANUAL 5. If the second entry of the KEY does not match the first entry, a warning message will appear and you will be returned to the KEY MANAGEMENT main menu. Select the ENTER MAC MASTER KEY option again and start over at Step 1. 6. If the second entry of the KEY matches the first entry, you will be prompted to enter ‘ANOTHER KEY PART’. In most instances you will answer NO to this prompt and continue with Step 7.
MANAGEMENT FUNCTIONS THIS COMMAND IS USED IN THE: 9100 9110 9700 9705 9710 9750 F UNCTION : E NTER PIN M ASTER KEY FACTORY DEFAULT: PROCESSORSPECIFIC ACCESS INSTRUCTIONS: 1. Select TERMINAL CONFIGURATION from the MANAGEMENT FUNCTIONS menu. 2. Select SET TERMINAL PARAMETERS. 3. Select KEY MANAGEMENT. 4. Choose the ENTER PIN MASTER KEY option. 5. Select YES at the warning screen.
MODEL 91XX/97XX CONFIGURATION MANUAL entry screen. 3. Enter the applicable 16-character KEY. To enter a digit 0-9, simply press the key that has the desired digit. To enter a Hex character (A through F), first press and hold down the key ( key on some model ATMs). While holding down the key, press the numbered key (1-6) that corresponds to the character you want to enter (1=A, 2=B, 3=C, 4=D, 5=E, 6=F). Release the key. Repeat for each character in the KEY.
MANAGEMENT FUNCTIONS entry field. Enter the additional KEY part, using the instructions in Step 3 and Step 4. When all KEY parts have been entered, continue with Step 7. 7. After entering the KEY a second time, a screen will display a series of CHECK DIGITS. Compare the CHECK DIGITS to the reference set provided by the processor. 8. If the CHECK DIGITS match, press any key to return to the KEY BLOCK selection screen. Repeat Steps 1 through 5 for the RIGHT KEY BLOCK. 9.
MODEL 91XX/97XX CONFIGURATION MANUAL THIS COMMAND IS USED IN THE: 9100 9110 9700 9705 9710 9750 FUNCTION: INJECT MASTER KEYS FACTORY DEFAULT: N/A ACCESS INSTRUCTIONS: 1. Select TERMINAL CONFIGURATION from the MANAGEMENT FUNCTIONS menu. 2. Select SET TERMINAL PARAMETERS. 3. Select KEY MANAGEMENT. 4. Choose the INJECT MASTER KEYS option.
MANAGEMENT FUNCTIONS • Follow the prompts that appear. Accept the default choices for the options that are presented. 2. After the setup program has completed the installation, start the Key Inject program by selecting Start / Programs / Key Inject for Windows / Key Inject option. 3. Connect the 9-pin adapter end of the data cable to the serial port on the PC. Take note of the serial port you are using (COM1, COM2, etc. ) for use in configuring the Key Inject program.
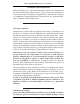
MODEL 91XX/97XX CONFIGURATION MANUAL browse for the key file, select the Load Keys option from the File menu, as shown here: 158
MANAGEMENT FUNCTIONS 8. The Select File to Load Keys dialog appears 9. Navigate to the location of the key file, highlight the file by clicking on it, then click the Open button to open the file and return to the main window. 10. If you have not already done so, select the INJECT MASTER KEYS option at the KEY MANAGEMENT main menu. At the warning message, select YES to continue. 11. The terminal will wait for key injection to begin.
MODEL 91XX/97XX CONFIGURATION MANUAL option at the KEY MANAGEMENT main menu. At the warning message, select YES to continue. 14. The terminal will wait for key injection to begin. At the PC, initiate the key inject operation for the second half of the selected Master Key by clicking the OK button on the Hit OK to Enter Next Key Part dialog: 15. The key inject operation will continue. At the conclusion of the operation a confirmation screen will appear on the terminal, displaying a series of CHECK DIGITS.
MANAGEMENT FUNCTIONS THIS COMMAND IS USED IN THE: 9100 9110 9700 9705 9710 9750 FUNCTION: ENTER MAC WORKING KEY FACTORY DEFAULT: PROCESSORSPECIFIC ACCESS INSTRUCTIONS: 1. Select TERMINAL CONFIGURATION from the MANAGEMENT FUNCTIONS menu. 2. Select SET TERMINAL PARAMETERS. 3. Select KEY MANAGEMENT. 4. Choose the ENTER MAC WORKING KEY option. 5. Select YES at the warning screen. DESCRIPTION: The MAC WORKING KEY is used to verify messages to and from the terminal.
MODEL 91XX/97XX CONFIGURATION MANUAL key (1-6) that corresponds to the character you want to enter (1=A, 2=B, 3=C, 4=D, 5=E, 6=F). Release the key. Repeat for each character in the KEY. If you make a mistake, press (or ) key to clear the entry and start over. Press (or ) to accept the entry. 3. A prompt will appear on the data entry screen, directing you to enter the KEY a second time. Enter the KEY again, using the instructions in Step 3. 4.
MANAGEMENT FUNCTIONS 6. After entering the KEY a second time, a screen will display a series of CHECK DIGITS. Compare the CHECK DIGITS to the reference set provided by the processor. 7. If the CHECK DIGITS match, press any key to return to the KEY MANAGEMENT main menu screen. 8. If the CHECK DIGITS do not match, press any key to return to the KEY MANAGEMENT main menu screen. Repeat Steps 1 through 6. If the CHECK DIGITS still do not match, contact your processor or service provider for assistance. 9.
MODEL 91XX/97XX CONFIGURATION MANUAL THIS COMMAND IS USED IN THE: 9100 9110 9700 9705 9710 9750 FUNCTION: DOWNLOAD WORKING KEYS FACTORY DEFAULT: PROCESSORSPECIFIC ACCESS INSTRUCTIONS: 1. Select TERMINAL CONFIGURATION from the MANAGEMENT FUNCTIONS menu. 2. Select SET TERMINAL PARAMETERS. 3. Select KEY MANAGEMENT. 4. Choose the DOWNLOAD WORKING KEYS option. DESCRIPTION: The WORKING KEYS are the MAC and PIN WORKING KEYS.
MANAGEMENT FUNCTIONS Keys. While the call is being placed the message ‘TRANSACTION PROCESSING, PLEASE WAIT’ will be displayed. If the call cannot be completed, a warning screen will be displayed. If the function continues to fail, contact your service organization for assistance. 3. Once the Working Keys have been downloaded, the message ‘CONFIGURATION TABLE DOWNLOADED’ will be displayed. Press to return to the KEY MANAGEMENT main menu. The procedure is complete.
MODEL 91XX/97XX CONFIGURATION MANUAL THIS COMMAND IS USED IN THE: 9100 9110 9700 9705 9710 9750 FUNCTION: TELEPHONE FACTORY DEFAULT: N/A ACCESS INSTRUCTIONS: 1.) Select TERMINAL CONFIGURATION from the MANAGEMENT FUNCTIONS menu. 2.) Select SET TERMINAL PARAMETERS. 3.) Select TELEPHONE. DESCRIPTION: The TELEPHONE function is used to set up parameters that control telephone communications between the Cash Dispenser and the Processor. The following parameters are accessed through this function. 1.
MANAGEMENT FUNCTIONS THIS COMMAND IS USED IN THE: 9100 9110 9700 9705 9710 9750 FUNCTION: PRIMARY NUMBER FACTORY DEFAULT: NONE ACCESS INSTRUCTIONS: 1.) Select TERMINAL CONFIGURATION from the MANAGEMENT FUNCTIONS menu. 2.) Select SET TERMINAL PARAMETERS. 3.) Select TELEPHONE. 4.) Select the PRIMARY NUMBER option. DESCRIPTION: The Cash Dispenser communicates to your host processor over a dial up phone line. The phone number of the processor must be entered before live transactions can be performed.
MODEL 91XX/97XX CONFIGURATION MANUAL THIS COMMAND IS USED IN THE: 9100 9110 9700 9705 9710 9750 FUNCTION: BACKUP NUMBER FACTORY DEFAULT: NONE ACCESS INSTRUCTIONS: 1.) Select TERMINAL CONFIGURATION from the MANAGEMENT FUNCTIONS menu. 2.) Select SET TERMINAL PARAMETERS. 3.) Select TELEPHONE. 4.) Select the BACKUP NUMBER option. DESCRIPTION: The Cash Dispenser communicates with your Processors’ host computer over a dial up phone line.
MANAGEMENT FUNCTIONS THIS COMMAND IS USED IN THE: 9100 9110 9700 9705 9710 9750 FUNCTION: DATAPAK ACCESS CODE (CANADA ONLY) *NOTE* This feature is only available in the Triton Standard Canadian version of ATM operating software. FACTORY DEFAULT: OFF ACCESS INSTRUCTIONS: 1.) Select TERMINAL CONFIGURATION from the MANAGEMENT FUNCTIONS menu. 2.) Select SET TERMINAL PARAMETERS. 3.) Select TELEPHONE. 4.) Select DATAPAK ACCESS CODE.
MODEL 91XX/97XX CONFIGURATION MANUAL THIS COMMAND IS USED IN THE: 9100 9110 9700 9705 9710 9750 Function: Cardway (UK) FACTORY DEFAULT: OFF ACCESS INSTRUCTIONS: 1.) Select TERMINAL CONFIGURATION from the MANAGEMENT FUNCTIONS menu. 2.) Select SET TERMINAL PARAMETERS. 3.) Select TELEPHONE. 4.) Select CARDWAY. DESCRIPTION: CARDWAY FEATURE SETUP USING MANAGEMENT FUNCTIONS STEP 1: Enter the Cardway Telephone Number The telehone number is supplied by your Processor, and is required for ATM communications.
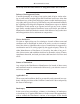
MANAGEMENT FUNCTIONS TERMINAL CONFIGURATION SET TERMINAL PARAMETERS TELEPHONE (HOST TELEPHONE NUMBERS) 171
MODEL 91XX/97XX CONFIGURATION MANUAL PRIMARY NUMBER d. Press CHANGE to blank the current number (if any) and enter the edit mode. e. Enter a carat (^) symbol. To enter a carat symbol, press the key, then press the <3> key FOUR times. Press the key to lock in the character and move to the next position. f. Enter the phone number. DO NOT enter dashes in the number! g. Press to accept the number. If necessary, press EXIT to return to the HOST TELEPHONE NUMBERS screen.
MANAGEMENT FUNCTIONS b. Check the caption in the CARDWAY FEATURE button. If necessary, press the button to turn the CARDWAY FEATURE ON, as shown here: STEP 3: Enter the Network User Address (NUA) 5555555555555555 The N.U.A. is supplied by the Processor, and is required for access to the Cardway communications network. a. Select the CHANGE CARDWAY N.U.A. option to blank the current entry (if any). b. Enter the N.U.A. number and press to accept it.
MODEL 91XX/97XX CONFIGURATION MANUAL a. From the HOST TELEPHONE NUMBERS screen, select the MODEM SETUP option.
MANAGEMENT FUNCTIONS b. At the MODEM CONFIGURATION screen select the MODEM SETUP STRING option. A data-entry screen appears, as in the +ES=2;+A8E=,,,0 following example: c. Select the POST HOST CALL STRING option. d. Enter the following string of characters EXACTLY as shown here: Follow these instructions to enter the alphabetic and special symbols present in the POST-HOST CALL STRING: To enter the PLUS (+) symbol, press the key, then press the <0> key SIX times.
MODEL 91XX/97XX CONFIGURATION MANUAL key. To enter the PLUS (+) symbol, press the key, then press the <0> key SIX times. Press the key. To enter the (A) symbol, press the key, then press the <2> key ONE time. Press the key. Press the <8> key. To enter the (E) symbol, press the key, then press the <3> key TWO times. +ES=2;+A8E=,,,0 To enter the EQUALS (=) symbol, press the key, then press the <0> key FIVE times.
MANAGEMENT FUNCTIONS mas Press the <0> key. e. After entering the POST-HOST CALL STRING, press to accept it. The string will appear on the screen, as shown in this example: STEP 5: Reset/Test Modem a. At the POST HOST CALL STRING screen, press the EXIT key to return to the MODEM CONFIGURATION screen. b. Select the RESET/TEST MODEM option. The following screen is displayed suring the reset/test operation: c.
MODEL 91XX/97XX CONFIGURATION MANUAL as needed to back out of the Management Functions screens and return to the Top-level menu. b. At the Top-level menu, select the CUSTOMER TRANSACTIONS option to return to the Customer Welcome Screen. c. Select the CUSTOMER TRANSACTIONS option to return to the Customer Welcome Screen. ERROR CONDITIONS: Failure to enter the Network User Address or Post- Host Setup String will result in failed customer transactions due to communication failure.
MANAGEMENT FUNCTIONS THIS COMMAND IS USED IN THE: 9100 9110 9700 9705 9710 9750 FUNCTION: PREDIAL ON/OFF FACTORY DEFAULT: OFF ACCESS INSTRUCTIONS: 1.) Select TERMINAL CONFIGURATION from the MANAGEMENT FUNCTIONS menu. 2.) Select SET TERMINAL PARAMETERS. 3.) Select TELEPHONE. US Screen DESCRIPTION: This function allows you to turn on or off the PREDIAL feature.
MODEL 91XX/97XX CONFIGURATION MANUAL THIS COMMAND IS USED IN THE: 9100 9110 9700 9705 9710 9750 FUNCTION: COMPUSERVE ID FACTORY DEFAULT: NONE ACCESS INSTRUCTIONS: 1.) Select TERMINAL CONFIGURATION from the MANAGEMENT FUNCTIONS menu. 2.) Select SET TERMINAL PARAMETERS. 3.) Select TELEPHONE. 4.) Select the COMPUSERVE ID option. DESCRIPTION: The COMPUSERVE Network is used by some processors to route transactions.
MANAGEMENT FUNCTIONS THIS COMMAND IS USED IN THE: 9100 9110 9700 9705 9710 9750 FUNCTION: MODEM SETUP FACTORY DEFAULT: N/A ACCESS INSTRUCTIONS: 1.) Select TERMINAL CONFIGURATION from the MANAGEMENT FUNCTIONS menu. 2.) Select SET TERMINAL PARAMETERS. 3.) Select TELEPHONE. 4.) Select the MODEM SETUP option. DESCRIPTION: Selecting the MODEM SETUP OPTION from the TELEPHONE screen allows the terminal operator to select the following parameters: 1.) 2.) 3.) 4.) 5.
MODEL 91XX/97XX CONFIGURATION MANUAL THIS COMMAND IS USED IN THE: 9100 9110 9700 9705 9710 9750 FUNCTION: DIAL MODE FACTORY DEFAULT: ‘DTMF’ ACCESS INSTRUCTIONS: 1.) Select TERMINAL CONFIGURATION from the MANAGEMENT FUNCTIONS menu. 2.) Select SET TERMINAL PARAMETERS. 3.) Select TELEPHONE. 4.) Select the MODEM SETUP option. 5.) Select DIAL MODE. DESCRIPTION: The modem is configured to dial in either the touch-tone mode (DTMF), or in the rotary (PULSE) mode.
MANAGEMENT FUNCTIONS THIS COMMAND IS USED IN THE: 9100 9110 9700 9705 9710 9750 FUNCTION: DIAL RATE FACTORY DEFAULT: ‘FAST’ ACCESS INSTRUCTIONS: 1.) Select TERMINAL CONFIGURATION from the MANAGEMENT FUNCTIONS menu. 2.) Select SET TERMINAL PARAMETERS. 3.) Select TELEPHONE. 4.) Select the MODEM SETUP option. 5.) Select DIAL RATE. DESCRIPTION: The internal modem can be configured to send dial tones at one of three speeds. The possible values are FAST (70 milliseconds), MED. (150 ms), and SLOW (255 ms).
MODEL 91XX/97XX CONFIGURATION MANUAL THIS COMMAND IS USED IN THE: 9100 9110 9700 9705 9710 9750 FUNCTION: BAUD RATE FACTORY DEFAULT: ‘1200’ ACCESS INSTRUCTIONS: 1200 1.) Select TERMINAL CONFIGURATION from the MANAGEMENT FUNCTIONS menu. 2.) Select SET TERMINAL PARAMETERS. 3.) Select TELEPHONE. 4.) Select the MODEM SETUP option. 5.) Select BAUD RATE. DESCRIPTION: The bit rate of the modem can be controlled with this function. The rate can be set to 2400 or 1200 bits per second (bps).
MANAGEMENT FUNCTIONS THIS COMMAND IS USED IN THE: 9100 9110 9700 9705 9710 9750 FUNCTION: MODEM SETUP STRING F ACTORY D EFAULT : MODEMSPECIFIC Access Instructions: 1.) Select TERMINAL CONFIGURATION from the MANAGEMENT FUNCTIONS menu. 2.) Select SET TERMINAL PARAMETERS. 3.) Select TELEPHONE. 4.) Select the MODEM SETUP option. 5.) Select MODEM SETUP STRING.
MODEL 91XX/97XX CONFIGURATION MANUAL THIS COMMAND IS USED IN THE: 9100 9110 9700 9705 9710 9750 FUNCTION: RESET/TEST MODEM FACTORY DEFAULT: N/A ACCESS INSTRUCTIONS: 1.) Select TERMINAL CONFIGURATION from the MANAGEMENT FUNCTIONS menu. 2.) Select SET TERMINAL PARAMETERS. 3.) Select TELEPHONE. 4.) Select the MODEM SETUP option. 5.) Select RESET/TEST MODEM. DESCRIPTION: This function is used to reset and test the internal modem.
MANAGEMENT FUNCTIONS THIS COMMAND IS USED IN THE: 9100 9110 9700 9705 9710 9750 FUNCTION: MORE FACTORY DEFAULT: N/A ACCESS INSTRUCTIONS: 1.) Select TERMINAL CONFIGURATION from the MANAGEMENT FUNCTIONS menu. 2.) Select SET TERMINAL PARAMETERS. 3.) Choose MORE. DESCRIPTION: Selecting the MORE TERMINAL PARAMETERS option from the TERMINAL PARAMETERS allows the terminal operator or a service technician to view or change the following: 1.) 2.) 3.) 4.) 5.) 6.) 7.
MODEL 91XX/97XX CONFIGURATION MANUAL THIS COMMAND IS USED IN THE: 9100 9110 9700 9705 9710 9750 FUNCTION: ADJUST/CONTRAST FACTORY DEFAULT: CONTRAST: MID-RANGE ACCESS INSTRUCTIONS: 1.) Select TERMINAL CONFIGURATION from the MANAGEMENT FUNCTIONS menu. 2.) Select SET TERMINAL PARAMETERS. 3.) Choose MORE. 4.) Choose ADJUST VOLUME/CONTR. DESCRIPTION: This feature allows the terminal operator to adjust the speaker volume and the contrast of the display.
MANAGEMENT FUNCTIONS THIS COMMAND IS USED IN THE: 9100 9110 9700 9705 9710 9750 FUNCTION: RECEIPT OPTION FACTORY DEFAULT: DISABLED ACCESS INSTRUCTIONS: 1.) Select TERMINAL CONFIGURATION from the MANAGEMENT FUNCTIONS menu. 2.) Select SET TERMINAL PARAMETERS. 3.) Choose MORE. 4.) Choose RECEIPT OPTION. DESCRIPTION: This feature allows the customer to select the option of receiving or not receiving a receipt at the completion of a withdrawal transaction.
MODEL 91XX/97XX CONFIGURATION MANUAL THIS COMMAND IS USED IN THE: 9100 9110 9700 9705 9710 9750 FUNCTION: TRITON CONNECT FACTORY DEFAULT: DISABLED ACCESS INSTRUCTIONS: 1.) Select TERMINAL CONFIGURATION from the MANAGEMENT FUNCTIONS menu. 2.) Select SET TERMINAL PARAMETERS. 3.) Choose MORE. 4.) Choose TRITON CONNECT. DESCRIPTION: Selecting the TRITON CONNECT function allows the terminal operator to set up the following parameters associated with Triton Connect: 1.) 2.) 3.) 4.) 5.
MANAGEMENT FUNCTIONS THIS COMMAND IS USED IN THE: 9100 9110 9700 9705 9710 9750 FUNCTION: PRIMARY NUMBER FACTORY DEFAULT: NONE ACCESS INSTRUCTIONS: 1.) Select TERMINAL CONFIGURATION from the MANAGEMENT FUNCTIONS menu. 2.) Select SET TERMINAL PARAMETERS. 3.) Choose MORE. 4.) Select TRITON CONNECT. 5.) Choose PRIMARY NUMBER. DESCRIPTION: The PRIMARY NUMBER function is used to enter the number that the terminal can use for calling back the Triton Connect Host Computer.
MODEL 91XX/97XX CONFIGURATION MANUAL THIS COMMAND IS USED IN THE: 9100 9110 9700 9705 9710 9750 FUNCTION: BACKUP NUMBER FACTORY DEFAULT: NONE ACCESS INSTRUCTIONS: 1.) Select TERMINAL CONFIGURATION from the MANAGEMENT FUNCTIONS menu. 2.) Select SET TERMINAL PARAMETERS. 3.) Choose MORE. 4.) Select TRITON CONNECT. 5.) Choose BACKUP NUMBER. DESCRIPTION: The BACKUP NUMBER function is used to enter a backup number that the terminal can use for calling back the Triton Connect computer.
MANAGEMENT FUNCTIONS THIS COMMAND IS USED IN THE: 9100 9110 9700 9705 9710 9750 FUNCTION: ALARM NUMBERS FACTORY DEFAULT: N/A ACCESS INSTRUCTIONS: 1.) Select TERMINAL CONFIGURATION from the MANAGEMENT FUNCTIONS menu. 2.) Select SET TERMINAL PARAMETERS. 3.) Choose MORE. 4.) Choose TRITON CONNECT. 5.) Choose ALARM NUMBERS. DESCRIPTION: In some applications the terminal monitoring organization may require different telephone numbers for alarm reporting purposes.
MODEL 91XX/97XX CONFIGURATION MANUAL THIS COMMAND IS USED IN THE: 9100 9110 9700 9705 9710 9750 FUNCTION: PRIMARY ALARM NUMBER FACTORY DEFAULT: NONE ACCESS INSTRUCTIONS: 1.) Select TERMINAL CONFIGURATION from the MANAGEMENT FUNCTIONS menu. 2.) Select SET TERMINAL PARAMETERS. 3.) Choose MORE. 4.) Select TRITON CONNECT. 5.) Select ALARM NUMBERS. 6.) Choose PRIMARY.
MANAGEMENT FUNCTIONS THIS COMMAND IS USED IN THE: 9100 9110 9700 9705 9710 9750 FUNCTION: BACKUP ALARM NUMBER FACTORY DEFAULT: NONE ACCESS INSTRUCTIONS: 1.) Select TERMINAL CONFIGURATION from the MANAGEMENT FUNCTIONS menu. 2.) Select SET TERMINAL PARAMETERS. 3.) Choose MORE. 4.) Select TRITON CONNECT. 5.) Select ALARM NUMBERS. 6.) Choose BACKUP.
MODEL 91XX/97XX CONFIGURATION MANUAL THIS COMMAND IS USED IN THE: 9100 9110 9700 9705 9710 9750 FUNCTION: ENABLE/DISABLE CALL BACK FACTORY DEFAULT: ENABLED ACCESS INSTRUCTIONS: 1.) Select TERMINAL CONFIGURATION from the MANAGEMENT FUNCTIONS menu. 2.) Select SET TERMINAL PARAMETERS. 3.) Choose MORE. 4.) Select TRITON CONNECT. DESCRIPTION: Normally, when the Triton Connect Host Computer contacts a terminal, it will hang up and wait for the terminal to CALL BACK. This is done for security reasons.
MANAGEMENT FUNCTIONS THIS COMMAND IS USED IN THE: 9100 9110 9700 9705 9710 9750 FUNCTION: ENABLE/DISABLE TRITON CONNECT FACTORY DEFAULT: DISABLED ACCESS INSTRUCTIONS: 1.) Select TERMINAL CONFIGURATION from the MANAGEMENT FUNCTIONS menu. 2.) Select SET TERMINAL PARAMETERS. 3.) Choose MORE. 4.) Select TRITON CONNECT. DESCRIPTION: If the Triton Connect feature has been ACTIVATED (using the ACTIVATE function), this function can be used to ENABLE or DISABLE Triton Connect access to the terminal.
MODEL 91XX/97XX CONFIGURATION MANUAL THIS COMMAND IS USED IN THE: 9100 9110 9700 9705 9710 9750 FUNCTION: ATM MONITORING FACTORY DEFAULT: N/A ACCESS INSTRUCTIONS: 1.) Select TERMINAL CONFIGURATION from the MANAGEMENT FUNCTIONS menu. 2.) Select SET TERMINAL PARAMETERS. 3.) Choose MORE. 4.) Select ATM monitoring. DESCRIPTION: The ATM Monitoring screen provides access to the following functions: 1.) STATUS MONITORING.
MANAGEMENT FUNCTIONS THIS COMMAND IS USED IN THE: 9100 9110 9700 9705 9710 9750 FUNCTION: STATUS MONITORING FACTORY DEFAULT: DISABLED ACCESS INSTRUCTIONS: 1.) Select TERMINAL CONFIGURATION from the MANAGEMENT FUNCTIONS menu. 2.) Select SET TERMINAL PARAMETERS. 3.) Choose MORE. 4.) Select ATM MONITORING. 5.) Select Status monitoring. DESCRIPTION: Status monitoring is a feature that is available with selected processor software.
MODEL 91XX/97XX CONFIGURATION MANUAL THIS COMMAND IS USED IN THE: 9100 9110 9700 9705 9710 9750 FUNCTION: HEARTBEAT MESSAGE FACTORY DEFAULT: DISABLED ACCESS INSTRUCTIONS: 1.) Select TERMINAL CONFIGURATION from the MANAGEMENT FUNCTIONS menu. 2.) Select SET TERMINAL PARAMETERS. 3.) Choose MORE. 4.) Select ATM MONITORING. 5.) Select HEARTBEAT MESSAGE. DESCRIPTION: The HEARTBEAT MESSAGE feature is designed to provide a means of reporting communications system status to the host processor.
MANAGEMENT FUNCTIONS Once the Heartbeat Message call feature is enabled at the terminal, an internal timer will be initialized to the number of minutes set in the DELAY PERIOD parameter at system power-up and after a reset. This timer is restarted each time a call is made to the host. A call to the host is defined as any transaction, including financial, balancing and configuration that actually communicates with the host to the point that the Terminal ID is recognized.
MODEL 91XX/97XX CONFIGURATION MANUAL Terminal is Turned Off or Power Has Failed If the terminal is turned off, no calls will be made. While an obvious point, it means that for this feature to be of any value, the terminal must always remain on. Communications System Has Failed A failure of any piece of the communications system will result in missed calls. This includes the terminal modem, the phone line to the terminal, and any intermediate telecommunications providers.
MANAGEMENT FUNCTIONS THIS COMMAND IS USED IN THE: 9100 9110 9700 9705 9710 9750 FUNCTION: AD SCREENS FACTORY DEFAULT: ENABLED ACCESS INSTRUCTIONS: 1.) Select TERMINAL CONFIGURATION from the MANAGEMENT FUNCTIONS menu. 2.) Select SET TERMINAL PARAMETERS. 3.) Choose MORE. 4.) Select AD SCREENS. DESCRIPTION: The terminal must have at least one Memory Expansion Card installed for this feature to operate.
MODEL 91XX/97XX CONFIGURATION MANUAL THIS COMMAND IS USED IN THE: 9100 9110 9700 9705 9710 9750 FUNCTION: COMMUNICATION HEADER FACTORY DEFAULT: PROCESSOR-SPECIFIC ACCESS INSTRUCTIONS: 1.) Select TERMINAL CONFIGURATION from the MANAGEMENT FUNCTIONS menu. 2.) Select SET TERMINAL PARAMETERS. 3.) Choose MORE. 3.) Select COMMUNICATION HEADER. DESCRIPTION: The COMMUNICATION HEADER is an optional feature that is only applicable to certain processors.
MANAGEMENT FUNCTIONS THIS COMMAND IS USED IN THE: 9100 9110 9700 9705 9710 9750 FUNCTION: MORE (TERMINAL PARAMETERS) FACTORY DEFAULT: N/A ACCESS INSTRUCTIONS: 1.) Select TERMINAL CONFIGURATION from the MANAGEMENT FUNCTIONS menu. 2.) Select SET TERMINAL PARAMETERS. 3.) Choose MORE. 4.) Select MORE. DESCRIPTION: This screen allows you to select additional terminal parameters functions. The functions available are ALARM THRESHOLDS and VIEW/MODIFY OPTIONS.
MODEL 91XX/97XX CONFIGURATION MANUAL THIS COMMAND IS USED IN THE: 9100 9110 9700 9705 9710 9750 FUNCTION: MORE (TERMINAL PARAMETERS) (UK) FACTORY DEFAULT: N/A ACCESS INSTRUCTIONS: 1.) Select TERMINAL CONFIGURATION from the MANAGEMENT FUNCTIONS menu. 2.) Select SET TERMINAL PARAMETERS. 3.) Choose MORE. 4.) Select MORE. DESCRIPTION: This screen allows you to select additional terminal parameters functions. The functions available are: 1.) 2.) 3.
MANAGEMENT FUNCTIONS THIS COMMAND IS USED IN THE: 9100 9110 9700 9705 9710 9750 FUNCTION: ALARM THERSHOLDS FACTORY DEFAULT: OFF ACCESS INSTRUCTIONS: 1.) Select TERMINAL CONFIGURATION from the MANAGEMENT FUNCTIONS menu. 2.) Select SET TERMINAL PARAMETERS. 3.) Choose MORE. 4.) Select MORE. 5.) Select ALARM THRESHOLDS. DESCRIPTION: This function allows you to turn on or off the LOW CASH THRESHOLD, JOURNAL THRESHOLD, and SCHEDULED JOURNAL features. 1.
MODEL 91XX/97XX CONFIGURATION MANUAL THIS COMMAND IS USED IN THE: 9100 9110 9700 9705 9710 9750 FUNCTION: SET LOW CASH THERSHOLD FACTORY DEFAULT: 0 ACCESS INSTRUCTIONS: 1.) Select TERMINAL CONFIGURATION from the MANAGEMENT FUNCTIONS menu. 2.) Select SET TERMINAL PARAMETERS. 3.) Choose MORE. 4.) Select MORE. 5.) Select ALARM THRESHOLDS. 6.) Select SET LOW CASH THRESHOLD. DESCRIPTION: This function allows you to enter the number of bills that will act as a low cash threshold.
MANAGEMENT FUNCTIONS THIS COMMAND IS USED IN THE: 9100 9110 9700 9705 9710 9750 FUNCTION: SET JOURNAL THRESHOLD FACTORY DEFAULT: 0 ACCESS INSTRUCTIONS: 1.) Select TERMINAL CONFIGURATION from the MANAGEMENT FUNCTIONS menu. 2.) Select SET TERMINAL PARAMETERS. 3.) Choose MORE. 4.) Select MORE. 5.) Select ALARM THRESHOLDS. 6.) Select SET JOURNAL THRESHOLD. DESCRIPTION: This function allows you to enter the number of journal entries that will act as a threshold.
MODEL 91XX/97XX CONFIGURATION MANUAL THIS COMMAND IS USED IN THE: 9100 9110 9700 9705 9710 9750 FUNCTION: SET SCHEDULED JOURNAL FACTORY DEFAULT: 0 ACCESS INSTRUCTIONS: 1.) Select TERMINAL CONFIGURATION from the MANAGEMENT FUNCTIONS menu. 2.) Select SET TERMINAL PARAMETERS. 3.) Choose MORE. 4.) Select MORE. 5.) Select ALARM THRESHOLDS. 6.) Select SET SCHEDULED JOURNAL.
MANAGEMENT FUNCTIONS THIS COMMAND IS USED IN THE: 9100 9110 9700 9705 9710 9750 FUNCTION: BACKGROUND GRAPHICS FACTORY DEFAULT: OFF ACCESS INSTRUCTIONS: 1.) Select TERMINAL CONFIGURATION from the MANAGEMENT FUNCTIONS menu. 2.) Select SET TERMINAL PARAMETERS. 3.) Select MORE. 4.) Select MORE. 5.) Select BACKGROUND GRAPHICS. DESCRIPTION: The BACKGROUND GRAPHICS function is used to turn ON or OFF the display of background graphics, and to select the currently displayed background graphic image.
MODEL 91XX/97XX CONFIGURATION MANUAL THIS COMMAND IS USED IN THE: 9100 9110 9700 9705 9710 9750 FUNCTION: PERSISTANT REVERSALS (UK ONLY) FACTORY DEFAULT: 1 ACCESS INSTRUCTIONS: 1.) Select TERMINAL CONFIGURATION from the MANAGEMENT FUNCTIONS menu. 2.) Select SET TERMINAL PARAMETERS. 3.) Choose MORE. 4.) Select MORE. 5.) Select PERSISTANT REVERSALS. DESCRIPTION: This option allow you to select the number of times the terminal will try to complete a reversal.
MANAGEMENT FUNCTIONS THIS COMMAND IS USED IN THE: 9100 9110 9700 9705 9710 9750 FUNCTION: VIEW/MODIFY OPTIONS FACTORY DEFAULT: N/A ACCESS INSTRUCTIONS: 1.) Select TERMINAL CONFIGURATION from the MANAGEMENT FUNCTIONS menu. 2.) Select SET TERMINAL PARAMETERS. 3.) Choose MORE. 4.) Select MORE. 5.) Select VIEW/MODIFY OPTIONS. DESCRIPTION: The VIEW/MODIFY OPTIONS FUNCTION provides access to terminal parameters for setting the following: 1.) ACTIVATE (A selected feature.) 2.) DEACTIVATE (A selected feature.
MODEL 91XX/97XX CONFIGURATION MANUAL THIS COMMAND IS USED IN THE: 9100 9110 9700 9705 9710 9750 FUNCTION: ACTIVATE FACTORY DEFAULT: N/A ACCESS INSTRUCTIONS: 1.) Select TERMINAL CONFIGURATION from the MANAGEMENT FUNCTIONS menu. 2.) Select SET TERMINAL PARAMETERS. 3.) Choose MORE. 4.) Select MORE. 5.) Select VIEW/MODIFY OPTIONS. 6.) Choose ACTIVATE. DESCRIPTION: To activate a FEATURE an activation code must be obtained from the Triton Systems, Inc., Technical Support Department.
MANAGEMENT FUNCTIONS THIS COMMAND IS USED IN THE: 9100 9110 9700 9705 9710 9750 FUNCTION: DEACTIVATE FACTORY DEFAULT: N/A ACCESS INSTRUCTIONS: 1.) Select TERMINAL CONFIGURATION from the MANAGEMENT FUNCTIONS menu. 2.) Select SET TERMINAL PARAMETERS. 3.) Choose MORE. 4.) Select MORE. 5.) Select VIEW/MODIFY OPTIONS. 6.) Choose DEACTIVATE. DESCRIPTION: To DEACTIVATE a Feature (such as Feature 00 - Triton Connect), select the DEACTIVATE option from the FEATURE menu.
MODEL 91XX/97XX CONFIGURATION MANUAL THIS COMMAND IS USED IN THE: 9100 9110 9700 9705 9710 9750 FUNCTION: SELECT FEATURE NUMBER FACTORY DEFAULT: N/A ACCESS INSTRUCTIONS: 1.) Select TERMINAL CONFIGURATION from the MANAGEMENT FUNCTIONS menu. 2.) Select SET TERMINAL PARAMETERS. 3.) Choose MORE. 4.) Select MORE. 5.) Select VIEW/MODIFY OPTIONS. 6.) Choose SELECT FEATURE NUMBER. DESCRIPTION: Selects the feature number to examine or to activate/deactivate.
MANAGEMENT FUNCTIONS THIS COMMAND IS USED IN THE: 9100 9110 9700 9705 9710 9750 FUNCTION: DATE/TIME FUNCTIONS FACTORY DEFAULT: N/A ACCESS INSTRUCTIONS: 1.) Select TERMINAL CONFIGURATION from the MANAGEMENT FUNCTIONS menu. 2.) Choose DATE / TIME FUNCTIONS. DESCRIPTION: This screen provides a menu of functions related to configuration of date and time parameters for the Cash Dispenser: 1.) SET DATE FORMAT.
MODEL 91XX/97XX CONFIGURATION MANUAL THIS COMMAND IS USED IN THE: 9100 9110 9700 9705 9710 9750 FUNCTION: SET DATE FORMAT FACTORY DEFAULT: MM/DD/YY ACCESS INSTRUCTIONS: 1.) Select TERMINAL CONFIGURATION from the MANAGEMENT FUNCTIONS menu. 2.) Choose DATE / TIME FUNCTIONS. 3.) Choose SET DATE FORMAT. DESCRIPTION: This function provides a way to change the date format the terminal uses when printing a date field on receipts and reports. Press the button next to the desired option to activate that format.
MANAGEMENT FUNCTIONS THIS COMMAND IS USED IN THE: 9100 9110 9700 9705 9710 9750 FUNCTION: SET DATE/TIME FACTORY DEFAULT: N/A ACCESS INSTRUCTIONS: 1.) Select TERMINAL CONFIGURATION from the MANAGEMENT FUNCTIONS menu. 2.) Choose DATE/TIME FUNCTIONS. 3.) Choose SET DATE / TIME. DESCRIPTION: The Cash Dispenser contains an internal clock that maintains the date and time, even when power is disconnected from the unit. Press SET DATE to begin the date entry process.
MODEL 91XX/97XX CONFIGURATION MANUAL THIS COMMAND IS USED IN THE: 9100 9110 9700 9705 9710 9750 FUNCTION: SET DATE FACTORY DEFAULT: N/A ACCESS INSTRUCTIONS: 1.) Select TERMINAL CONFIGURATION from the MANAGEMENT FUNCTIONS menu. 2.) Choose DATE/TIME FUNCTIONS. 3.) Select SET DATE / TIME. 4.) Select SET DATE. DESCRIPTION: Press SET DATE to begin the date entry process. The date is entered in the form ‘MM/DD/YY’ (month, day, year).
MANAGEMENT FUNCTIONS THIS COMMAND IS USED IN THE: 9100 9110 9700 9705 9710 9750 FUNCTION: SET TIME FACTORY DEFAULT: N/A ACCESS INSTRUCTIONS: 1.) Select TERMINAL CONFIGURATION from the MANAGEMENT FUNCTIONS menu. 2.) Choose DATE/TIME FUNCTIONS. 3.) Select SET DATE / TIME. 4.) Select SET TIME. DESCRIPTION: The time is entered in the form ‘HH:MM:SS’ (hours, minutes, seconds). Do not enter the ‘:’ characters separating the fields, just the fields themselves. Press CLEAR to erase everything and start over.
MODEL 91XX/97XX CONFIGURATION MANUAL THIS COMMAND IS USED IN THE: 9100 9110 9700 9705 9710 9750 FUNCTION: TRANSACTION TYPES FACTORY DEFAULT: ON ACCESS INSTRUCTIONS: 1.) Select the TERMINAL CONFIGURATION option from the MANAGEMENT FUNCTIONS screen. 2.) Select TYPES. TRANSACTION DESCRIPTION: This function allows you to turn on or off the availability of the two transaction types: TRANSFERS and BALANCE INQUIRIES.
MANAGEMENT FUNCTIONS THIS COMMAND IS USED IN THE: 9100 9110 9700 9705 9710 9750 FUNCTION: ACCOUNT TYPES FACTORY DEFAULT: ON ACCESS INSTRUCTIONS: 1.) Select the TERMINAL CONFIGURATION option from the MANAGEMENT FUNCTIONS screen. 2.) Select ACCOUNT TYPES. DESCRIPTION: This function allows you to turn on or off the availability of two account types: SAVINGS and CREDIT CARD. When an account type is turned ON, the terminal will provide that option to the customer.
MODEL 91XX/97XX CONFIGURATION MANUAL 224
ADDENDUM TO THE MODEL 91XX/97XX CONFIGURATION MANUAL ENCRYPTING PIN PAD (EPP) UPGRADE 225
ENCRYPTING PIN PAD (EPP) UPGRADE 226
SECTION 3 - MANAGEMENT FUNCTIONS INTRODUCTION (WAVES) This section describes the new or revised Management Functions for the VEPP software. The Triton WAVES (w/multi-host functions) version is presented in the first part of this section followed by non-WAVES applications. NEW OR MODIFIED MANAGEMENT FUNCTIONS (WAVES) The majority of the Management Functions are configured the same as before but they may have been relocated in the menu structure. A brief sysnopsis of each function is provided.
ENCRYPTING PIN PAD (EPP) UPGRADE MAIN MENU ACCESS INSTRUCTIONS: 1. Access Management Functions by entering your password. The MAIN MENU screen will be displayed. DESCRIPTION: The Main Menu screen allows the service provider/terminal operator to access the following Management functions: 1. Configure Terminal. Used to configure operating parameters for the ATM terminal. 2. Configure Services. Used to select transaction types, account types, and surcharging setup. 3. Configure Processors.
SECTION 3 - MANAGEMENT FUNCTIONS CONFIGURE TERMINAL ACCESS INSTRUCTIONS: 1. From the M AIN M ENU screen, select CONFIGURE TERMINAL. DESCRIPTION: The following options will be available from the CONFIGURE TERMINAL screen: 1. Cassette Setup. Allows the terminal operator to view and change cassette parameters. 2. Date/Time Functions. Provides a menu related to configuration of date and time parameters 3. Language Idioma.
ENCRYPTING PIN PAD (EPP) UPGRADE CONFIGURE TERMINAL (MORE) ACCESS INSTRUCTIONS: 1. From the MAIN MENU screen, select CONFIGURE TERMINAL. 2. From the CONFIGURE TERMINAL screen, select MORE. DESCRIPTION: The following options will be available from the MORE screen: 1. AD Screens. This feature enables or disables the display on an idle terminal to alternate between the Welcome Screen and a screen containing graphics and text elements used to make an advertisement screen. 2. Random/Level Prize Coupons.
SECTION 3 - MANAGEMENT FUNCTIONS CASSETTE SETUP ACCESS INSTRUCTIONS: 1. From the M AIN M ENU screen, select CONFIGURE TERMINAL. 2. From the CONFIGURE TERMINAL screen, select CASSETTE SETUP. DESCRIPTION: The following options will be available from the CASSETTE SETUP screen: 1. Relearn Bill Thickness. Enables you to force the dispenser to enter the learning mode. 2. International Currency. Allows operator to select one of eleven (11) possible monetary symbols that describe the type of currency being used. 3.
ENCRYPTING PIN PAD (EPP) UPGRADE 8. Extended Amount. Extends the currency amount entry field from eight (8) digits to twelve (12) digits, if needed. *Note* In configuring the cassettes parameters (amount, value, etc) in CONFIGURE TERMINAL, the availability of some options may be “grayed out” due to the specific dispensing mechanism installed.
SECTION 3 - MANAGEMENT FUNCTIONS CASSETTE PARAMETERS ACCESS INSTRUCTIONS: 1. From the CONFIGURE TERMINAL screen, select CASSETTE SETUP. 2. From the CASSETTE SETUP screen, select CASSETTE PARAMETERS. 3. Select CASSETTE “A”, “B”, “C”, OR “D”. *Note: Only Cassette “A” is available for single cassette dispensers. DESCRIPTION: The following options will be available from the CASSETTE SETUP screen: 1. Set Bill Dimensions.
ENCRYPTING PIN PAD (EPP) UPGRADE CONFIGURE PROCESSORS ACCESS INSTRUCTIONS: 1. From the M AIN M ENU screen, select CONFIGURE PROCESSORS. 2. From the CONFIGURE PROCESSORS screen, select option (1), (2), (3), or (4).DESCRIPTION: The following options will be available from the CONFIGURE PROCESSORS screen: *Important* Option (1) MUST be configured. It is the default processor for standard 0. Processor Name. Allows entry for the name of the specified processor (Ex: CALYPSO) 1. Terminal ID.
SECTION 3 - MANAGEMENT FUNCTIONS The remaining options are toggled to either Enable or Disable that particular function. 5. Send Terminal Totals. When this option is Enabled, the terminal will send accumulated totals information to the processor during the close operation. 6. Status Monitoring. Status monitoring is a feature available with selected processor software. When Enabled, the terminal will send operational status information to the processor.
ENCRYPTING PIN PAD (EPP) UPGRADE 8. Communications Header. This optional feature is only applicable to certain processors. When required, it must be Enabled and have the correct data in the header data field. The Communication Header consists of alphanumeric characters. 9. Predial. When this feature is Enabled, the terminal will dial out to the processor and establish a connection as soon as the customer’s ATM or credit card has been scanned by the card reader.
SECTION 3 - MANAGEMENT FUNCTIONS KEY MANAGEMENT ACCESS INSTRUCTIONS: 1. From the M AIN M ENU screen, select CONFIGURE PROCESSORS. 2. From the CONFIGURE PROCESSORS screen, select option (2) for K EY MANAGEMENT. DESCRIPTION: The K EY M A NAGEM ENT function provides access to the ATMs functions that control the method of entry for MAC Master Keys and/or PIN Master Keys, downloading the PIN Working Keys, and displaying the Check Digits. The new VEPP requires that two key parts for each key are loaded.
ENCRYPTING PIN PAD (EPP) UPGRADE entering PIN and/or MAC Master keys) Check Digits - Displays encryption key check digits. 2. Password Required - When “Enter Master Keys” is selected, you will be prompted to enter two (2) passwords. If this is an initial setup, the default password is six (6) zeros (000000) for both. You will then be prompted to change passwords. 3. Change Password (Initial Setup) - The VEPP requires that no default password can be entered.
SECTION 3 - MANAGEMENT FUNCTIONS Master keys. DO NOT enter keys in the MAC Master keys unless processor directs. You MUST enter two (2) sets of keys (32 alpha/numerical). 7. Enter Keys - Enter the first (32) alpha/numerical key. The onscreen keypad legend describes the ATMs keypad for entering numbers and characters. Select “ENTER” using the display function key. 8. Check Digits - After selecting “Enter” from previous screen, you will get the Check Digit which you can either Accept or Decline.
ENCRYPTING PIN PAD (EPP) UPGRADE STD ATM CONFIGURATION ACCESS INSTRUCTIONS: 1. From the M AIN M ENU screen, select CONFIGURE SERVICES. 2. From the CONFIGURE SERVICES screen, select STD. ATM CONFIGURATION. DESCRIPTION: The following options will be available from the STANDARD ATM CONFIGURATION screen: 1. Transaction Types. This function allows turning ON or OFF the availability of two (2) transaction types: Transfers and Balance Inquiries. It also allows prompting the customer on balance inquiries. 2.
SECTION 3 - MANAGEMENT FUNCTIONS PAYSPOT CONFIGURATION ACCESS INSTRUCTIONS: 1. From the M AIN M ENU screen, select CONFIGURE SERVICES. 2. From the CONFIGURE SERVICES screen, select PAYSPOT CONFIGURATION. DESCRIPTION: *Note: The specified processor must be configured in the Configured Processor setup. The following options will be available from the PAYSPOT CONFIGURATION screen: 1. PaySpot On/Off. This function enables or disables PaySpot as an option to customers.
ENCRYPTING PIN PAD (EPP) UPGRADE WESTERN UNION CONFIGURATION ACCESS INSTRUCTIONS: 1. From the MAIN MENU screen, select CONFIGURE SERVICES. 2. From the CONFIGURE SERVICES screen, select WESTERN UNION CONFIGURATION. DESCRIPTION: The following options will be available from the WESTERN UNION CONFIGURATION: 1. Western Union On/Off. This function enables or disables Western Union as an option to customers. When disabled, no display will be advertised on the Customer screen. 2. Multiple Amount.
SECTION 3 - MANAGEMENT FUNCTIONS 4. Select Processor. This function provides selection of the specified host processor for Western Union transactions. When a processor is selected, it automatically “moves” the selection to the USING PROCESSOR line. 5. 800 Customer Help Number. Western Union has an (800) number available for 24 hour assistance. The default number is 1-877-982-8286.
ENCRYPTING PIN PAD (EPP) UPGRADE DIAGNOSTICS ACCESS INSTRUCTIONS: 1. From the M AIN M ENU screen, select DIAGNOSTICS. DESCRIPTION: The following options will be available from the Diagnostics screen: 1. Status. This function presents the status checks on the primary functional areas of the dispensing mechanism. 2. Purge. This function instructs the dispenser to remove all documents from the feed path. The return code for a successful purge in a single cassette dispenser is ‘20 20 20’.
SECTION 3 - MANAGEMENT FUNCTIONS MORE DIAGNOSTICS ACCESS INSTRUCTIONS: 1. From the M AIN M ENU screen, select DIAGNOSTICS. 2. From the D IAGNOSTICS screen, select MORE DIAGNOSTICS. DESCRIPTION: The MORE DIAGNOSTICS menu allows the terminal operator to perform the following functions: 1. Inject New Cassette ID. This function enables the user to change the identification code of a cassette. *Note: For multicassette dispensers only. 2. Communication.
ENCRYPTING PIN PAD (EPP) UPGRADE CLOSE ACCESS INSTRUCTIONS: 1. From the M AIN M ENU screen, select CLOSE. DESCRIPTION: The following options will be available from the CLOSE screen: 1. Schedule Close. This function allows you to turn ON/OFF the schedule close feature. It also provides access to specify the time of day when a DAY CLOSE process is initiated. 2. Trial Close. This function is used to get the totals from the ATM. It prints information from the processor and the terminal itself.
SECTION 3 - MANAGEMENT FUNCTIONS CASSETTE CLOSE ACCESS INSTRUCTIONS: 1. From the M AIN M ENU screen, select CLOSE. 2. From the CLOSE screen, select CASSETTE CLOSE. DESCRIPTION: The following options will be available from the CASSETTE CLOSE screen: Select Cassette. This option allows the operator to select cassettespecific close operations. *Note: Only Cassette A is available for single cassette dispensers. 1. Trial Cassette Close.
ENCRYPTING PIN PAD (EPP) UPGRADE INTRODUCTION (NON-WAVES) This part of the Management Functions describes the new or revised options for the VEPP software. NEW OR MODIFIED MANAGEMENT FUNCTIONS The majority of the Management Functions are configured the same as before the new VEPP software. A brief synopsis of the functions is provided. Consult the appropriate Configuration or Operations manual for a detailed description of those functions.
SECTION 3 - MANAGEMENT FUNCTIONS MAIN MENU ACCESS INSTRUCTIONS: 1. Access Management Functions by entering your password. The MAIN MENU screen will be displayed. The Main Menu screen allows the service provider/terminal operator to access the following Management functions: 1. Close. Used to perform Cassette Close, Day Close, Trial Close, and Schedule Close functions.. 2. Diagnostics. This function performs self-tests on the major components to help determine and isolate any malfunctions or errors. 3.
ENCRYPTING PIN PAD (EPP) UPGRADE CASSETTE CLOSE ACCESS INSTRUCTIONS: 1. From the M AIN M ENU screen, select CLOSE. 2. From the CLOSE screen, select CASSETTE CLOSE. DESCRIPTION: The following options will be available from the CASSETTE CLOSE screen: Select Cassette. This option allows the operator to select cassettespecific close operations. *Note: Only Cassette A is available for single cassette dispensers. 1. Trial Cassette Close.
SECTION 3 - MANAGEMENT FUNCTIONS DIAGNOSTICS ACCESS INSTRUCTIONS: 1. From the M AIN M ENU screen, select DIAGNOSTICS. DESCRIPTION: The following options will be available from the Diagnostics screen: 1. Status. This function presents the status checks on the primary functional areas of the dispensing mechanism. 2. Purge. This function instructs the dispenser to remove all documents from the feed path. The return code for a successful purge in a single cassette dispenser is ‘20 20 20’.
ENCRYPTING PIN PAD (EPP) UPGRADE MORE (MORE) DIAGNOSTICS ACCESS INSTRUCTIONS: 1. From the M AIN M ENU screen, select DIAGNOSTICS. 2. From the D IAGNOSTICS screen, select MORE DIAGNOSTICS, then select MORE DIAGNOSTICS again. DESCRIPTION: The MORE (MORE) DIAGNOSTICS menu allows the terminal operator to perform the following functions: 1. Keypad. This function enables the user to reset VEPP errors that appear on the terminal screen (Error Code (EC) 205 and/or 239).
SECTION 3 - MANAGEMENT FUNCTIONS LANGUAGE,JOURNAL,CASSETTE SERVICE, AND PASSWORD MAINTENANCE ACCESS INSTRUCTIONS: 1. From the MAIN MENU screen, select LANGUAGE. 2. From the MAIN MENU screen, select JOURNAL. 3. From the MAIN MENU screen, select CASSETTE SERVICE. 4. From the MAIN MENU screen, select PASSWORD MAINTENANCE. The following screens allow the service provider/terminal operator access to their specific functions: 1. Language.
ENCRYPTING PIN PAD (EPP) UPGRADE SET TERMINAL PARAMETERS ACCESS INSTRUCTIONS: 1. From the MAIN MENU screen, select TERMINAL CONFIGURATION. 2. From the TERMINAL C ONFIGURATION screen, select S ET TERMINAL PARAMETERS. The Set Terminal Parameters option provides access to the following parameters: 1. Set Terminal ID. Allows entry of the terminal ID assigned by the host processor. 2. Reset Sequence #. Resets the sequence number printed on the journal printout and receipt to ‘00000000’.
SECTION 3 - MANAGEMENT FUNCTIONS CASSETTE SETUP ACCESS INSTRUCTIONS: 1. From the M AIN M ENU screen, select TERMINAL CONFIGURATION. 2. From the TERMINAL C ONFIGURATION screen, select S ET TERMINAL PARAMETERS. 3. From the SET TERMINAL PARAMETERS, select CASSETTE SETUP. DESCRIPTION: The following options will be available from the CASSETTE SETUP screen: 1. Relearn Bill Thickness. Enables you to force the dispenser to enter the learning mode. 2. International Currency.
ENCRYPTING PIN PAD (EPP) UPGRADE KEY MANAGEMENT ACCESS INSTRUCTIONS: 1. From the MAIN MENU screen, select TERMINAL CONFIGURATION. 2. From the TERMINAL C ONFIGURATION screen, select S ET TERMINAL PARAMETERS. 3. From the SET TERMINAL PARAMETERS, select KEY MANAGEMENT. DESCRIPTION: The KEY MANAGEMENT function provides access to the ATMs functions that control the method of entry for MAC Master Keys and/or PIN Master Keys, downloading the PIN Working Keys, and displaying the Check Digits.
SECTION 3 - MANAGEMENT FUNCTIONS 2. Password Required - When “Enter Master Keys” is selected, you will be prompted to enter two (2) passwords. If this is an initial setup, the default password is six (6) zeros (000000) for both. You will then be prompted to change passwords. 3. Change Password (Initial Setup) - The VEPP requires that no default password can be entered. If a user enters the default password, the VEPP will force the user to change them before they can enter keys. 4.
ENCRYPTING PIN PAD (EPP) UPGRADE 6. Enter Master Keys - This screen allows selection to enter the Master keys. You MUST enter PIN Master keys. DO NOT enter keys in the MAC Master keys unless processor directs. You MUST enter two (2) sets of keys (32 alpha/numerical). 7. Enter Keys - Enter the first (32) alpha/numerical key. The onscreen keypad legend describes the ATMs keypad for entering numbers and characters. Select “ENTER” using the display function key. 8.
SECTION 3 - MANAGEMENT FUNCTIONS MORE TERMINAL PARAMETERS ACCESS INSTRUCTIONS: 1. From the MAIN MENU screen, select TERMINAL CONFIGURATION. 2. From the TERMINAL C ONFIGURATION screen, select SET TERMINAL PARAMETERS. 3. From the SET TERMINAL PARAMETERS, select MORE. The More option provides access to the following parameters: 1. Adjust Contrast. Adjusts the contrast of the display. *Note: This function not available in Model 9100 ATMs. 2. Receipt Option.
ENCRYPTING PIN PAD (EPP) UPGRADE MORE (MORE) TERMINAL PARAMETERS ACCESS INSTRUCTIONS: 1. From the Terminal Configuration screen, select Set Terminal Parameters. 2. From the Set Terminal Parameters screen, select More. 3. From the More screen, select More. The More (More) option provides access to the following parameters: 1. Alarm Thresholds. Used to monitor the status of variopus parameters and determines at what point a notification message will be sent to Triton Connect. 2. Background Graphics.