
User guide
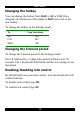
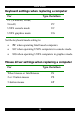
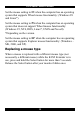
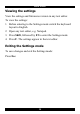
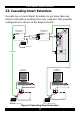

Table Of Contents
- CAT5 Smart KVM Extender User Guide
- Table of Contents
- Welcome
- Introduction
- The system components
- The KVM Extender units
- Pre-installation instructions
- The KVM Extender cables
- The 3 in 1 CPU cable
- Power supply
- The KVM Extender as an extender
- Giving 2 users access to 1 computer
- The KVM Extender as a 2-port KVM Switch
- Operating the KVM Extender
- Adjusting the picture
- Timeout
- Locking KVM control
- KVM Extender Settings mode
- Changing the hotkey
- Changing the Timeout period
- Enabling/disabling lock control
- Making advanced adjustments
- Replacing a computer
- Keyboard settings when replacing a computer
- Mouse driver settings when replacing a computer
- Replacing a mouse type
- Viewing the settings
- Exiting the Settings mode
- Cascading Smart Extenders
- Transmitter Power adapter
- Switching on
- Technical specifications
- KVM Extender configuration

CAT5 SMART KVM EXTENDER
13
Making advanced adjustments
The KVM Extender operates with:
• Windows, Linux, Novell or UNIX systems
• 2 or 3 or 5 button PS/2 mouse, Intellimouse or Wheel
mouse
When connected and switched on as set out above, the KVM
Extender automatically operates with the computer and mouse
types connected to it.
Replacing a computer
When a computer is replaced with a different computer type
while the KVM Extender is in use, we recommend turning the
new computer off before connecting it to the KVM Extender.
When turning the computers off is inconvenient, do the
following:
In the Settings mode adjust the KVM Extender keyboard and
mouse modes to be compatible with the new computer. See the
tables below.