
User guide
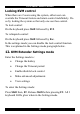
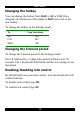
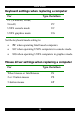
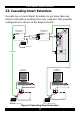

Table Of Contents
- CAT5 Smart KVM Extender User Guide
- Table of Contents
- Welcome
- Introduction
- The system components
- The KVM Extender units
- Pre-installation instructions
- The KVM Extender cables
- The 3 in 1 CPU cable
- Power supply
- The KVM Extender as an extender
- Giving 2 users access to 1 computer
- The KVM Extender as a 2-port KVM Switch
- Operating the KVM Extender
- Adjusting the picture
- Timeout
- Locking KVM control
- KVM Extender Settings mode
- Changing the hotkey
- Changing the Timeout period
- Enabling/disabling lock control
- Making advanced adjustments
- Replacing a computer
- Keyboard settings when replacing a computer
- Mouse driver settings when replacing a computer
- Replacing a mouse type
- Viewing the settings
- Exiting the Settings mode
- Cascading Smart Extenders
- Transmitter Power adapter
- Switching on
- Technical specifications
- KVM Extender configuration

USER GUIDE
10
11. Operating the KVM Extender
Once the system is connected there are 2 ways to switch
between the 2 computers / KVM workstations.
• On the Receiver press the Select button
Or
• On the keyboard press Shift followed by + or -.
When the Receiver works at its computer, its Control LED is
off. When the Receiver controls the Transmitter computer its
LED is on. The Receiver’s LED blinks when the Transmitter
controls its own computer.
At the Transmitter its Control LED remains off unless the
Receiver is working on the Transmitter computer.
Adjusting the picture
When the Receiver has control of the Transmitter’s computer,
adjust the picture quality where necessary using a small flat
screwdriver to turn the Picture adjuster located on the
Receiver’s rear panel. See Figure 4.
Timeout
When there are 2 workstations in the system you can gain
control at each workstation when the other workstation is idle
for 2 seconds. This timeout period can be altered in the settings
mode to between 1-99 seconds, as explained below.