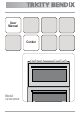
User Manual Cooker Model SG552/1DWN SG558/1
The following symbols are used in this user manual: WARNING! Important information concerning your personal safety and information on how to avoid damaging the appliance.
Important safety instructions These warnings are provided in the interests of your safety. Ensure that you understand them all before installing or using the appliance. Your safety is of paramount importance. If you are unsure about any of the meanings of these warnings please contact customer care. Installation • The appliance must be installed by an authorised person in order to guarantee that the local requirements of the gas supplier are considered.
• Always use oven gloves to remove and replace the grill pan handle when grilling. • Always support the grill pan when it is in the withdrawn or partially withdrawn position. • Always use oven gloves to remove and place food in the oven. • Ensure cooking utensils are large enough to contain foods to prevent spillage and boil over. • The handles of saucepans, which are smaller than the heated area on the hob, will become hot. • Ensure your hand is protected before handling the pan.
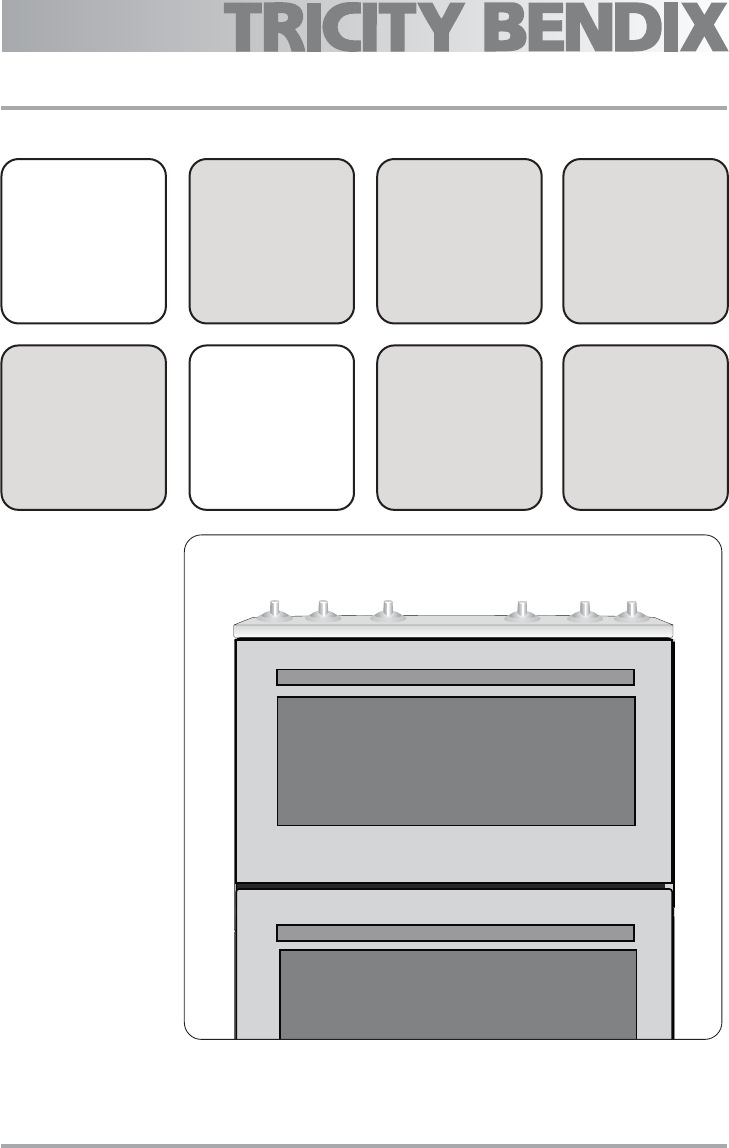
Product description Control panel Grill Main oven Controls and their functions Hob controls 1 Grill Electronic Main oven temperature control minute temperature control minder Hob controls Ignition switch 5
Before using the appliance Rating plate • This is usually situated on the front frame of the appliance and can be seen upon opening either the main or top oven door. Alternatively the rating plate may also be found on the back or top of some models (where applicable). • The appliance must be protected by a suitably rated fuse or circuit breaker. • The rating of the appliance is given on the rating plate. • Do not remove the rating plate from the appliance as this may invalidate the guarantee.
Grill and oven furniture • The following items of grill and oven furniture have been supplied with the appliance. If you require replacements of any of the items listed below please contact your local service force centre.
The electronic minute minder This oven has a 24-hour clock. In the event of an interuption of the electricity supply, the clock will stop and you will not be able to use the main oven. To set the time of day + + + When the electricity is first switched on, the display will show 12.00 and the time indicator neon will flash. Press the increase button until the correct time is showing. If necessary press the decrease button to help set the correct time.
IMPORTANT! This must be completed within 5 seconds of first pressing the selector control button If necessary press the decrease button to achieve the correct time interval. At the end of the timed period a sound will be heard intermittently for up to 2 minutes. + The sound can be stopped by pressing any button.
The hob The gas hob has different burner sizes to suit different types of cooking. To ensure maximum burner efficiency only use pots and pans with flat bases appropriate to the burner size used. The largest pan, which you should use on any burner, is 230mm (9") and the smallest pan should not measure less than 100mm (4"). WARNING! Ensure the pan supports are correctly fitted before using the hob.
WARNING! When lighting any burner, ensure that it is lit before you leave the appliance. When turning off a burner, ensure the flame has gone out before leaving the appliance. Things to note If you are having any difficulty lighting a hob burner turn all the hob controls off and make sure the burner parts have been replaced correctly. Hints and tips • Do not overfill pans or they will boil over. • Do not use pans with very heavy handles, which cause the pan to tip.
The grill IMPORTANT! CAUTION! Accessible parts may be hot when the grill is in use. Young children should be kept away. When you first operate the grill you may hear some sounds as the burner heats up, this is quite normal and is not a fault on the appliance. Using the grill Fully open the door before lighting the grill. Push in and hold the control knob, turn the knob to the highest setting. Press the ignition button immediately.
The grill pan and handle The grill pan has a removable handle. Attach and remove as described below To attach. Press the button on the handle with the thumb and insert the lip into the widest part of the bracket. Slide the handle towards the left and release the button. WARNING! Ensure the handle is properly located. Place the grill pan on the shelf so that the pan is positioned centrally beneath the grill.
Hints and tips • Most foods should be placed on the grid in the grill pan to allow maximum circulation of air to lift the food out of the fats and juices. • Adjust the grid and grill pan runner position to allow for different thicknesses of food. • Food should be thoroughly dried before grilling to minimise splashing. Brush lean meats and fish lightly with a little oil or melted butter to keep them moist during cooking.
The main oven Heat zones To fit the main oven shelves There are zones of heat within the oven. The temperature in the middle is the gas mark you have chosen. The top of the oven is slightly hotter and the lower shelf slightly cooler. The base of the oven is quite a lot cooler. You can make use of these heat zones when you are cooking foods requiring different temperatures all at the same time.
To turn the main oven off Turn the control knob to the off position. This is shown by a 0. Things to note • The oven light will illuminate. • The cooling fan for the controls may operate after a time. Hints and tips • Arrange the shelves in the required positions before switching the oven on. Shelf positions are numbered from the top downwards. 1 2 3 4 5 • Stand dishes on a suitably sized baking tray on the shelf to prevent spillage onto the oven base and to help reduce cleaning.
Main oven cooking chart The temperature and baking times are for guidance only, as these will depend on the consistency of the various ingredients and the number, type and size of baking trays or tins used. It may be necessary to increase or decrease the temperature to suite individual preference or requirements. For best results, moist recipes (for example pizza, fruitflans etc) should be baked on one level.
Main oven cooking chart continued Gas mark Pos Approximate cook time (m) Choux Pastry 6 2 00:30 – 00:40 Éclairs / Profiteroles 5 2 00:20 – 00:35 Flaky Pastry 6 2 00:25 – 00:45 Mince Pies 5 2+4 00:15 – 00:25 Pasta Lasagne etc.
Roasting chart Meat Gas mark Cooking time Beef/ Beef boned 5 20-35 minutes per ½kg (1lb) and 20-35 minutes over Mutton/Lamb 5 25-35 minutes per ½kg (1lb) and 25-35 minutes over Pork/Veal/Ham 5 30-40 minutes per ½kg (1lb) and 30-40 minutes over Chicken 5 20-25 minutes per ½kg (1lb) and 20 minutes over Turkey/Goose 5 20-25 minutes per ½kg (1lb) up to 3½kg (7lb) then 10 minutes per ½kg (1lb) over 3½kg (7lb) Duck 5 25-35 minutes per ½kg (1lb) and 25-30 minutes over Pheasant 5 35-40 minute
Slow cook The slow cook setting gives a very low heat in the oven. It is particularly useful when you are cooking soups, stews and casseroles because the long slow cooking will make cheaper, tougher cuts of meat more tender. Some foods such as pastry and biscuits are not suitable for slow cooking because the temperature is too low. Cover all food during cooking to prevent it from drying out. You can uncover food for the last half hour if it is normally served golden brown.
Food preparation – slow cooking Joints of meat and poultry Milk puddings • Do not cook meat joints over 2.7kg (6lb). • Do not cook poultry over 2 kg (4lb 8oz). • Cook on the middle shelf of the oven or above. • Cook stuffing separately. • Cook for at least six hours. • Only cook joints of pork if you can make sure, by using a meat thermometer, that the temperature inside the joint is at least 88°C. • For good air circulation always stand joints on a rack in a roasting tin or casserole.
Care and cleaning WARNING! Before cleaning always allow the appliance to cool down before switching off at the electricity supply. Cleaning materials • Before using any cleaning materials on your appliance, check that they are suitable and that their use is recommended by the manufacturer. • Cleaners that contain bleach should not be used as they may dull the surface finishes. Harsh abrasives and scourers should also be avoided.
Pan support Cap • The vitreous enamel main oven base and grill compartment base can be cleaned using normal oven cleaners with care. Ensure that the manufacturers instructions are followed and that all parts are well rinsed afterwards. WARNING! Hole Crown Location peg Aerosol cleaners must not come into contact with elements/burners, door seal, or any painted finishes as this may cause damage.
To remove the inner glass Open the oven door to gain access to the top of the oven door. Top Oven: • Carefully push the trim towards the oven and lift off. • Hold the door glass securely in place with one hand before sliding the glass out with the other hand. Main Oven: • Carefully push the trim towards the oven. • Hold the door glass securely in place with one hand before sliding the glass out with the other hand.
Replacing an oven light bulb • The type of bulb required is a 300°C 25 watt small Edison Screw. WARNING! Disconnect the appliance from the electricity supply before replacing the bulb. • • • • • • • Make sure the appliance is cool before replacing the bulb. Open the door and remove the shelves. Remove the glass cover by turning it to the left. Unscrew the bulb by turning it to the left. Fit a new bulb and then replace the glass bulb cover. Refit the shelves.
Troubleshooting • Maintenance must only be carried out by a competent/qualified person. Do not try to alter/modify the appliance yourself, as this could be dangerous. • We recommend that your appliance has an annual gas safety check carried out by our approved service organisation. • Please carry out the following checks on your appliance before calling a Service Engineer. It may be that the problem is a simple one that you can solve yourself without the expense of a service call.
PROBLEM POSSIBLE SOLUTION The hob burners will not light. Ensure the burner parts have been placed correctly. Check that there is not a problem with your gas supply. You can do this by making sure the other gas appliances such as central heating or gas fires are working. Due to the design of the burner the flame can appear to be orange/yellow (flame disturbance) in certain areas of the burner this is a natural occurrence.
Technical data Dimensions Height: Width: Depth: Weight: Space for fixing at hotplate level Space for fixing above hotplate level Minimum space above hotplate level Minimum distance from rear wall 900mm (nominal) 600mm (nominal) 600mm (to front of door panel) 64Kg 2mm minimum clearance. See important note ‘Location of appliance’. 650mm (If a cooker hood is fitted refer to the cookerhood installation instructions). 5mm (spacer given by pressed spacer on vent panel).
Technical data Hotplate Heat input Injector marking Grill Heat Input Injector marking Main oven Heat Input Injector marking Thermostat bypass marking General Ignition Spark gap Gas category CAT. I2ELL Natural Gas R.H.F. 1.0kW (3412 Btu/h) 070 Natural Gas 2.7kW (9212 Btu/h) 120 Natural Gas 1.9kW (6483 Btu/h) 099 R.H.R. 1.9kW (6483 Btu/h) 096 L.H.R. 1.9kW (6483 Btu/h) 096 L.H.F. 2.9kW (9895 Btu/h) 119 075 (H.T.
Installation instructions Important – safety requirements Provision for ventilation This appliance is suitable for installing on gas I2ELL and I2E. To install the appliance on gas supply of I2E all injectors must be changed to those supplied with the appliance. INJECTOR MARKING INJECTOR MARKING I2ELL I2E RHF 074 070 RHR 110 096 LHF 110 096 LHR 133 119 Grill 137 120 Oven 112 99 Check that this model is suitable for the type of supply available.
Moving your appliance • You may damage some soft or badly fitted floor coverings when you move the appliance. The floor covering under the appliance should be securely fixed so it does not ruck up when you move the appliance across it. Alternatively you could remove the floor covering. This appliance is heavy and care must be taken when moving it. Do not try to move the appliance by pulling the door handles. • To move the appliance, open the grill door.
• Curtains must not be fitted immediately behind the appliance or within 150mm of the sides of the hob. If fitted next to or between two base units a minimum space of 2mm must be left between each unit and the sides of the appliance. The levelling feet fitted to the appliance will achieve a nominal height to hob of 900mm + 20mm. Leveling the appliance • Adjustment to suit floor conditions or height is obtained by rotating clockwise or anti clockwise the feet at the front and rear of the appliance.
IMPORTANT! The fuse cover must be refitted when changing the fuse. In the event of losing the fuse cover the plug must not be used until a replacement fuse cover has been obtained and fitted. Connecting to gas supply • This appliance is designed to be installed with an appliance flexible connection only. • Supply piping should not be less than R3/8. Connection is made to the Rc ½ (½” B.S.P.) female threaded entry pipe located just below the hob level on the rear left hand side of the appliance.
Pressure testing 1. 2. 3. 4. 5. The Rapid injector is used as a pressure test point. Connect the pressure gauge to the Rapid injector. Check the supply pressure by turning the Rapid burner on and one other hotplate burner full on and light the appropriate burner. The pressure should be 20mbar. Turn off the taps, disconnect the pressure gauge. Check operation of each hotplate burner. Checking the grill • Place the grill pan containing the grid, with the handle attached, into the grill compartment.
Environment After installation please dispose of the packaging with due regard for safety and the environment. Your local authority can arrange this. Energy save mode By switching off the time display you can save energy. Switching off the time display Press and hold any two buttons until the display switches off. Switching on the time display Press any button to switch on the display. IMPORTANT! The display can only be switched off if none of the timer functions are in use.
Guarantee / Customer care This appliance is guaranteed by Electrolux in each of the countries listed below for the period specified in the appliance guarantee or otherwise by law.
Great Britain Hellas Hrvatska Ireland Italia Latvija Lituania Luxembourg Magyarország Nederland Norge Österreich Polska Portugal +44 8705 929 929 +30 23 10 56 19 70 +385 1 63 23 338 +353 1 40 90 753 +39 (0) 434 558500 +37 17 84 59 34 +370 5 27 80 609 +35 2 42 43 13 01 +36 1 252 1773 +31 17 24 68 300 +47 81 5 30 222 +43 18 66 400 +48 22 43 47 300 Addington Way, Luton, Bedfordshire LU4 9QQ 4, Limnou Str., 54627 Thessaloniki Slavonska avenija 3, 10000 Zagreb Long Mile Road, Dublin 12 C.
Notes 38
Notes 39
www.electrolux.com www.tricity-bendix.co.