
Operation Manual


6.2 First Steps
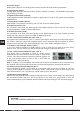
Press the button on the remote control or on the receiver.
"ON" appears on the front display of the receiver and the
language selection menu appears on your TV.
Use the and buttons on the remote control or on the
receiver to select the language of your choice. Then press the
OK button to start "Auto Search" (Automatic Channel Search)
GB
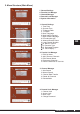
In the "General Settings" menu you can perform individual settings that are related to the local
time zone (summertime included), your TV set, and desired language selections. For
adjustments, please use the and buttons and see the explanations at the bottom of the
menu screens. Leave this menu by pressing EXIT.
6. Getting Started
This section explains some settings you will need to make before using the receiver for the first
time.
6.1 Connecting the DVB-T Receiver
Mains Supply
This unit is designed for any common mains voltage (95 to 250 volts AC, no adjustment needed).
TV Set
Connect the TV SCART connector on this DVB-T receiver to the SCART connector of your TV set,
using a commonly available 21-pole SCART cable.
Antenna
Connect the coaxial cable from your antenna system (indoor or outdoor antenna) to the RF IN 1
connector of the DVB-T receiver.
For details, please refer to section 4.3 "Rear Panel Connections".
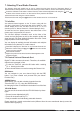
If the unit should fail to find available TV channels it
automatically turns to the "Main Menu".Check the active
antenna, the positioning and the cable connection to the
device Select "Channel Manager" in the Main Menu and
perform "Auto Search" once again.
After having successfully searched for available TV channels
the unit turns to TV viewing mode.
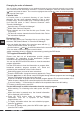
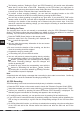
5. System Information
1. Date
2. Software version
3. Firmware
( OTA Software Update)
DVB T1 TWIN