
Installation User Manual

SeCtion ii:
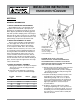
inStallation oF BuShing and ProPeller
1. inSerting BuShing
Insert bushing loosely into propeller. Do not press
or drive. Start capscrews by hand, turning them
just enough to engage threads in tapped holes on
propeller. Do not use a wrench at this time. The
bushing should be loose enough in the propeller to
move slightly.
note: DO NOT USE OIL, GREASE, OR ANTISIEZE
COMPOUNDS ON BUSHING SURFACES OR HUB
BORE.
2. PlaCing aSSeMBlY onto ShaFt
Be sure shaft and keyway are clean and smooth.
Check key size with both shaft and bushing keyway.
Slide propeller and bushing assembly onto shaft,
making allowance for end play of shaft to prevent
rubbing. Do not force propeller and bushing onto
shaft. If it does not go on easily, check shaft, bushing,
and key sizes.
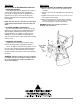
3. torquing CaPSCrewS
Tighten capscrews progressively with a torque
wrench. Set torque value using guide in Section I;
Part 3 - B. Tighten capscrews using quarter to half
turns at a time, moving around the bushing flange in
the same direction until desired torque is reached.
Torque should not exceed the values recommended
by factory.
warning: DO NOT ATTEMPT TO PULL BUSHING
FLANGE FLUSH WITH HUB END; THERE SHOULD
BE A CLEARANCE GAP WHEN TIGHTENED TO
SPECIFIED TORQUE.
SeCtion iii:
reMoVing ProPeller aSSeMBlY FroM ShaFt
1. Remove all three capscrews from propeller and hub
assembly.
2. Start two capscrews into threaded holes in the bushing
flange.
3. Tighten each bolt part of a turn, in succession, to force
the propeller off the bushing.
4. Remove the bushing from the shaft. If the assembly
has been in place for some time it may be necessary
to use a wheel puller to remove the bushing.
warning: NEVER USE A WHEEL PULLER TO
REMOVE THE PROPELLER.