
Operation Manual


Installing ServerProtect
2-23
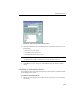
12. Type the Information Server password, and then click OK. This password was
assigned during Information Server installation.
FIGURE 2-18. Input ServerProtect Information Password window
The Start Copying Files window appears. Verify the information listed on the
screen.
13. Click Next to continue with the setup program. ServerProtect now starts copying
all program components and starts all services. After all program components
have been copied and all services have started successfully, the Setup Complete
screen appears. See Figure 2-12.
14. Click Finish. A ServerProtect icon ( ) will be added to your Windows taskbar,
notifying you that the scanner is on.
Installing a Normal Server from the Management Console
The Information Server the Management Console is logged on to, should already be
managing at least one Normal Server. The existing server will be used as a source for
installing the new Normal Server, so it must be of the same type as the one that will
be installed. For example, NetWare servers need a ServerProtect for NetWare source.
If there is only one existing Normal Server of the same type as the server to be
installed shown in the server tree, it is automatically selected as the source server.
To install a Normal Server from the Management Console:
1. Select the domain that you want to add a server to from the domain browser tree.
2. Do one of the following:
• Select Domain > Install New SPNT(s) or Domain > Install New SPNW(s)
(either by IPX or IP) from the main menu