OPERATING INSTRUCTIONS SmartPhone – Android™ 2.
Reading Before Proceeding . . . . . . . . . . . . . . . . . . . . . . . . . 1 Safety Precautions . . . . . . . . . . . . . . . . . . . . . . . . . . . . . . . . . . . . . . . 1 Notice and Copyright. . . . . . . . . . . . . . . . . . . . . . . . . . . . . . . . . . . . . . 4 Getting to Know Your Mobile Phone . . . . . . . . . . . . . . . . . . 7 What's in the Box . . . . . . . . . . . . . . . . . . . . . . . . . . . . . . . . . . . . . . . . 7 Mobile Phone View . . . . . . . . . . . . . . . . . . . . . . .
Importing Contacts from a SIM Card. . . . . . . . . . . . . . . . . . . . . . . . . Adding a Contact. . . . . . . . . . . . . . . . . . . . . . . . . . . . . . . . . . . . . . . . Searching for a Contact. . . . . . . . . . . . . . . . . . . . . . . . . . . . . . . . . . . Editing a Contact . . . . . . . . . . . . . . . . . . . . . . . . . . . . . . . . . . . . . . . . Viewing Contact Details . . . . . . . . . . . . . . . . . . . . . . . . . . . . . . . . . . Communicating with Your Contacts . . . . . . . .
Enjoying Music . . . . . . . . . . . . . . . . . . . . . . . . . . . . . . . . . . . . . . . . . 98 Listening to FM Radio . . . . . . . . . . . . . . . . . . . . . . . . . . . . . . . . . . . 102 Google Services . . . . . . . . . . . . . . . . . . . . . . . . . . . . . . . . . 106 Creating a Google Account . . . . . . . . . . . . . . . . . . . . . . . . . . . . . . . Using Gmail. . . . . . . . . . . . . . . . . . . . . . . . . . . . . . . . . . . . . . . . . . . Using Talk . . . . . . . . . . . . . . . . .
Setting the Display . . . . . . . . . . . . . . . . . . . . . . . . . . . . . . . . . . . . . Setting Ringers . . . . . . . . . . . . . . . . . . . . . . . . . . . . . . . . . . . . . . . . Setting Phone Services . . . . . . . . . . . . . . . . . . . . . . . . . . . . . . . . . . Setting Text-to-Speech . . . . . . . . . . . . . . . . . . . . . . . . . . . . . . . . . . Protecting Your Mobile Phone. . . . . . . . . . . . . . . . . . . . . . . . . . . . . Managing Applications . . . . . . . . . . . . . . . .
Reading Before Proceeding Safety Precautions Please read the safety precautions carefully to ensure the correct use of your mobile phone. For detailed information, refer to the section “Warnings and Precautions” on page 162. Do not crash, throw, or puncture your mobile phone. Avoid the falling, squeezing, and bending of your mobile phone. Do not use your mobile phone in a moist environment, such as the bathroom. Prevent your mobile phone from being soaked or washed in liquid.
Follow any rules or regulations in hospitals and health care facilities. Switch off your mobile phone near medical apparatus. Switch off your mobile phone in aircraft. The phone may cause interference to control equipment of the aircraft. Switch off your mobile phone near highprecision electronic devices. The phone may affect the performance of these devices. Do not attempt to disassemble your mobile phone or its accessories. Only qualified personnel are allowed to service or repair the phone.
Do not put your mobile phone in a hightemperature place or use it in a place with flammable gas such as a gas station. Keep your mobile phone and its accessories away from children. Do not allow children to use your mobile phone without guidance. Use only approved batteries and chargers to avoid the risk of explosions. Observe any laws or regulations on the use of wireless devices. Respect others’ privacy and legal rights when using your wireless device.
Notice and Copyright Copyright © Huawei Technologies Co., Ltd. 2010 & TrekStor GmbH. All rights reserved. No part of this document may be reproduced or transmitted in any form or by any means without prior written consent of Huawei Technologies Co., Ltd. The product described in this manual may include copyrighted software of Huawei Technologies Co., Ltd. and possible licensors.
Notice Some features of the product and its accessories described herein rely on the software installed, capacities and settings of local network, and may not be activated or may be limited by local network operators or network service providers. Thus the descriptions herein may not exactly match the product or its accessories you purchase. Huawei Technologies Co., Ltd. reserves the right to change or modify any information or specifications contained in this manual without prior notice or obligation.
WARRANTIES OF ANY KIND, EITHER EXPRESS OR IMPLIED, INCLUDING BUT NOT LIMITED TO, THE IMPLIED WARRANTIES OF MERCHANTABILITY AND FITNESS FOR A PARTICULAR PURPOSE, ARE MADE IN RELATION TO THE ACCURACY, RELIABILITY OR CONTENTS OF THIS MANUAL. TO THE MAXIMUM EXTENT PERMITTED BY APPLICABLE LAW, IN NO CASE SHALL HUAWEI TECHNOLOGIES CO., LTD. BE LIABLE FOR ANY SPECIAL, INCIDENTAL, INDIRECT, OR CONSEQUENTIAL DAMAGES, OR LOST PROFITS, BUSINESS, REVENUE, DATA, GOODWILL OR ANTICIPATED SAVINGS.
Getting to Know Your Mobile Phone What's in the Box Look in your mobile phone box and you will find much more in there than your new mobile phone– in fact, you will have all these handy items: • Mobile phone • Battery • Charger • USB cable • Headset • Quick start guide • Safety Information 7 Getting to Know Your Mobile Phone
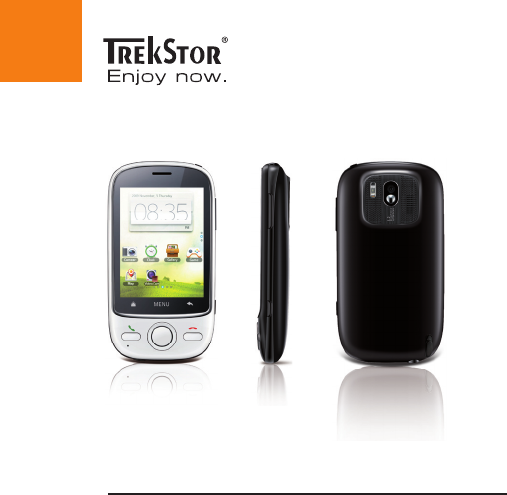
Mobile Phone View Key Features at a Glance 1 12 13 18 14 15 2 16 11 10 9 3 8 6 7 4 17 5 19 1 Earpiece 2 Volume control keys 3 Capture key 4 End key 5 Navigation key 6 OK key 7 Send key 8 Microphone 9 Home key 10 MENU key 8 Getting to Know Your Mobile Phone
11 Back key 12 Power key 13 Charging/Data interface 14 Camera flash 15 Camera 16 Speaker 17 Stylus 18 Wrist strap opening 19 Headset jack Key Functions at Your Fingertips • Press to power on your mobile phone. • Press and hold to open the Phone options menu when the phone is Power key unlocked. • Press to lock the screen when your mobile phone is on. Send key Press to go to the Call log screen.
MENU button • Press to open the menu on an active screen. • Press and hold to open the keyboard so you can perform quick searches. Navigation key Press to navigate to selectable items on the screen. OK key Press to select a highlighted item or action. Home button Press to return to the Home screen. Back button End key • Press to return to the previous screen or exit the application you are running. • Press to hide the onscreen keyboard • Press to hang up a call.
Getting Started with Your Mobile Phone Installing the SIM Card It takes just two simple steps to install your SIM card: 2 1 1. Remove the battery cover. 2. Insert the SIM card as shown in the diagram. Installing the Battery 1 2 Note: Ensure that the printed side of the battery faces upward.
1. Remove the battery cover. 2. Angle the edge labeled a (with the contacts) into the bottom end of the battery slot. 3. Push down the edge labeled b until the battery clicks firmly into place. 4. Replace the battery cover. Charging Your Mobile Phone Before charging the battery, make sure that the battery has been properly inserted into your mobile phone.
1. Connect your USB cable to your mobile phone, as shown in a. 2. Connect the other end of the cable to the charger, as shown in b. 3. Plug the charger into an electrical outlet. The phone starts charging, with the charging icon displayed in animation on the screen. Powering On or Off Your Mobile Phone Powering on Your Mobile Phone Press to power on the mobile phone. The first time you do this, you will be asked to sign in to your account and set up your mobile phone.
Setting up Your Mobile Phone The first time you power on your mobile phone, the phone displays a setup wizard to instruct you on how to set up the phone. The setup wizard includes the following parts: • Using the onscreen keyboard • Setting up your accounts • Important settings 1. Touch the Android image to learn a few important things to get the most out of your phone. 2. Touch Begin to start learning how to use the onscreen keyboard. 3.
6. You'll be prompted whether to enable the Google location service. This service gives you basic information about your location without using GPS. Then touch Next to go to the next step. 7. Set the date and time. If you want to set the time manually rather than use the system time, clear the Automatic check box. Touch Finish setup to finish and go to the Home screen. Powering off Your Mobile Phone 1. Press and hold to open the Phone options menu. 2. Touch Power off. 3.
responds. For example, you can touch and hold the screen to open the options menu of the active screen. • Flick: Move your finger or stylus either vertically or horizontally across the screen. For example, you can flick left and right to switch between pictures. • Drag: Touch and hold the desired item with your finger or stylus. To move an item, drag it to any part of the screen. For example, you can drag an icon on the screen to move or delete it.
Unlocking the Screen 1. Press , , or to wake up the screen. 2. Drag the lock icon to the right. The last screen you were on opens. Note: If you have set up a screen unlock pattern, you will be prompted to draw the pattern on the screen to unlock it.
Home Screen The Home screen allows you to put all the items you need in one place. Getting to Know the Home Screen 1 10:23 2 3 1 Notifications bar: displays reminders and status icons on your phone. Flick down to open the notifications panel.
2 3 Display area: shows the operation and display areas of your phone. Interface switching buttons: from left to right, include the Main Menu, Dialer, Contacts, Messaging, and Zoom buttons. Notification and Status Icons The notifications panel at the top of the screen contains icons that tell you about messages and phone status. To view your notifications, touch the notifications panel and drag it down.
Downloading data Uploading data Roaming Signal strength No signal Airplane mode Synchronizing data Sync failed Bluetooth is on Connected to another Bluetooth device Wi-Fi is on Connected to a Wi-Fi network GPS is on GPS connected More undisplayed notifications No SIM card Sound off Loudspeaker on Vibrate mode Mobile phone is mute GPRS connected GPRS in use 20 Getting to Know Your Mobile Phone
EDGE connected EDGE in use 3G connected 3G in use Battery is full Battery is very low Battery is charging Alarm is set Music is playing New calendar reminder New email New message New voicemail New instant message Notification Panel Your mobile phone will alert you when you receive a new message or when an event in your calendar is due; for example, when Call forwarding is activated.
Opening the Notifications Panel 1. When a new notification icon appears on the notification bar, touch and hold the notification bar, and then flick down to open the notification panel. 2. On the notification panel, you can do the following: • Touch a notification to open the related application. • Touch Clear to clear all notification. Closing the Notification Panel Touch and hold the bottom of the panel. Then flick up to close it. Customizing the Home screen Adding a New Screen Item 1.
Moving a Screen Item 1. Touch and hold an icon on the Home screen until the icon magnifies and the mobile phone vibrates. 2. Without lifting your finger or stylus, drag the icon to the desired position on the screen, and then release it.
Removing a Screen Item 1. Touch and hold an icon on the Home screen until the icon magnifies and the mobile phone vibrates. 2. Without lifting your finger or stylus off the item, drag it to the trash can. The item and the trash can will turn red, meaning the item is ready to be removed.
3. Release the item to remove it from the Home screen. Canvas Getting to Know the Canvas The Canvas is like a desktop. You can expand it and customize it. You can: • Expand the screen display in any direction. • Customize the Home screen. • Create and arrange shortcuts.
• Create and arrange widgets. • Create and arrange folders. • Define and switch between wallpapers. Expanding the Canvas To expand the Canvas, touch and hold an icon, drag it to the edge of the Canvas, and then release it. When you move an icon to an edge of the screen to expand, you will see the following icons displayed on the sides of the Canvas.
Move the item. Expand the desktop. The desktop cannot be expanded at this time. • To browse through a lot of items on the screen, press the OK key or touch on the Canvas. • To browse on the zoom-out screen, flick vertically or horizontally or press the Navigation key. • To zoom in on a selected area, touch it or press the OK key. • To switch to other screens, touch the screen and flick your finger vertically or horizontally.
• When browsing the Canvas, press the Back button to quickly return to the previous screen you were on.. 10:23 a.m. Widgets A widget works as a shortcut to let you preview or use an application. You can stick widgets on your desktop as icons or preview windows. Besides the default widgets installed on your phone, you can also download more from Android Market. To add a widget to the Canvas: 1. Touch and hold the blank area on the Canvas screen.
2. In the displayed menu, select Android widgets or Emotion widgets in which contains the widget you want to use. 3. Touch your desired widget. Other widgets Besides the widgets mentioned previously, other widgets are available for you to customize the Home screen to fit your needs, interests, and personality. Folders Creating a Folder 1. Touch and hold the screen to open the Add to Home screen menu, and then select Folders. 2. Choose one of various types of folders to create a folder. 3.
Note: When the move mode is activated, the item magnifies and the phone vibrates. Renaming a Folder 1. Touch the folder to open it. Then touch and hold the title bar of the folder to open the Rename folder dialog box. 2. Enter the new folder name, and then touch OK. Changing the Wallpaper 1. On the Home screen, press MENU key , and then touch Wallpaper. 2. Do any of the following: • Touch Pictures to select a picture and set it as the wallpaper.
Changing a Theme Your phone is preset with four themes. When you feel bored with one theme, change it to another one. 1. On the Home screen, press MENU key , and then touch Themes. 2. Touch the theme you want to use. Your theme will be changed automatically. Accessing the Last Six Applications with Task List 1. On any screen, press and hold the to open the Task List menu. You will pull up your six most recently used applications. 2. To use an application, touch the appropriate icon.
Using the microSD Card Installing the microSD Card 1. Remove the battery cover. 2. Insert the microSD card as shown in the diagram. Note: When inserting the microSD card, ensure that the golden contact faces downward. Using the microSD Card as USB Mass Storage To transfer all your favorite music and pictures from your PC to your mobile phone’s microSD card, set the microSD card as the USB mass storage. 1. Open > Settings.
2. Scroll down the screen, and then touch General info & option to select the USB Mass Storage check box. 3. Press the three times to return to the Home screen. 4. Connect your mobile phone to your PC with the USB cable. Your PC will detect the microSD card as a removable disk. You can now transfer files from your PC to your mobile phone’s microSD card. Note: When your microSD card acts as USB mass storage, your mobile phone will not use this memory space.
Customizing Your Mobile Phone Settings To personalize your mobile phone, you can alter the settings. To open the Settings screen, do either of the following: • Touch > Settings . • On the Home screen, press MENU key , and then touch Settings. Wireless & networks Alter the wireless connections of your phone, such as Wi-Fi and Bluetooth, enable the Airplane mode, or set options for roaming, networks, and more.
Location & security Select the GPS location source to use, set the screen unlock pattern, or enable the SIM card lock. Applications Manage applications and installation of new programs. Accounts & sync Select the master synchronization server. You can also set up automatic synchronisation of Gmail, Calendar, and Contacts, and account switching. Privacy Restore your mobile phone to factory settings and clear the data on the phone.
Language & keyboard Set the language and region where you want to use your phone. You can also set onscreen keyboard options. Accessibility Enable or disable the accessibility plug-ins. Text-tospeech Set text-to-speech parameters, including the language and speech rate. Date & time Set the date, time, time zone, and date or time format. Displays signal strength, battery power, your network name, and the About phone legal and software information on your phone.
Calling To place a phone call, you can dial a number or touch a number in your contacts list, on a Web page, or from a document that contains a phone number. When you are on a call, you can either answer incoming calls or send them to your voicemail box. You can also set up conference calls with several participants. Making a Call To make a call, you can use the Dialer application, or select a number from Contacts or Call log.
Making a Call with the Dialer 1. Touch > Dialer to display the dialer. If you are already working with Contacts or Call log, touch the Dialer tab. 2. Touch the appropriate numeric keys to enter the phone number. Tip: Your mobile phone supports the SmartDial function, that is, when you touch numbers on the dialer, the phone automatically searches among your contacts and lists the matching results based on the accuracy.
Dialing Panel 1 2 3 8 4 6 7 5 1 Touch to switch between Dialer, Call log, Contacts, and Favorites. 2 Displays the number you enter. 3 Touch to enter the number.
4 Touch to make a voicemail. 5 Touch to dial a number. 6 Touch to erase each subsequent digit of a number. Touch and hold to erase the entire number. 7 Touch and hold to enter +. 8 Touch to display all the matching contacts. Making a Call from Contacts 1. Touch > Contacts to display the contact list. If you are already working with Dialer or Call log, touch the Contacts tab. 2. In the list, touch the contact you want to call. 3. Touch to dial the phone number.
Making a Call from Call log 1. Touch > Call log to display the call log. If you are already working with Contacts or Dialer, touch the Call log tab. 2. Touch to the right of the log entry to dial. Tip: If you touch and hold the log entry, the options menu will open. Answering and Rejecting a Call Answering an Incoming Call When you receive a phone call, the incoming call screen opens with the caller ID and any additional information about the caller that you have entered in Contacts.
123456789 Ending a Call During a call, press to hang up. Rejecting an Incoming Call • Press • Drag the Calling to reject a call. to the left.
123456789 Other Operations During a Call Making a Conference Call If you receive a new call while you are already on a call, you can connect the second call to the call you are on. This feature is known as conference calling. You can also set up a conference call with multiple callers.
Note: Contact your network operator to learn whether it supports conference calls and how many participants you can add. 1. To initiate a conference call, dial the number of the first person to be on the call. While you are on that call, press then touch Add call. MENU key , and 2. Enter the phone number of the person you want to join the , or select someone from your Call conversation and press log or Contacts. The first call is automatically placed on hold. 3.
6. To end the conference call and disconnect everyone, press . Switching Between Calls If you receive a new call while you are already on a call, you can switch between the two calls. 1. While you are on two calls, press calls. MENU key , and then touch Swap 2. The current call is placed on hold and you are connected to the other call. Using Call log The Call log contains a list of calls that you have dialed, received, or missed.
2. Touch and hold the entry you want to add. 3. Touch Add to contacts in the options menu. 4. Touch Create new contact or scroll through the contact list and touch an existing contact name. Using the Airplane Mode Some locations may require you to turn off your phone’s wireless connections. Rather than powering off your phone, you can place it in Airplane mode. 1. Press and hold . 2. Touch Airplane mode in the options menu.
Contacts The Contacts application enables you to save and manage information such as phone numbers and addresses of your contacts. After you save the contact information on your mobile phone, it gives you an easy access to the people with whom you want to communicate. Opening the Contacts Application If you have a new mobile phone and have not yet added any contacts,Contacts displays a message with hints on how to start adding contacts to your mobile phone. • Touch • Press > Contacts.
Importing Contacts from a SIM Card When you open the Contacts application for the first time, you are asked whether to import contacts from the SIM card to your phone. Select OK to import the contacts, or Cancel to import them later. 1. In the contacts list, press contacts. MENU key , and then touch Manage 2. Touch Copy from SIM card. Wait for the SIM card contents to be loaded. 3. Select the check box of the contact you want to import. Touch Deselect all or Select all. 4. Touch Copy. 5.
Tip: In the contacts list, you can touch to add a new contact. 2. If you have more than one account with contacts, touch the account to which you want to add the contact. 3. Enter the contact's name, and then add any detailed information such as phone number or address. 4. When you are finished, touch Done to save the contact information.
Searching for a Contact 1. In the contacts list, press MENU key , and then touch Search. Tip: In the contacts list, you can also touch to search for a contact. 2. Enter the name of the contact for which you are searching. As you type, contacts with matching names appear below the search box. Editing a Contact You can always make changes to the information you have stored for a contact. 1.
3. Make the desired changes to the contact information, and then touch Done. To cancel all changes you made to the contact information, touch Cancel.
1 Touch the Picture Frame icon to select a picture to display next to the name in your list of contacts and in other applications. Touch to open a menu with preset labels, such as 2 Mobile and Work for a phone number, or touch Custom in the menu to create your own label. 3 Touch to remove the entry from that category. 4 Touch to add more than one entry for that category. 5 Touch to display more text boxes for entering the name details such as middle name and last name.
Contact details 5 1 4 3 2 1 Touch an icon to open Quick Contact. 2 Touch an address to view it on maps. 3 Touch an icon to call, send a message, chat, and so on.
4 Touch the History tab to view a list of interactions you have had with this contact. 5 Touch to add the contact to your favorites. Communicating with Your Contacts From the Contacts or Favorites tab, you can quickly call or send a text (SMS) or multimedia message (MMS) to a contact’s default phone number. You can also open details to view a list of all the ways you can communicate with that contact. This section describes how to communicate with a contact when you view your contacts list.
Note: The icons available depend on the information you have for the contact and the applications and accounts on your mobile phone. Quick Contact for Android As you build up your list of contacts on your phone, you can use Quick Contact for Android in many applications to quickly start a chat, email, or text message, to place a call, or to locate your contacts. Quick Contact for Android is a special icon that you can touch to open a bubble with options for quickly initiating a connection to that contact.
1 3 2 1 A bubble with icons for all the ways you can communicate with the contact. If there are more icons than can fit in the bubble, drag the icons left or right to view them all.
2 Quick Contact icon with a picture frame. Touch to open a bubble with icons for all the ways you can communicate with the contact. 3 Touch an icon to open its application, and you can start communicating with your contact right away. Communicating with a Contact 1. In the contacts list, touch the contact that you want to communicate. 2. In the contact’s details screen, touch the green icon to the right of the number to call or send messages. Deleting a Contact 1.
Using the Onscreen Keyboard Displaying the Keyboard Panel To enter text, use the onscreen keyboard. Some applications open the keyboard automatically. In others, touch a text field to open the keyboard. To open the keyboard, do one of the following: • Press and hold MENU key to display the keyboard. • Touch the space where you want to write text to display the keyboard. Press to hide the keyboard. Tip: Touch and hold the space where you usually write your text to open the options menu.
3. Select the input method. The keyboard panel will be displayed automatically.
1 Displays the list of candidate words. Touch a word to insert it into your text. If word prediction is enabled, the suggested word is highlighted. 2 Touch to change from uppercase to lowercase. 3 Touch to enable word prediction. 4 Touch to set the language for your mobile phone. To select a language that your mobile phone > Settings > Language & supports, touch keyboard > TouchPal > Select languages. 5 Touch to insert a space. 6 Touch to switch to the numbers and symbols keyboard panel.
9 Touch to see more candidate words. Switching the Keyboard Layout You can switch the keyboard layout only when TouchPal is selected. There are three keyboard layouts for you to choose: Full QWERTY, 12-Key PhonePad, and CooTek T+. Note: When you switch the keyboard layout, you need to touch and hold anywhere on the panel and then flick the panel to the edge of the screen.
1 Full QWERTY 2 CooTek T+ 3 12-Key PhonePad Using the Android Keyboard 1 5 2 4 3 62 Using the Onscreen Keyboard
1 Touch to change from lowercase to uppercase. 2 Touch to change from text mode to symbol/ number mode. Touch again to change back. 3 Touch to insert a space. 4 Touch to insert a smiley in your text. 5 Touch to delete a character to the left of the cursor. Touch and hold to delete all characters to the left of the cursor. Using the Landscape Keyboard If you find the keyboard inconvenient or difficult to use, turn your mobile phone sideways.
Word prediction Select to enable word prediction while typing. Key press sound Select to play a brief sound each time you touch a key on the onscreen keyboard. Key press vibration Select to have the phone vibrate briefly each time you touch a key on the onscreen keyboard. Layout in portrait mode Select the layout to display in portrait mode. Layout in landscape mode Select the layout to display in landscape mode.
Mixed language input Select the check box to enable your mobile phone to auto detect languages if no more than 3 languages have been selected. Select languages Select the languages you want to use. Predict next word Select the check box to enable the ability to predict the next word when you are typing. Correct mistyping Select to activate auto spelling correction as you type. Slide-down symbols Select the check box to enable you to slide down on keys to enter symbols.
Help Access the online user manual for TouchPal. TouchPal View the version of TouchPal. Touch > Settings > Language & keyboard > Android keyboard to customize the Android keyboard settings. Vibrate on keypress Select to have the phone vibrate briefly each time you touch a key on the onscreen keyboard. Sound on keypress Select to play a brief sound each time you touch a key on the onscreen keyboard.
Quick fixes Select to activate auto spelling correction as you type. Show suggestions Select to show suggested words in a strip above the onscreen keyboard as you type. Autocomplete Select to automatically enter a suggested word, highlighted in orange in the strip above the keyboard, when you enter a space or punctuation.
Messaging The Messaging application allows you to exchange text messages (SMS) and multimedia messages (MMS) with anyone using an SMS-or-MMS-capable phone. With the Email application you can read and send emails. SMS and MMS Text messages: One text message can contain up to 160 characters. You can send a text message of any length, but every 160 characters or portion thereof will be charged as one text message. For recipients, the message will count as just one text message.
Opening Messaging • Touch on the Home screen. • Touch > Messaging. Creating and Sending a Text Message 1. Touch > Messaging > New message. 2. Enter a phone number in the To field, or touch + to select a contact from Contacts. As you enter the phone number, matching contacts appear. You can touch a suggested recipient or continue entering the phone number. 3. Touch the composition text box to start entering your message.
Creating and Sending a Multimedia Message 1. Touch > Messaging > New message. 2. Enter a phone number in the To field, or touch + to select a contact from Contacts. You can also press recipients. MENU key , and then touch Add recipient to add more 3. Touch the composition text box to start entering your message. Tip: If you want to enter a smiley face, press MENU key , and then touch Insert smiley. 4. Press MENU key to display the options panel. • Touch Add subject to add the message subject.
Adding a Slideshow If you want to attach more than one file to your message, use the Slideshow option. 1. On the message editing screen, press options panel. MENU key to display the 2. Touch Attach > Slideshow, and then select a slide to start editing it. 3. Press slides. MENU key , and then touch More > Add slide to add more You can touch the green arrow icons to switch between slides. 4. Touch Done to finish composing your message and return to the multimedia message screen. 5.
2. Touch the multimedia message to view the message. 3. Flick left or right to view the previous or next slide. Replying to a Message 1. In the message list, touch a text or multimedia message thread to open it. 2. Touch the text box to compose your message, and then touch Send. Customizing the Message Settings In the message list, press , and then touch Settings to customize the message settings. MENU key Email Your mobile phone puts email at your fingertips, too.
Adding an Email Account When using the Email application for the first time, you must configure your email account. The Email setup wizard helps you set up your account for many popular email systems, so you can read and work with the same email that you do on a computer in a web browser, or with another email application. 1. Touch > Email. 2. To customize your email settings, answer the onscreen prompts, and then touch Next. Or touch Manual setup if you want to set the mail server yourself.
After the initial setup, your email application opens to the last screen you were viewing or, if you have not used Email recently, it displays the contents of your Inbox or the accounts screen (when you have more than one account). Adding Other Email Accounts 1. After creating your initial email account, press MENU key on the Inbox screen, and then touch Accounts to access the accounts screen. 2. Press on the accounts screen, and then touch Add account to create another email account.
2. Access a folder, and then touch the message that you want to view. Email Message Screen 1 3 2 1 Touch to read the next or previous message in the folder.
2 Touch to open or save an attachment. 3 Touch to place a star next to an important message to make it easy to locate. Creating and Sending an Email Message 1. On the accounts screen, touch the email account you want to use. 2. On the Inbox screen, press the options panel. MENU key , and then touch Compose in 3. In the To field, enter the name or the email address. 4. Write the subject and email. To send an attachment with the message, press MENU key , and then touch Add attachment. 5.
Replying to an Email Message 1. On the accounts screen, touch the email account you want to use. 2. Touch the email message you want to view and reply to. 3. Touch Reply or Reply all to reply to the email message. Deleting an Email Account 1. On the accounts screen, touch and hold the email account you want to delete. 2. Touch Remove account. 3. Touch OK.
necessary details manually, although you will typically need to contact your email service provider to determine the right settings for the account. 1. Touch > Email. 2. On the accounts screen, touch and hold the email account you want to change. 3. Touch Account settings. 4. Change General settings, Notification settings, or Server settings.
Getting Connected GPRS/3G Your mobile phone will be automatically configured to use your wireless service provider’s GPRS/3G/EDGE service (if available) when you turn on the phone for the first time. Note that the SIM card must be inserted. Checking the Network Connection 1. Touch > Settings. 2. Touch Wireless & networks > Mobile networks. 3. Touch Network operators or Access Point Names to check the network connection. Note: Your mobile phone will automatically read the access point of the SIM card.
Turning on the Data Service 1. Touch > Settings. 2. Touch Wireless & networks > Mobile networks. 3. Select the Data Service check box to turn on the data connection. Wi-Fi Wi-Fi gives you wireless access to broadband Internet access. To use Wi-Fi on your mobile phone, you need to have an access to wireless access points (hotspots). Obstacles that block the Wi-Fi signal will reduce its strength. Turning On Wi-Fi 1. Touch > Settings. 2.
2. Touch Wireless & networks > Wi-Fi settings. You will see a list of detected Wi-Fi networks in the Wi-Fi networks section. 3. Touch a Wi-Fi network to connect to it. • If you select an open network, you will be automatically connected to the network. • If you select a network that is secured with Wired Equivalent Privacy (WEP) and connect to it for the first time, enter the password, and then touch Connect.
Opening the Browser Touch > Browser to the home page. 1 3 2 1 Touch to enter the desired website. 2 Web page view area. 3 Touch to open Bookmarks.
Open the browser options menu and perform one of the following operations, press MENU key : • New window: Touch to open a new window. • Bookmarks: Touch to display bookmarks. • Windows: Touch to go to the web preview screen. You can switch to another web page or open a new web page on this screen. • Refresh: Touch to refresh the current page. • Forward: Touch to browse the next web page.
it and go directly to that web page or complete entering the address of the web page you want. 4. Touch Go. Setting a Home Page 1. In a browser window, press MENU key . 2. Touch More > Settings > Set home page. 3. Enter the address of the desired home page, and then touch OK. Managing Bookmarks You can store as many bookmarks as you want on your mobile phone. Adding a Bookmark 1. In a browser screen, go to the web page you want to save as a bookmark. MENU key 2. Press , and then touch Bookmarks > Add.
3. Edit the bookmark name as needed and then touch OK. Opening a Bookmark 1. In a browser window, press MENU key , and then touch Bookmarks. On the Bookmarks screen, touch the History tab to view the pages you have visited. Or touch the Most visited tab to view the pages you have visited most frequently. 2. Touch the bookmark of the website you want to open. Customizing the Browser Settings Customize the browser to suit your browsing style.
If you are using Bluetooth, remember to stay within 10 meters (33 feet) of other Bluetooth devices. Be aware that obstacles like walls or other electronic equipment may interfere with your Bluetooth connection. Turning On Bluetooth 1. Touch > Settings. 2. Touch Wireless & networks, and then select the Bluetooth check box to turn on Bluetooth. When Bluetooth is turned on, the Bluetooth icon appears in the notification bar. 3.
• Advanced Audio Distribution Profile (A2DP): allows you to use a stereo Bluetooth headset. • A/V Remote Control Profile (AVRCP): allows you to control what plays through the Bluetooth headset remotely. Before you use Bluetooth, you need to pair your mobile phone with another Bluetooth device as follows: 1. Ensure that the Bluetooth function on your mobile phone is enabled. 2. Touch > Settings > Wireless & networks > Bluetooth settings.
1. Touch > File Manager to open the file manager. 2. Touch and hold the file to be sent. The active options menu is displayed. 3. Touch Share, and then touch Bluetooth to select a paired device. Disconnecting or Unpairing a Bluetooth Device 1. Touch > Settings > Wireless & networks > Bluetooth settings. 2. Navigate to the Bluetooth devices section, and then touch and hold the connected device. You can also just touch a connected device to disconnect it. 3.
2. On the PC, choose Start > My Computer. 3. Double-click the displayed logo and a prompt window appears. For more information, refer to the PC Suite help.
Entertainment In addition to being a communication device and personal assistant, your mobile phone also provides you with a multitude of entertainment possibilities. You can take photos, create videos and audio clips, and download and listen to music. Taking Photos and Recording Videos The camera is a combination of camera and camcorder that you can use to shoot and share pictures and videos. Opening Your Camera • Touch > Camera to open the camera.
Capture Screen 3 4 1 5 2 On the capture screen, touch the screen to show the zoom in or out controls. 1 Touch to open the settings panel. 2 Touch to zoom in or out. 3 Thumbnail of the last photo. Touch to preview the photos or videos.
4 Drag up to shoot videos (camcorder mode), drag down to take photos (camera mode). 5 Touch to take a photo or shoot a video. On the capture screen, press MENU key key to show the capture panel. Taking a Photo 1. Open your camera and switch to the camera mode. 2. If necessary, open the settings panel to change the camera settings. The preview changes as you change the settings. 3. Compose your photo within the photo capture screen. 4. Touch and hold in focus. 5. Release .
Viewing Your Photos 1. After taking a photo, a thumbnail of the photo you have just taken is shown in the upper right corner of the Capture screen. Touch the thumbnail to view it. 2. Touch the onscreen button to do any of the following: • Touch DELETE to delete the photo. • Touch SHARE to send the photo in a message or post it online. • Touch SET AS to set the photo as a wallpaper or a contact icon. Press MENU key , to edit a photo, view its details, or show the photo on Maps. 3.
3. Frame the scene which you want to start your video. 4. Touch to start recording a video. The camcorder starts shooting the video. 5. Touch to stop shooting. You can shoot another video or preview your videos. Viewing Your Videos 1. After recording a video, a thumbnail of the video you have just recorded is shown in the upper right corner of the Capture screen. Touch the thumbnail to view it. 2. Touch the onscreen button to do any of the following: • Touch DELETE to delete the video.
3. If you want to view more videos, touch the screen, and then touch or . Using the Gallery Your Gallery application can automatically search for pictures and videos on your mobile phone and microSD card. Use Gallery to sort photos and videos into folders, view and edit pictures, watch videos, and set a picture as wallpaper or as a photo for a contact. Opening the Gallery Touch > Gallery to open the viewer.
• Touch Capture video to open the camera and switch to the video capture mode. • Touch Settings to go to the Gallery settings screen. There, you can set the size of a picture, arrange pictures, play a slideshow, and specify whether to prompt for confirmation when you delete a picture. Viewing a Picture 1. In the Gallery, touch the folder that contains the pictures you want to view. 2. Touch the picture to view it in full-screen mode.
Rotating a Picture 1. When viewing a picture, press panel. MENU key to display the operations 2. Touch Rotate. 3. Select either Rotate left or Rotate right. The picture is saved with the new orientation. Cropping a Picture MENU key 1. When viewing a picture, press to display the more operations panel, and then touch Crop. 2. Use the cropping tool to select the portion of the picture to crop. • Drag from the inside of the cropping tool to move it. • Drag an edge of the cropping tool to resize the image.
3. Touch Save to save the cropped picture. Touch Rotate to rotate the cropped picture. Touch Discard to discard the changes. Enjoying Music You can download music files to your PC or insert a CD and copy the files to your microSD card so you can listen to music on your mobile phone. Copying Music to the microSD Card 1. Connect the phone to your computer with a USB cable and mount the microSD card. 2. On the PC, navigate to the USB drive and open it. 3.
6. Disconnect the mobile phone from the PC. Opening the Media Library Touch > Music to display the media library. The Music application organizes your music files by storage location. It contains four tabs: Artists, Albums, Songs and Playlists. Playing Music 1. Touch a category on the music library screen. 2. Touch the song you want to play. Tip: When you are listening to music, touch , to use another application. Your music continues to play.
Music Player Screen 5 4 3 1 2 1 Touch and hold to search for information. 2 Touch to control the music. 3 Touch to set the repeat mode.
4 Touch to turn the shuffle on or off. 5 Touch to open the current playlist. Adding Music to a Playlist 1. Touch a category on the music library screen. 2. In the list that appears, use the Navigator key to select the song you want to add to the playlist. 3. Touch and hold the song, and then touch Add to playlist in the options menu. • Touch Current playlist to add the song to an existing playlist. • Touch New to create a playlist and add the song to it. Playing a Playlist 1.
Listening to FM Radio FM Radio lets you listen to FM radio stations on your mobile phone. Since FM Radio uses the provided wired stereo headset as the antenna, connect the headset first to the audio jack of your phone before you open the application. Opening the FM Radio 1. Touch > FM Radio to open the application. 2. The first time you open FM Radio, touch Auto tuning, which automatically scans for available FM channels, saves them as presets, and plays the first FM channel found.
FM Radio Screen 1 8 2 3 7 4 6 5 1 Shows the channel name. 2 Touch to search for the next FM channel at a lower frequency. 3 Shows the FM radio frequency.
4 Touch to switch between the headset and the speaker. 5 Touch to view a list of all presets. 6 Touch to stop listening to the FM radio. 7 Flick left or right to search for the next lower or next higher frequency FM channel. 8 Touch to search for the next FM channel at a higher frequency. Press to display the operations panel and set more FM Radio options.
OK when you are satisfied. After tuning, press touch Save channel. MENU key , and then • Touch Auto tuning to scan automatically for available FM channels.
Google Services When you turn on your mobile phone for the first time, touch a Google services such as Talk, Gmail, or Market, and you will be prompted to sign in to your Google account. Note: Ensure that your mobile phone has an active data connection (3G/GPRS) before you sign in to your Google account. If you already have a Google account, touch Sign in and enter your username and password. Creating a Google Account If you do not have a Google account, you can create one: 1.
will be prompted to choose another one or select one from a list. 4. Enter and confirm your Google account password. 5. Select a security question from the drop down menu, and then enter the answer. 6. Touch Create. 7. When the Google Terms of Service screen appears, touch I agree, Next. 8. Enter the characters that appear on the screen, and then touch Next. Tip: To use another Google account, go to the Accounts & sync settings screen, and touch Add account to select which type of accounts you want to add.
the Gmail application on your phone, your Inbox will contain the messages from your Gmail account on the web. Opening Gmail Touch > Gmail. The Inbox mail list appears. Any emails you decide to keep on your mobile phone will go to your Inbox folder. Switching Between Accounts 1. In the mail list, press MENU key , and then touch Accounts. 2. Touch the account that contains the email you want to read. Creating and Sending an Email 1. In the mail list, press MENU key , and then touch Compose. 2.
3. Enter the email subject and write your message. If you want to add a picture attachment, press MENU key , and then touch Attach to select the picture you want to attach. 4. After composing your email, touch Send. Replying To or Forwarding an Email 1. In the mail list, touch the email that you want to reply to or forward, and then scroll down to the end of the email. 2. Touch Reply, Reply to all, or Forward. 3. Do one of the following: • If you selected Reply or Reply to all, enter your message.
2. Enter the search keywords in the box, and then touch . Customizing Your Gmail Settings 1. In the mail list, press MENU key , and then touch Settings. 2. Set the following options: • Signature: Touch to enter a signature that is appended at the end of all your emails. • Confirm delete: Select the check box to show a confirmation box when you delete an email. • Batch operations: Select the check box to show the batch operations feature.
• Select ringtone: Touch to choose a ringtone for a new email message. A short sample of the ringtone will play when you select it. If you prefer no ringtone to play when you receive a new email message, touch Silent. Then touch OK to confirm your ringtone selection. • Vibrate: Select the check box if you want your mobile phone to vibrate when you receive a new email message. Using Talk Talk is Google’s instant messaging service.
Adding a Friend 1. In the friends list, press MENU key , and then touch Add friend. 2. Enter the Talk instant messaging ID or Google email address of the friend you want to add. 3. Touch Send invitation. Accepting an Invitation 1. If you have invited anyone to chat or if someone else has invited you to chat, this information will appear in the friends list. 2. Touch a pending invitation, and then touch Accept or Cancel. Starting a Chat 1.
2. Use the onscreen keyboard to enter text and chat with your friend. 3. After entering your message, touch Send. Setting Notifications for New Instant Messages Whenever you receive an instant message, your mobile phone can play a sound, vibrate, or display an icon. To set up one of these handy notifications, start in the friends list, and then press MENU key . Then touch More > Settings.
Select the check box to make your mobile phone vibrate when you receive a new instant message. Vibrate Signing Out of Talk In the friends list screen, press out to quit Talk. MENU key , and then touch More > Sign Using Maps Maps lets you find your current location, view real-time traffic conditions (depending on availability in your locale), and get detailed directions to various destinations on a satellite, traffic, or other kind of map.
3. In the My Location section, select the Use wireless networks check box, Use GPS satellites check box, or both. Opening Maps Touch > Maps to open the application. Searching for Places of Interest 1. On the map, press MENU key , and then touch Search. 2. Enter the place you want to search for in the search box, and then touch the Search icon. 3. Your search results will then be displayed. Touch a place you are interested in and the application will show where it is on the map. Getting Directions 1.
4. Touch Go. Your directions will appear in a list. 5. Touch a direction item on the list to show it on the map. 6. When you finish viewing or following the directions, press and touch More > Clear Map to reset the map. MENU key Using YouTube YouTube is Google’s free online video streaming service for viewing, searching for, and uploading videos. Opening YouTube Touch > YouTube. You will then see the YouTube screen.
3. You will see a number of search results displayed below the notification bar. Scroll through the results and touch a video to watch it. Sharing a Video 1. On the YouTube screen, do one of the following: • While viewing a list of videos, touch and hold a video entry, and then touch Share on the options menu. • While watching a video, press MENU key , and then touch Share. 2. Compose a message if you like, address the email, and send it.
2. When you open Market for the first time, the Android Market Terms of Service window will appear. Touch Accept to continue. Searching for Applications There are a few different ways to find applications on the Market home screen, including: • Featured applications: Scroll horizontally to view more. • List of applications by category: Includes subcategories, which you can sort by popularity (most to least) or by date (newest to oldest). • List of games. • Search function. • Your downloads.
1. In the Market, touch Apps. 2. Touch a category, and then touch the item you want to download. 3. On the item details screen, read more about the application, including its cost, overall rating, and user comments. If you scroll down to the About the developer section, you can see other applications from the same developer, link to the developer's website, or send the developer an email. 4. To install the item, touch Install (if the item is free) or Buy, whichever is displayed. 5.
2. Touch the application you want to uninstall, and then touch Uninstall. 3. When prompted, touch OK to remove the application from your mobile phone. 4. Choose the reason for removing the application, and then touch OK.
Synchronizing Information Some applications on your mobile phone give you access to the same personal information that you can add, view, and edit on your computer. If you add, change, or delete your information in any of these applications on the web, the updated information also appears on your mobile phone. This is made possible through over-the-air data synchronization. The process occurs in the background and does not interfere with use of your mobile phone.
always available. You could then add a work account, so your work-related emails work contacts are handy. If you like, you may add multiple Google accounts or other accounts. Adding an Account When you add an account, Contacts compares contacts from the newly synchronized account with contacts from your existing mobile phone accounts and attempts to merge duplicates into a single entry in Contacts. While it is presented as a single contact entry, the contact data itself is not merged. 1.
4. Follow the onscreen steps to enter the required and optional information about the account. Most accounts require a username and password, but the details depend on the kind of account and the configuration of the service to which you are connecting. 5. Configure the account. Depending on the kind of account, you may be asked to configure what kind of data you want to sync to the mobile phone, to name the account, and for other details.
2. Touch Remove account. 3. Confirm that you want to remove the account. Customizing Your Account Synchronization You can configure background data use and synchronization options for all the applications on your phone. You can also configure what kind of data you synchronize for each account. Some applications, such as Contacts and Gmail, can synchronize data from multiple applications.
Configuring General Sync Settings On the Accounts & sync settings screen, do the following: • Select or clear the Background data check box to control whether applications and services can transmit data when you are not working with them directly (that is, when they are running in the background). If you clear this option, Gmail stops receiving new mail, Calendar stops synchronizing events, and so on, until you touch the Refresh menu item or send an email.
2. Selected items are configured to synchronize to your mobile phone. 3. Select or clear the check box of information you want to synchronize to the mobile phone. Using the PC Suite to Synchronize Install the PC Suite stored in your mobile phone. Follow the instructions on your computer to complete the installation. You can now synchronize your contacts and calendar appointments between your PC and mobile phone. For more details, please refer to the PC Suite help.
Using Other Applications Using the Calendar Use Calendar to create and manage events, meetings, and appointments. Depending on your synchronization settings, the calendar on your phone stays in synchronization with your calendar on the web. Opening the Calendar Touch > Calendar to open the application. Tip: MENU To access Google calendar, touch key , and then touch More > Launch Google Calendar.
Calendar Panel 1 2 3 4 5 6 1 Touch to switch to the current day or time. 2 Switch to Day view. 3 Switch to Week view.
4 Switch to Month view. 5 Switch to Agenda view. 6 Touch to create an event. Changing the Calendar View On the Calendar screen, touch the view of your calendar.
Agenda View 1 2 3 1 Flick up or down to view earlier or later events. 2 Touch an event to view its details. 3 Indicates that this event repeats.
Day View 1 2 3 1 Flick left or right to view earlier or later days. 2 Touch an event to view its details. 3 Touch and hold a time slot or an event to create a new event at that time.
Week View 1 2 3 1 Flick left or right to view earlier or later days. 2 Touch an event to view its details. 3 Touch and hold a time slot or an event to create a new event at that time.
Month View 1 2 1 Flick up or down to view earlier or later days. 2 Touch a day to view the events of that day.
Creating an Event 1. On any calendar view, touch . Then touch New event to open the Event details screen. MENU key 2. Enter the event name on the keyboard. • If there is a time frame for the event, touch From and To, so you can set the duration of the event. • If it is a special occasion such as a birthday or a day-long event, set dates for From and To, and then select the All day check box. 3. Enter the location of the event and the description. 4.
Tip: To quickly create an event in the Day, Week, or Month view, touch and hold an empty time slot, and then touch New event. A new event details screen will appear with the selected time slot and date in the From and To fields. Setting an Event Reminder 1. On any calendar view, touch an event to view its details or event summary. 2. Touch the Add reminder button to add a reminder. Or touch the reminder’s “-” button to delete it. 3.
• Set alerts & notifications: Touch to set event reminders to alert you, send you a notification, or turn off event notifications on your mobile phone. • Select ringtone: Touch to select the ringtone to sound when you receive an event reminder. • Vibrate: Select to vibrate the mobile phone when you receive an event notification. • Default reminder time: Touch to select the default time before an event for event reminders to occur. Using the Alarm You can set a new alarm or modify an existing alarm.
Alarm List Screen 1 2 3 1 Shows the current time. Touch to select a clock to display. 2 Touch to access the alarm settings screen. You can set the alarm time, ringtone, vibration, and repeat mode.
3 Touch to enable or disable an alarm. Adding an Alarm 1. On the alarm list screen, touch alarm. MENU key , and then touch Add 2. Set the alarm, and then touch Done. Setting an Alarm 1. On the alarm list screen, touch one of the alarms on the screen. 2. Touch Time to set the time of the alarm. 3. Touch Ringtone to select a ringtone for the alarm. 4. Select the Vibrate check box to have the phone vibrate, in addition to playing the ringtone. 5.
Customizing Alarm Settings On the alarm list screen, touch MENU key , and then touch Settings. • Alarm in silent mode: Select to sound alarms even when the phone is in silent mode. • Alarm volume: Touch to open a dialog where you can set the volume of all alarms. • Snooze duration: Touch to open a dialog where you can set how long the alarm waits before it sounds again. • Side button behavior: Touch to open a dialog where you can set what happens if you press the side buttons when an alarm sounds.
Sound Recorder Screen 1 1 2 5 3 4 1 Shows the recording duration. 2 Shows the volume of your audio files. 3 Touch to pause or play back the recording.
4 Touch to start recording. 5 Touch to stop recording. Starting a Recording 1. Touch > Sound Recorder to open the application. 2. Touch the start button to start recording. 3. Record your desired message. 4. Touch the stop button to stop recording. 5. Touch MENU key , and then touch Recordings to view the voice clip. Setting a Voice Clip as a Ringtone 1. On the sound recorder screen, touch MENU key , and then touch Recordings. 2. Select the location where you have saved the recordings. 3.
Using the File Manager File Manager is like having a pocket-sized personal assistant (PA), letting you organize, edit, and delete files and folders. Opening the File Manager Touch > File Manager to open the application.
1 Touch to show the files and folders in your mobile phone memory. 2 Touch to show your list of files and folders. 3 Touch to show the files and folders on the microSD card. The options menu of the file manager may not be completely shown on one page. You may need to flick the menu upward or downward, or press the Navigation key to browse all options. Creating a Folder 1. On the File Manager screen, access the directory of the folder you want to create. 2. Touch folder.
Moving or Copying a File 1. On the File Manager screen, touch panel, and then touch Cut or Copy. MENU key to show the options 2. Touch the file or folder you want to move or copy. When selected, a check mark will appear. To select all files, touch MENU key to open the options panel. Then touch Select all to select all files in a folder (touch Unselect all to cancel the selection). MENU key 3. Touch to open the options panel, and then touch Done to cut or copy the file. 4.
3. Write a key word of the name of your file or folder in the search box. 4. Touch Search. Your mobile phone will start the search. 5. A list of search results will be displayed. Touch a file in the list to open it. 6. Touch New search for a new search or press the Back key to return to the file manager screen. Viewing Your Memory Status MENU key On the File Manager screen, touch to open the options panel, and then touch Memory Status. The memory management screen will be displayed.
Opening the Calculator Touch > Calculator to open the application. Switching to the Advanced panel On the Calculator screen, flick the screen to the right or left to switch between Advanced panel and Basic panel. Using the Notepad Notepad features a simple text processor and lists all notes in a linear structure. You can add, edit, and delete notes. 1. Touch 2. Press > Notepad to open the application. MENU key , and then touch Add note to create a note. 3.
Managing Your Mobile Phone To configure your mobile phone, touch > Settings. Setting the Date and Time By default, your mobile phone automatically uses the date, time zone, and time provided by the network. Note: When the time provided by the network is automatically used, you cannot set the date, time, and time zone. 1. On the Settings screen, touch Date & time. 2. Clear the Automatic check box. 3. Touch Set date.
5. Touch Set time. On the set time screen, touch the up or down buttons to adjust the hour and minute. Touch Set when the configuration is complete. 6. Select or clear the Use 24-hour format check box to switch between 24-hour format and 12-hour format. 7. Touch Select date format to select how you want the date to display on your mobile phone. Setting the Display Adjusting the Screen Brightness 1. On the Settings screen, touch Sound & display > Brightness. 2.
Adjusting the Time Before the Screen Turns Off If your mobile phone is idle for several minutes, it will turn off the screen to save battery power. To set a longer or shorter idle time, do the following: 1. On the Settings screen, touch Sound & display > Screen timeout. 2. Select the duration you want the screen to be illuminated. Setting Ringers Turning On Silent Mode 1. On the Settings screen, touch Sound & display. 2. Select the Silent mode check box.
You can also adjust the ringer volume on the settings screen. 1. On the Settings screen, touch Sound & display > Ringer volume. 2. Drag the slider left to make the volume softer, or right to make it louder. 3. Touch OK to save the adjustment. On the Ringer volume screen, if you do not select Use incoming call volume for notifications, you can set Incoming call volume and Notification volume separately.
Changing the Phone Ringtone 1. On the Settings screen, touch Sound & display > Phone ringtone. 2. Touch the ringtone you want to use, and then touch OK. The ringtone plays when selected. Tip: You can set a song as the ringtone. Open the Music application, and then press and hold the song name, and select Use as phone ringtone. Setting Your Phone to Vibrate for Incoming Calls 1. On the Settings screen, touch Sound & display. 2. Select the Phone vibrate check box.
You can customize many of these services if they are part of your calling plan. On the Settings screen, touch Call settings to customize your call functions. Turning on Data Roaming 1. On the Settings screen, touch Wireless & networks > Mobile networks. 2. Select the Data roaming check box. Note: Accessing data services while roaming may incur additional charges. Ask your wireless service provider about data roaming fees. Switching off the Data Service 1.
Switching on Always-on Mobile Data If you have not selected Enable always-on mobile data, after your screen is locked for 30 minutes, your mobile phone will automatically stop all data services. For example, your mobile phone will not check new emails or synchronize data in the background. The mobile phone will automatically enable data services only after you have waken up your screen. On the Settings screen, touch Wireless & networks > Mobile networks.
2. If your mobile phone does not have speech synthesizer data installed, connect to Android Market and let it guide you through the process of downloading and installing the data. 3. Follow the instructions to install the voice data. Adjusting the Speech Rate 1. On the Settings screen, touch Text-to-speech > Speech rate. 2. Select a speed at which the text is to be spoken. Protecting Your Mobile Phone Turning on Your SIM Card PIN 1. On the Settings screen, touch Location & security > Set up SIM card lock.
4. To change the SIM card PIN at any time, touch Change SIM PIN. Note: You can dial emergency numbers any time from your mobile phone. Protecting Your Mobile Phone with a Screen Lock To keep your data more secure, lock the screen and/or require a screen unlock pattern every time your mobile phone is turned on or wakes up from sleep mode. 1. On the Settings screen, touch Location & security > Set unlock pattern. 2.
Clear the Use visible pattern check box if you do not want the unlock pattern to be displayed on the screen when you unlock it. To change your unlock screen pattern, touch Location & security > Change unlock pattern. Managing Applications Viewing an Installed Application 1. On the Settings screen, touch Applications > Manage applications. 2. In the applications list, do any of the following: • Touch , and then touch Sort by size. Then touch an application to view its details.
Removing an Installed Application 1. On the Settings screen, touch Applications > Manage applications. 2. Touch an application, and then touch Uninstall to remove the application from your mobile phone. Ways to Free Up Your Mobile Phone Memory • Move files and email attachments to the microSD card. • In Browser, clear all temporary Internet files and Browser history information. • Uninstall the downloaded programs that you no longer use. • Reset your mobile phone.
1. On the Settings screen, touch Privacy. 2. Select the Back up my settings check box. Restoring Factory Data If you reset your phone to the settings that were configured at the factory, all of your personal data from internal phone storage, including information about your Google Account, any other accounts, your system and application settings, and any downloaded applications will be erased.
is correct. Back up important information such as the contacts, email messages, files, and other messages saved to your mobile phone. Downloading the Upgrade Package You can download the software upgrade files from the following websites: • http://www.huaweidevice.com/worldwide/technicaIndex.do Preparing for the Upgrade 1. Download the upgrade file from the appropriate websites. 2. The file you download will be compressed. Use the unzip software on your PC to decompress the upgrade package.
5. After you have copied the file to the microSD card, disable the USB mass storage feature. Upgrading the Software through the microSD Card After copying the update files to the microSD card, do the following: 1. On the Settings screen, touch SD card & phone storage > Software Upgrade > SD card Upgrade. 2. Before the upgrade, the system of your mobile phone automatically checks the battery level and the upgrade version.
7. Touch About phone > Build number to view the version information.
Appendix Warnings and Precautions This section contains important information pertaining to the operating instructions of your device. It also contains information about how to use the device safely. Read this information carefully before using your device. Electronic Device Power off your device if using the device is prohibited. Do not use the device when using the device causes danger or interference with electronic devices.
the opposite side of the pacemaker and do not carry the device in your front pocket. Potentially Explosive Atmosphere Power off your device in any area with a potentially explosive atmosphere, and comply with all signs and instructions. Areas that may have potentially explosive atmospheres include the areas where you would normally be advised to turn off your vehicle engine. Triggering of sparks in such areas could cause an explosion or a fire, resulting in bodily injuries or even deaths.
Traffic Security Observe local laws and regulations while using the device. In addition, if using the device while driving a vehicle, comply with the following guidelines: • Concentrate on driving. Your first responsibility is to drive safely. • Do not talk on the device while driving. Use hands-free accessories. • When you have to make or answer a call, park the vehicle at the road side before using your device. • RF signals may affect electronic systems of motor vehicles.
Operating Environment • Do not use or charge the device in dusty, damp, and dirty places or places with magnetic fields. Otherwise, it may result in a malfunction of the circuit. • The device complies with the RF specifications when the device is used near your ear or at a distance of 1.5 cm from your body. Ensure that the device accessories such as a device case and a device holster are not composed of metal components. Keep your device 1.5 cm away from your body to meet the requirement earlier mentioned.
Prevention of Hearing Damage Using a headset at high volume can damage your hearing. To reduce the risk of damage to hearing, lower the headset volume to a safe and comfortable level. Safety of Children Comply with all precautions with regard to children's safety. Letting the child play with your device or its accessories, which may include parts that can be detached from the device, may be dangerous, as it may present a choking hazard.
• The battery can be charged and discharged hundreds of times before it eventually wears out. When the standby time and the talk time are shorter than the normal time, replace the battery. • Use the AC power supply defined in the specifications of the charger. An improper power voltage may cause a fire or a malfunction of the charger. • Do not connect two poles of the battery with conductors, such as metal materials, keys, or jewelries.
• If the power cable is damaged (for example, the cord is exposed or broken), or the plug loosens, stop using the cable at once. Otherwise, it may lead to an electric shock, a short circuit of the charger, or a fire. • Do not dispose of batteries in fire as they may explode. Batteries may also explode if damaged. Cleaning and Maintenance • The device, battery, and charger are not water-resistant. Keep them dry. Protect the device, battery, and charger from water or vapor.
the temperature is lower than 0°C, performance of the battery is affected. • Do not place sharp metal objects such as pins near the earpiece. The earpiece may attract these objects and hurt you when you are using the device. • Before you clean or maintain the device, power off the device and disconnect it from the charger. • Do not use any chemical detergent, powder, or other chemical agents (such as alcohol and benzene) to clean the device and the charger.
Certification Information (SAR) This mobile device meets guidelines for exposure to radio waves. Your device is a low-power radio transmitter and receiver. As recommended by international guidelines, the device is designed not to exceed the limits for exposure to radio waves.
Disposal and Recycling Information This symbol on the device (and any included batteries) indicates that they should not be disposed of as normal household garbage. Do not dispose of your device or batteries as unsorted municipal waste. The device (and any batteries) should be handed over to a certified collection point for recycling or proper disposal at the end of their life.
batteries from other waste is to minimize the potential environmental impacts on human health of any hazardous substances that may be present. Reduction of Hazardous Substances This device is compliant with the EU Registration, Evaluation, Authorisation and Restriction of Chemicals (REACH) Regulation (Regulation No 1907/2006/EC of the European Parliament and of the Council) and the EU Restriction of Hazardous Substances (RoHS) Directive (Directive 2002/95/EC of the European Parliament and of the Council).
Note: Observe the national local regulations in the location where the device is to be used. This device may be restricted for use in some or all member states of the European Union (EU). Note: This device may be operated in all member states of the EU. France: Outdoor use limited to 10 mW e.i.r.p. within the band 2454-2483.5 MHz. Italy: For private use, a general authorisation is required if WAS/ RLAN’s are used outside own premises. For public use, a general authorisation is required.
Numerics 12–key PhonePad . . . . . . . . . . . . . . . . . . . . . . . . . . . . . . . . . . . . . . . . 62 A accept an invitation . . . . . . . . . . . . . . . . . . . . . . . . . . . . . . . . . . . . . . 112 add a bookmark. . . . . . . . . . . . . . . . . . . . . . . . . . . . . . . . . . . . . . . . . . 84 add a contact. . . . . . . . . . . . . . . . . . . . . . . . . . . . . . . . . . . . . . . . . . . . 48 add a favorite contact . . . . . . . . . . . . . . . . . . . . . . . . . . . . . . . . . . . .
alarm list screen . . . . . . . . . . . . . . . . . . . . . . . . . . . . . . . . . . . . . . . . 137 android keyboard. . . . . . . . . . . . . . . . . . . . . . . . . . . . . . . . . . . . . . . . . 63 answer a call . . . . . . . . . . . . . . . . . . . . . . . . . . . . . . . . . . . . . . . . . . . . 41 B back button functions . . . . . . . . . . . . . . . . . . . . . . . . . . . . . . . . . . . . . 10 back key . . . . . . . . . . . . . . . . . . . . . . . . . . . . . . . . . . . . . . . . . . . . . . .
change the phone ringtone . . . . . . . . . . . . . . . . . . . . . . . . . . . . . . . . 151 charge your mobile phone. . . . . . . . . . . . . . . . . . . . . . . . . . . . . . . . . . 12 charging interface . . . . . . . . . . . . . . . . . . . . . . . . . . . . . . . . . . . . . . . . . 9 check the network connection . . . . . . . . . . . . . . . . . . . . . . . . . . . . . . . 79 choose an input method . . . . . . . . . . . . . . . . . . . . . . . . . . . . . . . . . . . 58 close the notification panel .
customize the calendar settings . . . . . . . . . . . . . . . . . . . . . . . . . . . . 135 customize your account synchronization. . . . . . . . . . . . . . . . . . . . . . 124 customize your mobile phone settings . . . . . . . . . . . . . . . . . . . . . . . . 34 D data interface. . . . . . . . . . . . . . . . . . . . . . . . . . . . . . . . . . . . . . . . . . . . . 9 day view . . . . . . . . . . . . . . . . . . . . . . . . . . . . . . . . . . . . . . . . . . . . . . 131 delete a contact . . . . . . . .
export regulations . . . . . . . . . . . . . . . . . . . . . . . . . . . . . . . . . . . . . . . . . 6 F file manager. . . . . . . . . . . . . . . . . . . . . . . . . . . . . . . . . . . . . . . . . . . . 142 flash. . . . . . . . . . . . . . . . . . . . . . . . . . . . . . . . . . . . . . . . . . . . . . . . . . . . 9 FM Radio screen . . . . . . . . . . . . . . . . . . . . . . . . . . . . . . . . . . . . . . . . 103 forward an email . . . . . . . . . . . . . . . . . . . . . . . . . . . . . . . . . . . . .
install the microSD card . . . . . . . . . . . . . . . . . . . . . . . . . . . . . . . . . . . 32 install the SIM card . . . . . . . . . . . . . . . . . . . . . . . . . . . . . . . . . . . . . . . 11 install voice data . . . . . . . . . . . . . . . . . . . . . . . . . . . . . . . . . . . . . . . . 153 K keyboard settings . . . . . . . . . . . . . . . . . . . . . . . . . . . . . . . . . . . . . . . . 63 L landscape keyboard . . . . . . . . . . . . . . . . . . . . . . . . . . . . . . . . . . . . . .
music player screen . . . . . . . . . . . . . . . . . . . . . . . . . . . . . . . . . . . . . 100 N navigation functions. . . . . . . . . . . . . . . . . . . . . . . . . . . . . . . . . . . . . . . 10 navigation key . . . . . . . . . . . . . . . . . . . . . . . . . . . . . . . . . . . . . . . . . . . . 8 no warranty . . . . . . . . . . . . . . . . . . . . . . . . . . . . . . . . . . . . . . . . . . . . . . 5 notepad . . . . . . . . . . . . . . . . . . . . . . . . . . . . . . . . . . . . . . . . . . . . . .
open the notification panel . . . . . . . . . . . . . . . . . . . . . . . . . . . . . . . . . 22 open your camera . . . . . . . . . . . . . . . . . . . . . . . . . . . . . . . . . . . . . . . . 90 other widgets . . . . . . . . . . . . . . . . . . . . . . . . . . . . . . . . . . . . . . . . . . . . 29 P packing list. . . . . . . . . . . . . . . . . . . . . . . . . . . . . . . . . . . . . . . . . . . . . . . 7 pair a Bluetooth device . . . . . . . . . . . . . . . . . . . . . . . . . . . . . . . . . . . .
remove the microSD card . . . . . . . . . . . . . . . . . . . . . . . . . . . . . . . . . . 33 rename a folder . . . . . . . . . . . . . . . . . . . . . . . . . . . . . . . . . . . . . . . . . . 30 reply to a message . . . . . . . . . . . . . . . . . . . . . . . . . . . . . . . . . . . . . . . 72 reply to an email . . . . . . . . . . . . . . . . . . . . . . . . . . . . . . . . . . . . . . . . 109 reply to an email message . . . . . . . . . . . . . . . . . . . . . . . . . . . . . . . . .
set a voice clip as a ringtone . . . . . . . . . . . . . . . . . . . . . . . . . . . . . . . 141 set an alarm. . . . . . . . . . . . . . . . . . . . . . . . . . . . . . . . . . . . . . . . . . . . 138 set an event reminder . . . . . . . . . . . . . . . . . . . . . . . . . . . . . . . . . . . . 135 set notifications for new instant messages . . . . . . . . . . . . . . . . . . . . 113 set the date and time. . . . . . . . . . . . . . . . . . . . . . . . . . . . . . . . . . . . . 147 set up your mobile phone .
TouchPal keyboard panel . . . . . . . . . . . . . . . . . . . . . . . . . . . . . . . . . . 60 touchscreen actions . . . . . . . . . . . . . . . . . . . . . . . . . . . . . . . . . . . . . . 15 trademarks . . . . . . . . . . . . . . . . . . . . . . . . . . . . . . . . . . . . . . . . . . . . . . 4 turn on Bluetooth . . . . . . . . . . . . . . . . . . . . . . . . . . . . . . . . . . . . . . . . . 86 turn on data roaming . . . . . . . . . . . . . . . . . . . . . . . . . . . . . . . . . . . . .
view your videos . . . . . . . . . . . . . . . . . . . . . . . . . . . . . . . . . . . . . . . . . 94 volume control keys. . . . . . . . . . . . . . . . . . . . . . . . . . . . . . . . . . . . . . . . 8 W week view . . . . . . . . . . . . . . . . . . . . . . . . . . . . . . . . . . . . . . . . . . . . .
Support AT BE CH DE ES FR HU IT NL PL PT UK TR SE SI Other Countries Hotline +49 431 - 24 89 45 70** +49 431 - 24 89 45 80** +49 431 - 24 89 45 73** 01805 - TREKSTOR* 01805 - 87 35 78 67* +49 431 - 24 89 45 76** +49 431 - 24 89 45 74** +49 431 - 24 89 45 79** +49 431 - 24 89 45 75** +49 431 - 24 89 45 81** +49 431 - 24 89 45 77** +49 431 - 24 89 45 78** +49 431 - 24 89 45 71** +49 431 - 24 89 45 83** +49 431 - 24 89 45 92** +49 431 - 24 89 45 94** +49 431 - 24 89 45 99** If you want to contact our support