
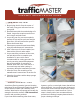
Installation Guide


4. Mapoutyourinstallation.Measuretond
the center of a room on two opposite
wallsandusethesepointstosnapa
chalkline across the room. Do the same
ontheotherwallstocreateperpendicular
line,andchecktomakesurethey
are square.
5. Drytyourtilestartingfromcenterpoint,
leavingenoughspacingforgroutjoints.
Thegoalistoworkwithasmanyfulltiles
as possible.
1. Thesuccessandlongevityoftileinstallation
reliesonasolidbase.Unlessyouaredealing
with new construction, this usually means
removingtheoriginalooringmaterialbefore
you install your new tile.
2. Ceramicandporcelaintileshouldbe
installedonaclean,levelandrigidoor.If
youroorsexorhaveunevenareas,repair
andaddsupportwhereneeded.Followup
withacementboardorbercement
underlayment.Bothareresilienttomoisture
andimpervioustoliquids.
3. Choose your installation pattern. There are
anendlessnumberofoptions,andthe
patternshouldreecttheoveralltoneand
lookyouaretryingtoachieve.
Installingporcelaintileisaprocess;properpreparationofthebaseisanabsolute
necessityforasuccessfulinstallation.Don’tletthisdissuadeyoufromaDIYporcelain
tileinstallation!Belowareinstructionsonhowtocompleteyourprojectsuccessfully.
CERAMIC INSTALLATION GUIDE
PREPARE