
Instructions / Assembly

Expansion space: As a general rule, a ¾” expansion space
must be left around the perimeter and at all vertical
obstructions. To minimize expansion on floors wider than 20
feet, more or less spacing between rows may be needed,
depending on the geographical area, interior climate control
and time of the year. When additional spacing is needed this
can be accomplished by inserting thin spacers above the
tongue every 10 to 20 rows and then removed after several
adjacent rows have been installed and/or start in the center of
the room working in two directions. Do not use spacers that
may cause damage on factory-finished products. Remove the
spacers as additional rows are added.
SET UP AND USE OF PNEUMATIC
STAPLERS AND NAILERS
Minor occasional noises within the flooring are inherent to all
staple/ nail-down installations and can change as
environmental changes occur. This is not a manufacturing
defect and is therefore not covered under our warranties (see
warranty brochure for complete warranty coverage). You can
help reduce squeaking, popping, and crackling by being sure
that the sub floor is structurally sound, does not have any
loose decking or joists, and is swept clean prior to installation.
You should also be sure that your stapler or nailer is setting
the fastener properly, not damaging the planks, and that you
are using the correct nailing schedule.
When used improperly, staples or cleats can damage wood
flooring. If the tool is not adjusted properly the staples/ cleats
may not be positioned at the proper angle. Test the tool on a
piece of scrap material first - set the stapler/ nailer flush on the
tongue side of the plank and install a staple/ cleat. Should the
staple/ cleat penetrate too deeply reduce the air pressure; if the
staple/ cleat is not deep enough then increase the air pressure
using an in-line regulator. The crown of the staple/ cleat
should sit flush within the nail pocket to prevent damage to the
flooring and to reduce squeaking. The flooring manufacturer is
not responsible for damage caused by the mechanical
fasteners.
Getting Started
Step One – Establish a Starting Point
Wall to Wall Installation
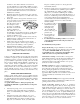
Prior to installing flooring roll out 15 lb. asphalt saturated felt
paper – overlap joints 6” and staple if needed.
However, by today’s standards, asphalt saturated kraft or felt
paper may not be an effective vapor retarder in all
applications. The 2006 International Residential Code requires
a vapor retarder on the warm-in-winter side of exterior floors
(a floor over a vented crawl space, for example), with a vapor
permeance of 1 perm or less in Zones 5 and higher. This
material will help to keep the floor clean and help to retard
moisture from below (there is no complete moisture barrier
system for staple or nail-down applications).
- Determine the direction of the floor joists – Run the
flooring perpendicular (90°) to the floor joists. Do not
run plank flooring parallel to floor joists unless a
minimum nominal ½”(15/32) CD Exposure 1 (CDX)
plywood underlayment is added.
- Establish a starting point – preferably the longest exterior
wall running parallel with direction of flooring and
perpendicular to the joists.
- Measure the width of the material plus 1” for expansion
and width of the tongue.
- Measure out the distance (width of plank + 1”) in at least
2 places from the starting wall and 12” from the corners.
- Snap a working line parallel to the starting wall.
Center To Wall Installation
- Alternative method to install flooring when the area is
greater than 20’ in width.
- Measuring out from an exterior wall, snap a line in the
center of the room.
- Top nail a sacrificial row along the chalk line with the
groove side aligned with the chalk line.
- Install 3-4 rows of flooring and nail/staple into place.
- Remove sacrificial row and insert spline (slip tongue) into
the groove, glue and blind nail the spline into place. To
keep the spline in alignment for the next flooring board,
use a scrap piece of wood flooring to run along the length
of the spline as you nail.
-
Install the remaining rows in the opposite direction. Use
the nailing practices described prior.
Step Two: Lay Out
- Chose the longest and straightest boards and align the
planks tongue with the working line, cut the last plank to
the proper length leaving a ¾” from the end wall.
- Pre-drill holes spaced approximately 6” apart and 1” from
the back edge (groove side) and top nail the board into
place using 7d or 8d nails, use a nail set to avoid damage
to the flooring.
- Pre-drill holes spaced 6” to 8” apart at a 45° angle along
the tongue and blind nail the plank – countersink nails
with a nail set.
- Continue to blind nail each seceding row until the
nailer/stapler can be used to install the flooring .
- It is critical to make sure the starting row is properly
aligned and straight.
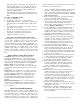
Step Three: Racking the floor
- Once the first row is in place continue to lay out the
planks. Working from several cartons blend the planks
and stagger the end joints a minimum of 6” (8”-10” for
plank) apart to ensure a favorable appearance.
Step Four: Installation of Flooring
- Once enough of the planks are laid out begin installing the
planks using either a manual or pneumatic nailer/stapler.
Check to ensure the fastener is set to the proper depth.
Blind nail through the tongue using the proper length
staple or cleat and fasten the planks approximately 1 1/2”
to 3” from the ends and every 8”-10”s apart for strip
flooring. For 3” plank or wider fasten every 6”-8” apart.
(Minimum of 2 fasteners per plank)
- Continue installing planks across the room ending at the
far wall using the manual or pneumatic nailer/ stapler and
following the recommended nailing schedule.
- As you reach the far wall it may be necessary to blind
nail by hand until top nailing is required.