REV:1.1.
COPYRIGHT & TRADEMARKS Specifications are subject to change without notice. is a registered trademark of TP-LINK TECHNOLOGIES CO., LTD. Other brands and product names are trademarks or registered trademarks of their respective holders. No part of the specifications may be reproduced in any form or by any means or used to make any derivative such as translation, transformation, or adaptation without permission from TP-LINK TECHNOLOGIES CO., LTD. Copyright © 2008 TP-LINK TECHNOLOGIES CO., LTD.
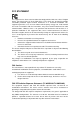
FCC STATEMENT This equipment has been tested and found to comply with the limits for a Class B digital device, pursuant to part 15 of the FCC Rules. These limits are designed to provide reasonable protection against harmful interference in a residential installation. This equipment generates, uses and can radiate radio frequency energy and, if not installed and used in accordance with the instructions, may cause harmful interference to radio communications.
FCC Radiation Exposure Statement: (TL-WN512AG) This device has been tested for compliance with FCC RF Exposure limits in the typical laptop computer configuration and this device can be used in desktop or laptop computers with side mounted PCMCIA slots. This device cannot be used with handheld PDAs (personal digital assistants). This device and its antenna must not be co-located or operated in conjunction with any other antenna or transmitter. CE Mark Warning This is a class B product.
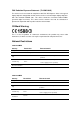
470-5725 MHz Country Restriction Reason/remark Bulgaria Not implemented Planned Relevant+ provisions for the implementation of DFS France mechanism described in ETSI standard EN 301 893 V1.3.1 and subsequent versions General authorization required if used outside own Italy premises General authorization required for network and Luxembourg None service supply (not for spectrum) Russian No info Federation Turkey Not implemented Note:It not used outdoors in France.
CONTENTS Package Contents...........................................................................................1 Chapter 1. Introduction ...............................................................................2 1.1 Overview of the product ................................................................................ 2 1.2 Features ........................................................................................................ 2 1.3 LED Status ....................................
TL-WN512AG/TL-WN552AG/TL-WN553AG 54M Wireless Adapter User Guide Package Contents The following items should be found in your package: ¾ One TL-WN512AG/TL-WN552AG/TL-WN553AG Wireless Adapter ¾ Quick Installation Guide ¾ One Resource CD for TL-WN512AG/TL-WN552AG/TL-WN553AG, including: • TP-LINK Wireless Client Utility (TWCU) and Drivers • User Guide • Other Helpful Information ) Note: Make sure that the package contains the above items.
TL-WN512AG/TL-WN552AG/TL-WN553AG 54M Wireless Adapter User Guide Chapter 1. Introduction Thank you for choosing TP-LINK 54M Wireless Adapter TL-WN512AG/TL-WN552AG/TL-WN553AG. 1.1 Overview of the product The TP-LINK 54M Wireless Adapter TL-WN512AG/TL-WN552AG/TL-WN553AG can provide high performance of wireless connectivity, without the restrictions of phone lines or Ethernet cables. With the IEEE 802.11a, 802.11b and 802.
TL-WN512AG/TL-WN552AG/TL-WN553AG 1.3 54M Wireless Adapter User Guide LED Status 1.3.1 TL-WN512AG LED Indications Name Status Status Green Intermittently Activity Not lit Status Lit Activity Not lit Status Activity Indication The adapter is in an electricity saving status. The adapter is on wake up status. Flashing Alternately Flashing The adapter is trying to scan a networking connection.
TL-WN512AG/TL-WN552AG/TL-WN553AG 54M Wireless Adapter User Guide Chapter 2. Installation Guide 2.1 Hardware Installation 2.1.1 TL-WN552AG/TL-WN553AG Hardware Installation To install the adapter, follow these steps listed below: 1. 2. 3. 4. Turn off your desktop PC and disconnect the power. Remove your PC case and locate an available PCI slot on the motherboard. Remove the metal slot cover on the back of the PC. Check with your computer manufacturer for instructions if needed.
TL-WN512AG/TL-WN552AG/TL-WN553AG 54M Wireless Adapter User Guide Figure 2-1 TP-LINK Wireless Client Utility – Install Shield Wizard 2. You can click Cancel to end the installation on the Preparing Setup screen of Figure 2-1. Otherwise, the Setup Wizard will display a screen similar to that shown in Figure 2-2 after a moment. To continue, click Next on the screen as Figure 2-2. Click Cancel to end the Installation.
TL-WN512AG/TL-WN552AG/TL-WN553AG 3. 54M Wireless Adapter User Guide The Setup Wizard will ask you to choose a Setup type in Figure 2-3. It is recommended that you select Install Client Utilities and Driver. Select Install Driver Only to install driver only, select Make Driver Installation Diskette(s) to make the diskette(s) as the installation driver. Select Install Client Utilities and Driver and click Next to continue the Installation.
TL-WN512AG/TL-WN552AG/TL-WN553AG 54M Wireless Adapter User Guide Figure 2-5 Choose Destination Location 6. The Setup Wizard will ask you to create a new folder name or select one from the Existing Folders list shown in Figure 2-6. It is recommended that you keep the default value. Click Next to continue the Installation. Click Back to return to the previous page, or click Cancel to end the Installation. Figure 2-6 Select a Program Folder 7.
TL-WN512AG/TL-WN552AG/TL-WN553AG 54M Wireless Adapter User Guide Figure 2-7 Information Prompt 8. While files are copying, you will see a warning box, shown in Figure 2-8. Please select YES to continue installation. Our drivers have been tested thoroughly, and are able to work with the operating system. Figure 2-8 Widows 2000 Warning Box 9. After the files have been successfully copied, the screen in Figure 2-9 will appear. Click OK to reboot the system.
TL-WN512AG/TL-WN552AG/TL-WN553AG Figure 2-9 54M Wireless Adapter User Guide Finish 2.2.3 Installation for Windows Vista 1. Insert the Resource CD into your CD-ROM drive, open the relative operating system folder in the CD, and double click Setup.exe to install the driver, then Figure 2-10 will appear; Click Cancel to end the installation in the screen. Otherwise, the installation will continue.
TL-WN512AG/TL-WN552AG/TL-WN553AG 2. 54M Wireless Adapter User Guide Click Next in the screen below (shown in Figure 2-12) to continue, you can click Cancel to end the installation. Figure 2-11 3. After that, the files will be copied as the next screen shown (shown in Figure 2-13). To end the Installation, click Cancel.
TL-WN512AG/TL-WN552AG/TL-WN553AG 54M Wireless Adapter User Guide ) Note: During the installation, the system will warn about Windows Security testing, please click “Install this driver software anyway” to continue the installation. Figure 2-13 4. Click the Finish button to complete.
TL-WN512AG/TL-WN552AG/TL-WN553AG 54M Wireless Adapter User Guide Chapter 3. Configuration TP-LINK Wireless Adapter TL-WN512AG/TL-WN552AG/TL-WN553AG can be configured by TP-LINK Wireless Client Utility (TWCU). This chapter describes how to configure your TP-LINK Wireless Adapter for wireless connectivity on your Wireless Local Area Network (WLAN) and use the data security encryption features. After Installing the Adapter, for the first time a region selector box appears, as shown in Figure 3-1.
TL-WN512AG/TL-WN552AG/TL-WN553AG 3.1 54M Wireless Adapter User Guide Current Status The Current Status tab contains general information about the program and its operations. The Current Status tab does not require any configurations. Figure 3-2 Current Status The following table describes the items found on the Current Status screen. ¾ ¾ ¾ ¾ Profile Name - The name of current selected configuration profile. Set up the configuration name on the General tab of Profile Management.
TL-WN512AG/TL-WN552AG/TL-WN553AG 54M Wireless Adapter User Guide Figure 3-3 Advance Status 3.2 Profile Management Click the Profile Management tab of the TWCU Utility and the Profile Management screen will appear, Figure 3-4. The Profile Management screen provides tools to: ¾ Add a profile ¾ Edit a profile ¾ Remove a profile ¾ Switch to another Profile ¾ Import a Profile ¾ Export a Profile ¾ Scan Available Networks ¾ Order profiles Figure 3-4 Profile Management tab 3.2.
TL-WN512AG/TL-WN552AG/TL-WN553AG 54M Wireless Adapter User Guide configuration profile, select the configuration from the Profile list and click Modify. The Profile Management dialog box will display a screen similar to that shown in Figure 3-5. 1. Edit the General tab ¾ Profile Name - Identifies the configuration profile. This name must be unique. Profile names are not case-sensitive. ¾ Client Name - Identifies the client machine. Network Names (SSIDs) - The IEEE 802.11 wireless network name.
TL-WN512AG/TL-WN552AG/TL-WN553AG 54M Wireless Adapter User Guide Figure 3-6 Security tab of Profile Management ¾ ¾ ¾ ¾ ¾ WPA/WPA2: Wi-Fi Protected Access WPA/WPA2 Passphrase: Wi-Fi Protected Access Passphrase 802.1x: Enables 802.1x security. Shared Key (Static WEP): Enables the use of shared keys that are defined on both the access point and the station. To define shared encryption keys, choose the Shared Key radio button and click Configure to fill in the Define Shared Keys window.
TL-WN512AG/TL-WN552AG/TL-WN553AG 54M Wireless Adapter User Guide 802.11 Authentication Mode as appropriate on the Advanced tab of this Profile Management dialog. 3. Edit the Advanced tab ¾ Power Save Mode - ¾ ¾ ¾ • Maximum - Selects maximum mode to let the access point buffer incoming messages for the wireless adapter. The adapter will detect the access point if any messages are waiting periodically.
TL-WN512AG/TL-WN552AG/TL-WN553AG 54M Wireless Adapter User Guide Figure 3-8 Advanced tab of Profile Management 3.2.2 Remove a profile 1. 2. Go to the Profile Management tab. Select the profile name to remove in the Profiles List. 3. Click Remove. 3.2.3 Switch another Profile 1. 2. Go to the Profile Management tab. Click on the profile name in the Profiles List. 3. Click Activate. 3.2.4 Import a Profile 1. 2. 3. From the Profile Management tab, click Import…. The Import Profile will then appear.
TL-WN512AG/TL-WN552AG/TL-WN553AG 54M Wireless Adapter User Guide Figure 3-9 Import Profile Dialog 3.2.5 Export a Profile 1. From the Profile Management tab, highlight the profile to export. 2. 3. Click Export, the Export Profile window will then appear. Browse the directory to export the profile to. 4. Click Save. The profile should then be exported to the specified location. Figure 3-10 Export Profile Dialog 3.2.6 Scan Available Networks 1.
TL-WN512AG/TL-WN552AG/TL-WN553AG 54M Wireless Adapter User Guide configuration profile exists for that network, the Profile Management window will open the General tab. Fill in the Profile name and click OK to create the configuration profile for that network. Figure 3-11 Scan Available Networks Dialog 3.2.7 Auto Profile Selection Management The auto selection feature allows the wireless adapter to automatically select a profile from the list of profiles and use it to connect to the network.
TL-WN512AG/TL-WN552AG/TL-WN553AG 54M Wireless Adapter User Guide Figure 3-12 Auto Profile Selection Management Dialog 3.3 Diagnostics The Diagnostics tab of the TP-LINK Wireless Client Utility (TWCU) provides buttons used to retrieve receiving and transmitting statistics. The Diagnostics tab does not require any configuration.
TL-WN512AG/TL-WN552AG/TL-WN553AG 54M Wireless Adapter User Guide Figure 3-13 Diagnostics tab 3.3.1 Check Driver Information ¾ The Adapter Information contains general information about the wireless network adapter and the Network Driver Interface Specification (NDIS) driver. Access the adapter information from the Diagnostics tab. 3.3.
TL-WN512AG/TL-WN552AG/TL-WN553AG 54M Wireless Adapter User Guide Chapter 4. Configuration for windows Vista After the Adapter's driver has been installed, Windows Vista will display a wireless Network Connection message like this one. Figure 4-1 Icon means the connection has been established. Icon means there is no connection. If the icon does not appear, please follow the steps below.
TL-WN512AG/TL-WN552AG/TL-WN553AG 54M Wireless Adapter User Guide Figure 4-3 3. To continue, click Connect Anyway. Click the Cancel button to end the Installation. Figure 4-4 4. After that, the installation will proceed as shown below, click Close.
TL-WN512AG/TL-WN552AG/TL-WN553AG 54M Wireless Adapter User Guide Figure 4-5 5. The screen below will appear if the connection is successful.
TL-WN512AG/TL-WN552AG/TL-WN553AG 54M Wireless Adapter User Guide Appendix A: Specifications Normal Interface TL-WN512AG: 32-bit CardBus TL-WN552AG/TL-WN553AG: 32-bit PCI Standards IEEE802.11a; IEEE802.11b; IEEE802.11g Operating System Windows 98SE, Me, 2000, XP,Vista Transmission Distance Indoor up to 100m, outdoor up to 300m (Standard transmission distance, it is limited to the environment).
TL-WN512AG/TL-WN552AG/TL-WN553AG 54M Wireless Adapter User Guide Appendix B: Glossary ¾ 2x to 3x eXtended RangeTM WLAN Transmission Technology - The WLAN device with 2x to 3x eXtended RangeTM WLAN transmission technology make its sensitivity up to 105 dBm, which gives users the ability to have robust, longer-range wireless connections.
TL-WN512AG/TL-WN552AG/TL-WN553AG 54M Wireless Adapter User Guide through an access point. An infrastructure wireless network connected to a wired network is referred to as a Basic Service Set (BSS). A set of two or more BSS in a single network is referred to as an Extended Service Set (ESS). Infrastructure mode is useful at a corporation scale, or when it is necessary to connect the wired and wireless networks.