
User's Manual

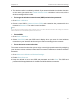


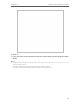


Table Of Contents
- About This Guide
- Get to Know About Your Router
- Connect the Hardware
- Log In to Your Router
- Set Up Internet Connection
- TP-Link Cloud Service
- Guest Network
- USB Settings
- HomeCare – Parental Controls, QoS, Antivirus
- Network Security
- NAT Forwarding
- VPN Server
- Customize Your Network Settings
- 12. 1. Change the LAN Settings
- 12. 2. Set Up Link Aggregation
- 12. 3. Configure to Support IPTV Service
- 12. 4. Specify DHCP Server Settings
- 12. 5. Set Up a Dynamic DNS Service Account
- 12. 6. Create Static Routes
- 12. 7. Specify Wireless Settings
- 12. 8. Use WPS for Wireless Connection
- 12. 9. Schedule Your Wireless Function
- Manage the Router
- 13. 1. Set Up System Time
- 13. 2. Control LEDs
- 13. 3. Test the Network Connectivity
- 13. 4. Test Your Internet Speed
- 13. 5. Upgrade the Firmware
- 13. 6. Backup and Restore Configuration Settings
- 13. 7. Change the Administrator Account
- 13. 8. Password Recovery
- 13. 9. Local Management
- 13. 10. Remote Management
- 13. 11. System Log
- 13. 12. Monitor the Internet Traffic Statistics
- FAQ

82
Chapter 12
Customize Your Network Settings
• PIN (Personal Identification Number) is an eight-character identification number preset to each router. WPS supported
devices can connect to your router with the PIN. The default PIN is printed on the label of the router.
12. 8. 2. Use the WPS Wizard for Wi-Fi Connections
1. Select a setup method:
• Push Button(Recommended): Click Connect on the screen. Within two minutes,
press the WPS button on the client device.
• PIN: Enter the client’s PIN, and click Connect.
2. Success will appear on the above screen and the WPS LED on the router will keep on
for five minutes if the client has been successfully added to the network.
12. 9. Schedule Your Wireless Function
The wireless network can be automatically off at a specific time when you do not need
the wireless connection.
1. Visit http://tplinkwifi.net, and log in with your TP-Link ID or the password you set for
the router.
2. Go to Advanced > Wireless > Wireless Schedule.
3. Select 2.4GHz, 5GHz-1 or 5GHz-2 to change the corresponding settings.
4. Enable the Wireless Schedule feature.
5. Click the icon to set the effective time. Drag the cursor over the cells to choosethe
period during which you need the wireless off automatically, and click OK.