
User's Manual


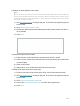
Table Of Contents
- About This Guide
- Get to Know About Your Router
- Connect the Hardware
- Log In to Your Router
- Set Up Internet Connection
- TP-Link Cloud Service
- Guest Network
- USB Settings
- HomeCare – Parental Controls, QoS, Antivirus
- Network Security
- NAT Forwarding
- VPN Server
- Customize Your Network Settings
- 12. 1. Change the LAN Settings
- 12. 2. Set Up Link Aggregation
- 12. 3. Configure to Support IPTV Service
- 12. 4. Specify DHCP Server Settings
- 12. 5. Set Up a Dynamic DNS Service Account
- 12. 6. Create Static Routes
- 12. 7. Specify Wireless Settings
- 12. 8. Use WPS for Wireless Connection
- 12. 9. Schedule Your Wireless Function
- Manage the Router
- 13. 1. Set Up System Time
- 13. 2. Control LEDs
- 13. 3. Test the Network Connectivity
- 13. 4. Test Your Internet Speed
- 13. 5. Upgrade the Firmware
- 13. 6. Backup and Restore Configuration Settings
- 13. 7. Change the Administrator Account
- 13. 8. Password Recovery
- 13. 9. Local Management
- 13. 10. Remote Management
- 13. 11. System Log
- 13. 12. Monitor the Internet Traffic Statistics
- FAQ

103
• Your computer might not recognize any DNS server addresses. Please manually
configure the DNS server.
1 ) Go to Advanced > Network > DHCP Server.
2 ) Enter 8.8.8.8 as Primary DNS, click Save.
Tips: 8.8.8.8 is a safe and public DNS server operated by Google.
• Restart the modem and the router.
1 ) Power off your modem and router, and leave them off for 1 minute.
2 ) Power on your modem first, and wait about 2 minutes until it gets a solid cable
or Internet light.
3 ) Power on the router.
4 ) Wait another 1 or 2 minutes and check the internet access.
• Reset the router to factory default settings and reconfigure the router.