Introduction Basic Setup Recording Playback Editing Function Setup I/ CH ON/STANDBY REC REC MODE Connections D-RW2SU / D-RW2SC ® Others 2006/01/11 17:57:25 TopLast_UD.
Introduction Precautions WARNING: TO REDUCE THE RISK OF FIRE OR ELECTRIC SHOCK, DO NOT EXPOSE THIS APPLIANCE TO RAIN OR MOISTURE. CAUTION RISK OF ELECTRIC SHOCK DO NOT OPEN CAUTION: TO REDUCE THE RISK OF ELECTRIC SHOCK, DO NOT REMOVE COVER (OR BACK). NO USER SERVICEABLE PARTS INSIDE. REFER SERVICING TO QUALIFIED SERVICE PERSONNEL.
Introduction IMPORTANT SAFEGUARDS National Electrical Code, ANSI/NFPA No. 70, provides information with regard to proper grounding of the mast and supporting structure, grounding of the lead-in wire to an antenna discharge unit, size of grounding conductors, location of antenna-discharge unit, connection to grounding electrodes, and requirements for the grounding electrode. (Fig.
Introduction Precautions (cont’d) Installation Location For safety and optimum performance of this unit: ● Install the unit in a horizontal and stable position. Do not place anything directly on top of the unit. Do not place the unit directly on top of the TV. ● Shield it from direct sunlight and keep it away from sources of intense heat. Avoid dusty or humid places. Avoid places with insufficient ventilation for proper heat dissipation. Do not block the ventilation holes on the sides of the unit.
Introduction Maintenance ■ CLEANING THE CABINET ● Use a soft cloth slightly moistened with mild detergent solution. Do not use any solution containing alcohol, spirits, ammonia or abrasive. ■ CLEANING THE DISC LENS ● If this unit still does not perform properly although you refer to the relevant sections and to “Troubleshooting” in this Owner’s Manual, the laser optical pickup unit may be dirty.
Introduction Table of contents Introduction ■ ■ ■ ■ ■ ■ ■ Precautions . . . . . . . . . . . . . . . . . . . . . . . . . . . . . 2 Table of contents . . . . . . . . . . . . . . . . . . . . . . . . 6 Features. . . . . . . . . . . . . . . . . . . . . . . . . . . . . . . . 8 Choosing a disc . . . . . . . . . . . . . . . . . . . . . . . . . 9 Index to parts and controls . . . . . . . . . . . . . . . 14 Preparation of the remote control . . . . . . . . . 19 On Screen menu . . . . . . . . . . . . . . . . . . . .
Introduction Playback ■ Information on disc editing . . . . . . . . . . . . . . . 98 Guide to a title list . . . . . . . . . . . . . . . . . . . . . . . . . . . . . . . . . 98 Edit the recorded disc . . . . . . . . . . . . . . . . . . . . . . . . . . . . . . 98 Editing discs . . . . . . . . . . . . . . . . . . . . . . . . . . . . . . . . . . . . . 99 Notes for deleting titles . . . . . . . . . . . . . . . . . . . . . . . . . . . . . 99 ■ Editing discs . . . . . . . . . . . . . . . . . . . . . . . . . .
Introduction Features This DVD unit not only plays DVDs and CDs but also offers features for you to record to DVD discs and edit them after that. The following features are offered with this unit. Recording This unit is compatible with both DVD-RW which is rewritable repeatedly, and DVD-R which is available for recording once. You can choose either one for your convenience. ■ Up to 8 program recording: You can program the unit to record up to 8 programs, within a month in advance.
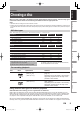
Introduction Introduction Choosing a disc When you want to play DVD or CD software, load an appropriate disc into the recorder. There are many types and formats of discs. Please use the following information to select an appropriate disc. Connections Notes • Handle the disc according to the disc instruction manual. • Toshiba cannot guarantee that all discs bearing the DVD or CD logos will operate as expected.
Introduction Choosing a disc (cont’d) For playback only Disc Mark DVD video disc Specification Remarks • 12cm (43/4 in.) / 8cm (31/4 in.) • Region number The region number of this DVD recorder is 1. If region numbers, corresponding to a specific playable area, are printed on your DVD video disc and you do not find Region 1 or ALL regions, or the disc is encoded to permit playback only in regions other than Region 1, disc playback will not be allowed by the recorder.
Introduction DVD players with are capable of playing DVD-RW recorded in VR mode. ■ Standards ■ Recording conditions ■ Discs that have been tested and are proven to be compatible with this recorder: Number of audio streams recorded in the disc. (2 streams such as English and Japanese in this example.) 2 2 3 4:3 On DVD-RW discs ● Discs labeled DVD-RW Ver.1.1 or 1.2 can be used. ● Discs compatible with the following recording speed can also be used Ver. 1.1/2X Ver. 1.
Introduction Choosing a disc (cont’d) Structure of disc contents On handling discs Normally, DVD video discs are divided into titles, and the titles are subdivided into chapters. Audio CDs are divided into tracks. ● Do not touch the playback side of the disc. DVD video disc Title 1 Chapter 1 Chapter 2 Chapter 1 Title 2 Chapter 2 Yes Chapter 3 Playback side ● Do not stick paper or tape to discs.
Introduction Discs and purposes DVD-RW disc Video mode Characteristics on this recorder Suitable for saving data in Suitable for saving data in Video mode format to play on VR mode format to play on compatible devices. compatible devices. Suitable for saving data in DVD-Video format to play on compatible devices. You can erase recorded contents to use the disc repeatedly. You can erase recorded contents to use the disc repeatedly.
Introduction Index to parts and controls Front Panel 2 1 3* 4 5 6 7 8* 9 I /y CH REC MODE ON / STANDBY REC L2 15 1. Disc tray Place a disc when open. 2. Display Refer to “Front Panel Display Guide” on page 18. 3. A (OPEN/CLOSE) button* Press to open or close the disc tray. 4. CH / button Press to change the channel up and down. 5. H (REV) button During playback, press once midway through a chapter or track to go back to the beginning of the current chapter or track.
Introduction Rear Panel Connections 1 2 3 COMPONENT VIDEO OUTPUT S-VIDEO IN VIDEO OUT Y DIGITAL AUDIO OUTPUT PCM / BITSTREAM OUT L OUT Basic Setup VIDEO IN IN 4 L PB/CB R ANTENNA AUDIO IN R PR/CR (L1) 10 9 8 7 6 Recording 11 COAXIAL AUDIO OUT 5 Introduction_UD.indd 15 Others EN Function Setup Notes • Do not touch the inner pins of the jacks on the rear panel. Electrostatic discharge may cause permanent damage to the unit. • This unit does not have the RF modulator.
Introduction Index to parts and controls (cont’d) * * 16 EN Introduction_UD.
Introduction Playback Editing Function Setup Others EN Introduction_UD.indd 17 Recording * The unit can also be turned on by pressing these buttons. Basic Setup 15. DISPLAY button Press to display the On Screen menu on or off. 16. ZOOM button During playback, press to enlarge the picture on the screen. 17. MENU/LIST button Press to display the Disc menu.To change Original and Playlist on the TV screen. (VR mode only) 18. ENTER button Press to confirm or select menu items. 19.
Introduction Index to parts and controls (cont’d) Front Panel Display Guide 4 2 1 3 7 6 1. Current Status of the unit :Appears when disc playback is paused. :Appears when playing a disc. :Appears when the timer programming has been set or in progress. Flashes when all Timer Recordings have been finished, or when a program cannot be performed for some reason. REC :Appears during recording process. REPEAT :Appears during repeat play. 2.
Introduction Introduction Preparation of the remote control ■ Install two “AA” size batteries (supplied) matching the polarity indicated inside battery compartment of the remote control. • Make sure that there is no obstacle between the remote control and the remote sensor on the unit. • Remote operation may become unreliable if strong sunlight or fluorescent light is shining on the remote sensor of the unit. • Remote control for different devices can interfere with each other.
Introduction On Screen menu This unit uses following On Screen menu for most operations: Setup menu, Title list, Playlist, Original and Display menu. They allow you to change the playing status of disc during playback. The Display menu also gives you information on the status of the disc. Display menu Setup menu Press [DISPLAY] to call up the Display menu. This menu will give you the information on the playing disc. Some operations are available while disc is playing.
Introduction Disc Format Finalize 1 2 3 Finalize Disc Protect OFF ON CD Playback Mode 4 5 4 6 4 Random Play Program Play Slide Show 5 sec. Playback
Introduction_UD.
Connections Connect your recorder to your TV or stereo system. ● Connection to a TV ● RF modulator Connection ● Connection to a cable box or satellite box ● Connection to an Audio System Connection_UD.
Connections Connection to a TV Connect your TV and the antenna to this recorder for recording and to view broadcast signals on the TV.
Introduction Method 1 Method 2 Better picture Basic Audio Connections Make one of the following connections, depending on the capabilities of your existing equipment.
Connections RF modulator Connection If your TV has Antenna in jack only, it is still possible to connect this unit to your TV by using a Stereo Audio/Video RF modulator. In this case, follow the instructions below. 1) The antenna input jack of your TV may have been already occupied. If so, disconnect the RF cable from your TV, and then connect the RF cable to the ANTENNA IN jack of this unit. 2) Connect the ANTENNA OUT jack of this unit to your RF modulator (usually marked “ANT IN”) by the RF cable.
Introduction Connections Connection to a cable box or satellite box VIDEO AUDIO IN Connect (Cable box or Satellite box) IN Connect Connect Video cable (supplied) RF cable (supplied) Basic Setup CableTV signal Connections (Back of TV) Audio cable (supplied) OUT VIDEO IN IN Connect OUT Y L OUT RF cable COMPONENT VIDEO OUTPUT S-VIDEO L PB/CB R ANTENNA DIGITAL AUDIO OUTPUT PCM / BITSTREAM Recording IN AUDIO IN (L1) R PR/CR AUDIO OUT COAXIAL (Back of this unit) • You can record
Connections Connection to an Audio System • When you change the connections, all devices should be turned off. • Refer to the operation manual accompanying external devices for more information.
Basic Setup Read this chapter for necessary settings to get started. ● ● ● ● ● Basic setup_UD.
Basic Setup Initial setting Turn on this unit for the first time, you need to follow these steps. Start 1 2 3 Press [I/y ON/STANDBY]. Turn the TV on. Select the input to which the unit is connected. “Initial Setting” will automatically appear. Using [K / L], select your desired language for the on screen menu. Then press [ENTER] to go to next step. Initial Setting English Français Español 30 EN Basic setup_UD.
Introduction Connections Basic Setup 4 Press [ENTER] to start Channel Preset. Initial Setting Channel Preset Recording The unit will start getting channels available in your area. Playback 5 After channel setting is finished, “Clock Setting” will appear. Then press [ENTER]. Initial Setting Clock Setting Editing Function Setup 6 Follow the steps 3 to 7 on pages 41-43 for “Manual Clock Setting”. Others EN Basic setup_UD.
Basic Setup Channel setting Setting channels automatically If you have changed antenna connection, we recommend you to program channels which are available in your area with the following procedures. 1 Press [SETUP]. Setup Required Setting Playback Display Recording Clock Channel Disc 2 Using [K / L], select “Channel”. Press [ENTER]. Setup Required Setting Playback Display Recording Start Clock Channel Disc Channel menu will appear. 32 EN Basic setup_UD.
Introduction Connections The unit will start presetting channels available in your area automatically. Basic Setup 3 Using [K / L], select “Auto Preset”. Press [ENTER]. Initial Setting Channel Clock Setting Auto Preset Manual Preset Recording Playback 4 Press [SETUP] after scanning. You can select only the channels memorized in this unit by using [CH / ].
Basic Setup Channel setting (cont’d) Adding/deleting channels The channels you no longer receive or seldom watch can be deleted from the memory. You also may add channels into the memory. 1 2 Start 3 Press [SETUP]. Using [K / L], select “Channel”. Press [ENTER]. Channel menu will appear. Using [K / L], select “Manual Preset”. Press [ENTER]. Channel Auto Preset Manual Preset Manual Preset menu will appear. 34 EN Basic setup_UD.
Introduction Connections Press [{] or [CH ] to move to a lower channel number. Press [B] or [CH ] to move to a higher channel number. Press the Number buttons to select a channel number directly. Basic Setup 4 Select the channel number to add or delete. Using [K / L], select “Add” or “Delete”. Press [ENTER]. The channel number will be added or deleted from the channel memory. Then the next channel number will appear so that you can continue adding or deleting channels.
Basic Setup Selecting TV stereo or SAP You can select a sound channel to output from TV. “Stereo” has been selected as the default. 1 2 Press [SETUP]. Using [K / L], select “Required Setting”. Press [ENTER]. Setup Required Setting Playback Display Recording Clock Channel Disc Required Setting menu will appear. Start 3 Using [K / L], select “TV Audio Select”. Press [ENTER]. Required Setting Select Video TV Aspect 4:3 Letter Box TV Audio Select Stereo Option window will appear.
Introduction Connections Basic Setup 4 Using [K / L], select “Stereo” or “SAP”. Press [ENTER]. TV Audio Select Stereo SAP Recording 5 Playback Stereo: Outputs main audio. SAP (Secondary Audio Program): Outputs sub audio. Press [SETUP] to exit.
Basic Setup Setting the clock Auto Clock Setting Set the clock before you try the Timer Recording. If a Public Broadcasting Station (PBS) is available in your area, follow “Auto Clock Setting” below. If not, follow “Manual Clock Setting” on page 41. Make sure • The antenna/Cable TV connections are correct. • If this unit is connected to a Cable Box or Satellite Box, select the local PBS station on them to set the clock automatically. 1 2 Press [SETUP]. Using [K / L], select “Clock”. Press [ENTER].
Introduction Connections The setting will be activated. Basic Setup 4 If you do not know your PBS channel number: Using [K / L], select “Auto”. Press [ENTER]. Auto Clock Setting OFF Auto Manual Recording Playback If you know your PBS channel number: Using [K / L], select “Manual”. Press [ENTER]. Auto Clock Setting - Manual Set Channel No. CH 1 Editing Function Setup Using the Number buttons or [K / L], enter your PBS channel number. Press [ENTER]. The setting will be activated.
Basic Setup Setting the clock (cont’d) 5 6 Press [SETUP] to exit. Press [I/y ON/STANDBY] to turn off the unit. This unit will search for the time only when the power is off. Leave it off for several minutes to give this unit time to set the clock on the front panel display. Notes • The clock may set itself automatically after you connect the antenna/cable signal to this unit and plug in the power cord. In this case, the current time will appear on the front panel display.
Introduction Manual Clock Setting Basic Setup Recording 2 Connections 1 Press [SETUP]. Using [K / L], select “Clock”. Press [ENTER]. Playback Editing 3 Using [K / L], select “Clock Setting”. Press [ENTER]. Clock Clock Setting Auto Clock Setting Auto Daylight Saving Time ON Function Setup Start Clock Setting menu will appear. Others Press [ENTER] again. Default date will appear. (Continued) EN Basic setup_UD.
Basic Setup Setting the clock (cont’d) 4 Using [K / L], enter the date (month / day / year). Press [{ / B] to move the cursor. Clock Setting JAN/ 01 / 2006(SUN) 12: 00 AM 5 Using [K / L], enter the time (hour / minute). Press [{ / B]. Clock Setting JAN/ 01 / 2006(SUN) 12: 00 AM The cursor will move on to AM. 42 EN Basic setup_UD.
Introduction Connections The settings will be activated. Although seconds are not displayed, they begin counting from zero. Basic Setup 6 Press [K / L] to select “AM” or “PM”. Press [ENTER]. Clock Setting Press [SETUP] to exit, if Clock menu appears. Playback 7 Recording JAN/ 01 / 2006(SUN) 12: 00 AM Editing Function Setup Note • Your clock setting will be lost if there is a power failure or this unit has been unplugged for more than 30 seconds, set the clock manually.
Basic Setup Setting the clock (cont’d) Setting the Daylight Saving Time When “Daylight Saving Time” is “ON”, the unit clock will automatically move forward one hour at 2:00a.m. on the first Sunday in April and move back one hour at 2:00a.m. on the last Sunday in October. “ON” has been selected as the default. 1 2 Start 3 Press [SETUP]. Using [K / L], select “Clock”. Press [ENTER]. Clock menu will appear. Using [K / L], select “Daylight Saving Time”. Press [ENTER].
Introduction Connections Choose “ON” when currently observing the daylight saving time. Basic Setup 4 Using [K / L], select “ON” or “OFF”. Press [ENTER]. Daylight Saving Time ON OFF Recording Playback 5 Press [SETUP] to exit. Editing Function Setup Others EN Basic setup_UD.
Basic Setup Selecting the TV aspect ratio You can select the TV aspect ratio to match the formats of what you are playing with the unit and your TV screen (4:3 standard or 16:9 widescreen TV). “4:3 Letter Box” has been selected as the default. 1 2 Press [SETUP]. Using [K / L], select “Required Setting”. Press [ENTER]. Setup Required Setting Playback Display Recording Clock Channel Disc Start Required Setting menu will appear. 3 Using [K / L], select “TV Aspect”. Press [ENTER].
Introduction Connections Basic Setup 4 Using [K / L], select a desired format. Press [ENTER]. TV Aspect 4:3 Letter Box 4:3 Pan & Scan 16:9 Wide Recording Playback 5 Press [SETUP] to exit. Editing Function Setup EN Basic setup_UD.indd 47 Others Note If you have a standard TV: Select “4:3 Letter Box”, so that black bars appear on the top and bottom of the screen. Select “4:3 Pan & Scan” for a full height picture with both sides trimmed. If you have a widescreen TV: Select “16:9 Wide”.
Basic setup_UD.