Operation Manual
Table Of Contents
- CONTENTS
- NOTICE TO USERS
- TOSHIBA QUALITY IS SECOND TO NONE
- PREFACE
- FEATURES OF THE e-STUDIO520/600/720/850
- GENERAL PRECAUTIONS
- DISCLAIMER NOTICE
- 1. BEFORE USING EQUIPMENT
- 1. Description of Each Component
- 2. Turning Power On / Shutdown
- 3. Energy Saving Mode
- 4. Setting Copy Paper
- 2. HOW TO MAKE COPIES
- 3. SETTING OF BASIC COPY MODES
- 1. Paper Selection
- 2. Enlargement and Reduction Copying
- 3. Selecting Finishing Modes
- 4. Duplex Copying
- 5. Original Mode
- 6. Copy Density Adjustment
- 4. IMAGE ADJUSTMENT
- 5. USING THE EDITING FUNCTIONS
- 6. e-FILING
- 7. TEMPLATE
- 8. JOB STATUS
- 9. BLINKING GRAPHIC SYMBOLS
- 10. WHEN THIS MESSAGE APPEARS
- 1. “Toner low”
- 2. “Check staple cartridge”
- 3. “Check staple cartridge in the saddle stitch unit”
- 4. “Examine stapler”
- 5. “READY (CHECK STAPLER)”
- 6. “Examine stapler in the saddle stitch unit”
- 7. “READY (CHECK SADDLE STITCH STAPLER)”
- 8. “READY (HOLE PUNCH DUST BIN IS FULL)”
- 9. “POWER FAILURE”
- 10. “Time for periodic maintenance”
- 11. “Check paper size setting on control panel for drawer N”
- 12. “Reboot the machine”
- 11. MAINTENANCE
- 12. SPECIFICATIONS & OPTIONS
- INDEX

164
5.USING THE EDITING FUNCTIONS
17.TAB PAPER (Cont.)
5
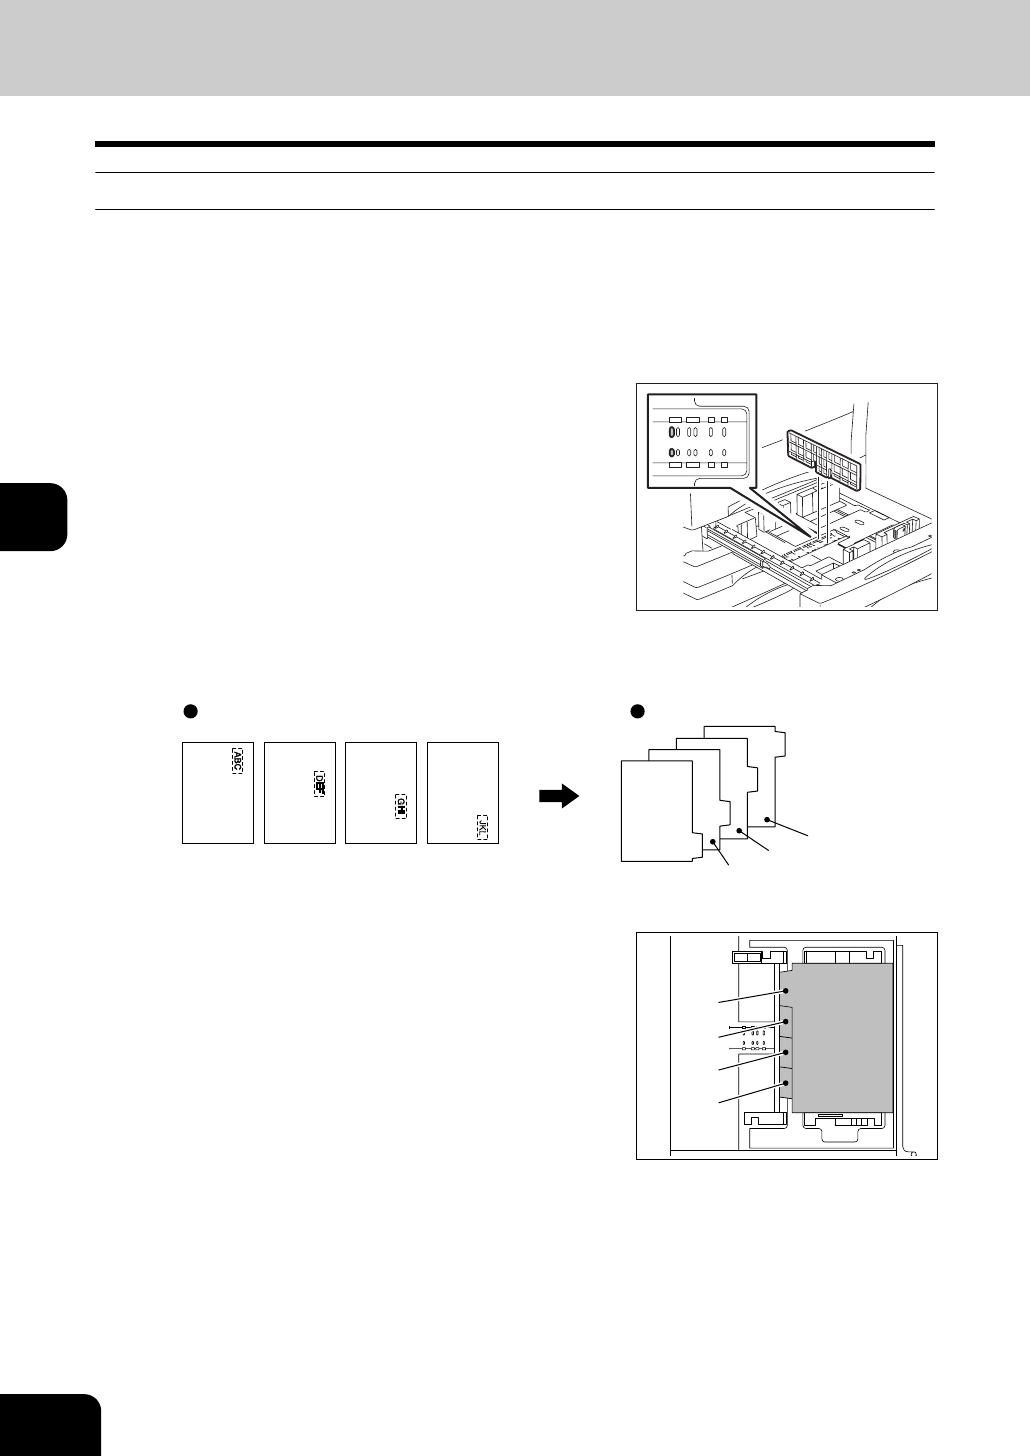
Setting tab paper in the drawer
The setting order is different between when the tab paper is set in the drawer and when it is set on the
bypass tray.
1
Pull out the drawer.
• Placing paper in the second drawer is recommended.
3
Align the tab paper with the original.
5
Close the drawer.
• Check if the drawer for special uses is “TAB PAPER”.
2
Insert the tab paper back guide into the
slit of A4-TAB (or LT-TAB).
4
Place the tab paper with its face down in
the drawer.
front
side
Originals Sheets of tab paper
1st 2nd 3rd 4th
4th
3rd
2nd
1st
1st
2nd
3rd
4th
back side


