
User's Manual
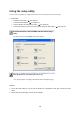
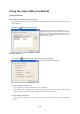
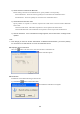

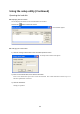
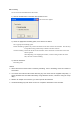
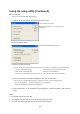
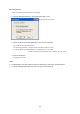
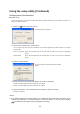
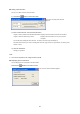
Table Of Contents

34
Using the setup utility (Continued)
Scanning disk
You can scan the hard disk built in the Product.
1) Click the Scan Disk button in the hard disk operation screen.
2) Click the Options button.
3) Select cross-link processing.
If part of the disk area is used concurrently by more than one file, set a method of cross-link processing.
Copy the cross-linked portion: Copies and leaves the cross-linked portion.
Delete all the cross-linked files: Deletes the cross-linked files.
Save only cross-linked files with correct file sizes: Saves only the properly cross-linked files.
4) Select a method for processing a damaged file, then click the OK button.
If you cannot use a file damaged owing to a certain cause as it is, set a processing method.
Save the damaged file: Saves the damaged file as a separate file.
Delete the damaged file: Deletes the damaged file.
5) Click the OK button. If the confirmation message appears, click the OK button. Disk scanning
starts.
Notes
•
You should regularly scan the disk.
•
Scanning the hard disk may take a few hours depending on its status.
•
To cancel disk scanning during the process, click the Cancel button.
The Set Scan Disk Options screen appears.
The Scan Disk screen appears.
Select Generate Log File if you need a report on the
scanned disk.