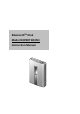
BluetoothTM Disk Model HOPBIT B105H Instruction Manual
Contents Introduction • • • • • Introduction ................................................................................................................................. 1 Safety instructions ...................................................................................................................... 2 Notes on use ............................................................................................................................... 6 Applicable standards ............................
ii
Introduction Welcome to the BluetoothTM disk, HOPBIT. Thank you very much for purchasing it. Before using this Product, you should carefully the Instruction Manual to correctly use it. After having read the Instruction Manual, you should store it nearby for convenient future reference. Please note that designs and specifications of the Product, and contents of its software and Instruction Manual are subject to change for modification or improvement without prior notice.
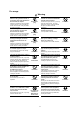
Safety instructions • • • Before using the Product, you should carefully read the safety instructions below to prevent any hazardous accidents, trouble, damage and injury, and malfunction. You must abide by those instructions, which cover important information about your safety. The following gives signal words and their meanings.
For usage Warning If you notice such trouble as an offensive odor, generated smoke, or overheating, turn off the Product and disconnect the AC adapter. Should you continue to use the Product, it may be on fire, or you may suffer an electric shock or burn. Ask your dealer to repair the Product. Should a foreign material or water enter the Product, turn off it and disconnect the AC adapter. Should you continue to use the Product, it may be on fire, or you may suffer an electric shock. Contact your dealer.
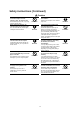
Safety instructions (Continued) Caution You must not use the Product in an environment subject to much moisture, vapor, oil smoke or dust. The Product may be on fire, or you may suffer an electric shock. Before moving the Product, you must disconnect the cord and cable. The cord and cable may be damaged, causing fire or electric shock. Before maintaining the Product, you must disconnect the AC adapter. If maintaining the Product with the AC adapter connected, you may suffer an electric shock.
AC adapter Warning You must connect the power plug for the AC adapter into a commercial 100 VAC outlet at your home. Should you use a voltage other than 100 VAC, the AC adapter may be on fire, or you may suffer an electric shock. You must not disassemble nor modify nor repair the AC adapter. The AC adapter may be on fire, or you may suffer an electric shock. You must neither cover the live AC adapter with bedclothes nor install the AC adapter near a heater or on a hot carpet.
Notes on use Handling • • • • You must not apply a strong shock to the Product. Otherwise, the Product may be damaged, or stored data may be destroyed. You must not apply excessive force to the display of the Product. Otherwise, the Product may be damaged. You must not apply any insecticide and volatile liquid to the Product. You must not make rubber or vinyl items contact the Product for a long period. Otherwise, the Product may be discolored or its coating may come off.
• • • • • Do not turn off the Product during writing to or reading from it. Otherwise, the data may be lost or the Product may malfunction. If the battery becomes dead during writing to or reading from the Product, the data may be lost or the Product may malfunction. If you use the battery, pay attention to the state of the battery. Regularly back up the data stored in the Product to provide against unexpected trouble, and changes and loss.
Built-in battery recycling The battery built in the Product is an advanced lithium ion battery, which is valuable because it can be recycled.
Notes on use (Continued) Limitation of applications • The Product has not been developed and manufactured so that it may be applied to a system containing equipment related directly to human life (*1). Do not, therefore, use the Product for such application.
Radio waves The Product uses a radio wave for communication. It may, therefore, incur deterioration of the communications performance, or equipment installed near it may be adversely affected depending on the site or direction of installation, or the operation environment. • • • • If you use the Product near a microwave oven, it may incur deterioration of the communications performance, or a communications error owing to effects of radio waves emitted from the microwave oven.
For Usage in the United States Notes on radio waves CHANGES OR MODIFICATIONS NOT EXPRESSLY APPROVED BY THE MANUFACTURER FORCOMPLIANCE COULD VOID THE USER’S AUTHORITY TO OPERATE THE EQUIPMENT. NOTE : This equipment has been tested and found to comply with the limits for a Class B digital device, pursuant to Part 15 of the FCC Rules. These limits are designed to provide reasonable protection against harmful interference in a residential installation.
Applicable standards For Usage in Japan Target country and region for use The Product meets the requirements of the radio application standard for use in Japan. • Note that, if you use the Product in a country or region other than Japan, you may be punished according to an applicable law therein.
AC adapter For Usage in Japan You must use the supplied AC adapter. Should you use another AC adapter, it may malfunction, or be heated or fired. Before using the Product, carefully read the Safety Instructions ( page 2) and the following description, and abide by the requirements on safety operations. • • • • • • • • • • You must prevent the contact of the AC adapter from touching other metals. Otherwise, the AC adapter may be shorted.
• • Buzzing noises may come form inside the product. This does not designate malfunction. Do not use the AC adapter near a radio because it could interfere with the radio.
Preparation • • • • • Product overview Components' designations Turning on the battery switch Charging the battery Installing the setup utility 15
16
Product overview The Product is a mobile storage device containing a 5G-byte hard disk drive. The Product, which is connected to destination equipment via Bluetooth or USB cable, transmits data. Connection configuration The Product, which is connected to destination equipment via Bluetooth, transmits data. PDA, personal computer or other equipment containing Bluetooth Product The Product, which is connected to destination equipment via the USB cable, transmits data.
To use the Product, take the following procedure. 1 Preparation [1] Turn on the battery switch. (See page 20.) [2] Charge the battery. (See page 21.) [3] Install the setup utility. (See page 22.) 2 Product configuration Use the setup utility. (See page 25.) 3 Destination equipment connection • Connect destination equipment via Bluetooth. (See page 36.) • Connect destination equipment via the USB cable. (See page 37.) Have data transmitted.
Components' designations Bluetooth antenna Main power switch (See page 24.) Reset switch (See page 38.) LCD display (See pages 19 and 38.) Bottom view Battery switch (See page 20.) AC adapter connector (See page 21.) Extension connector (Connector for the USB cable and the cradle) (See page 37.
LCD display indications Indication Description Indicates that destination equipment is connected via Bluetooth. Indicates that the Product is waiting for being connected via Bluetooth or the USB cable. Indicates that the Product is connected to a personal computer via the USB cable. Indicates that the hard disk of the Product is active. Indicates that the Product has been started in setup mode. Indicates that the built-in battery contains about 60 or more percent of the full charge capacity.
Turning on the battery switch The Product supports the battery switch for preventing the battery from discharging during a long deenergization period prior to its use or from being damaged during transportation. Your purchased initial Product is such that the battery switch is turned off. Before using the Product, turn on the battery switch. Placing the battery switch in the ON position OFF ON Battery switch Attention • Once you begin to use the Product, you will not turn off the battery switch.
Charging the battery The battery is built in the main body. When initially using the Product, turn on the battery switch (see page 20), then charge the battery. De-energize the Product before connecting it to the AC adapter. Insert the connection plug for the AC adapter into the Product's AC adapter connector. [1] Connection plug Power plug Insert the power plug into an outlet. [2] When the Product begins to be charged, the battery status LCD indicator starts to blink.
Installing the setup utility Install the setup utility into your personal computer. Before the installation, terminate the other applications. Recommended environment for a personal computer into which you want to install the setup utility OS Personal computer where Windows 98SE/2000SP2/ME/XP is pre-installed Required devices CD-ROM derive and USB port Insert the supplied software CD-ROM into your personal computer's CD-ROM drive. From the Start menu, choose Run. Enter :\setup.
24
Configuration • • Power-up/down Using the setup utility 25
26
Power-up/down • Preparation • Place the battery switch in the ON position. • If you use the purchased Product for the first time or if the built-in battery contains only insufficient charges, connect the AC adapter. ( See page 21.) Power-up Slide the main power switch in the arrow direction. When the Product is energized, appears. Starting the Product in configuration mode It takes about five or more seconds until appears in the LDC screen.
Using the setup utility You can use the setup utility to configure the Product, format the hard disk, and do other things. • Preparation • Install the setup utility. ( • Connect the AC adapter. ( • Start the Product in configuration mode. ( • Connect the Product to your personal computer using the USB cable. ( See page 22.) See page 21.) See page 24.) See page 37.) From the Start menu, choose HOPBIT and then choose Setup Utility. The main screen for the HOPBIT setup utility appears.
Using the setup utility (Continued) Setting Bluetooth Displaying the authenticated remote devices The Product displays the names of the destination Bluetooth devices it has already authenticated, and their device addresses. Choose the button in the main screen. The authenticated remote devices are displayed. You can subsequently connect the displayed remote devices without any passkeys. You can delete a selected remote device by clicking the Delete button.
4) Select whether to authenticate Bluetooth. Before starting connection to a destination device, specify whether to need a passkey. Do not authenticate: You do not need any passkeys for connection from a destination device. Do authenticate: You need a passkey for connection from a destination device. 5) Select Bluetooth detection mode. Specify whether to respond to a detection request from another device with the Product's Bluetooth device name.
2) Click the OK button. Bluetooth settings are initialized. The following are the initial values. Authenticated remote device: None Bluetooth device name: Bluetooth Disk Bluetooth passkey: None Bluetooth authentication: Not authenticated Bluetooth detection mode: Detection enable mode Caution • If you use the Product for the first time or if you have initialized Bluetooth, note that any destination devices can access the Product without any passkeys.
Using the setup utility (Continued) Operating the hard disk Displaying disk information You can display information on the hard disk built in the Product. Choose the button in the main screen. Disk information appears. Changing the volume label 1) Click the Change Label button in the hard disk operation screen. The Change Volume Label screen appears. 2) Enter a new volume label, then click the OK button. Enter a new volume label you want to set for the hard disk.
Formatting You can format the hard disk built in the Product. 1) Click the Format button in the hard disk operation screen. The Format screen appears. 2) Select an appropriate formatting option, then click the OK button. Set an appropriate formatting option. Normal formatting: Updates only control information on the data stored in the hard disk. The data may be reproduced using commercially available restoration software. Overall formatting: Deletes all the data on the hard disk.
Using the setup utility (Continued) Scanning disk You can scan the hard disk built in the Product. 1) Click the Scan Disk button in the hard disk operation screen. The Scan Disk screen appears. Select Generate Log File if you need a report on the scanned disk. 2) Click the Options button. The Set Scan Disk Options screen appears. 3) Select cross-link processing. If part of the disk area is used concurrently by more than one file, set a method of cross-link processing.
Defragmentation You can defragment the hard disk built in the Product. 1) Click the Defragment button in the hard disk operation screen. The Defragment screen appears. 2) Select conditions for the defragmentation, then click the OK button. Set conditions for the defragmentation. Forcible defragmentation: Defragments the hard disk regardless of effect. Do not defragment if the defined degree of fragmentation is not exceeded: Does not defragment the hard disk if that would have only little effect.
Using the setup utility (Continued) Setting system information/time Power setup You can specify the time when the Product's hard disk is stopped automatically, and whether to need the AC adapter for USB connection. 1) Select the button in the main screen. The Power Setup screen appears. 2) Select power saving mode or normal mode. You can specify the time when the hard disk in the Product supplied by the built-in battery is stopped automatically.
Setting a date and time You can set a date and time for the Product. 1) Choose the button in the main screen. The screen for setting a date and time appears. 2) Enter a date and time, then click the OK button. Acquire a date and time from the Bluetooth Disk: Displays the date and time stored in the Product. Acquire a date and time from your PC: Displays the date and time set in your personal computer. You can directly modify the date and time.
38
Others • • • Accessing a destination device Troubleshooting Specifications 39
40
Accessing a destination device Connection by Bluetooth The Product waits for Bluetooth connection immediately after it has been powered up. In this status, Bluetooth is started automatically when a destination device requests connection, with data transmitted by the FTP (File Transfer Profile). The Product is recognized by the other devices equipped with Bluetooth as external storage.
USB cable connection You can connect the Product to a destination device by the supplied USB cable. The Product connected by the USB cable is recognized by the destination device as external storage. Caution • • • If the battery becomes dead during writing to or reading from the Product, data may be lost, or the Product may malfunction. Use the AC adapter, or pay attention to the status of the battery if you use it.
Troubleshooting If you feel that trouble may have occurred, check the following items before asking for services. Trouble The Product is not turned on. Possible cause Actions to be taken See: The battery is dead. Charge the battery. 21 The power plug for the AC adapter is disconnected from the outlet. Insert the power plug into the outlet. 21 The battery switch is not placed in the ON position. Place the battery switch in the ON position.
Specifications Built-in battery: Advanced lithium ion battery Mass: About 178 grams (Only the main body) Outside dimensions: 110 mm (height) x 70 mm (width) x 21.5 mm (depth) (Excluding the projections, the accessories, and other items) Storage media: 1.8-inch ATA standard hard disk drive (5G-bytes). Fixed at format FAT32 Bluetooth: Conforms to Bluetooth 1.
Warranty and service Be sure to read the following. Written warranty (Separately supplied) • You must check the entries in the warranty including the purchase date and the dealer's name. Be sure to fully read its contents, and carefully keep the warranty. Warranty period: Described in the written warranty. Components • Unless otherwise described, Toshiba Corporation will take components removed for repair. • Toshiba Corporation may reuse components removed for repair if they satisfy its quality standard.