
User Manual
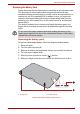
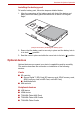

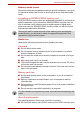
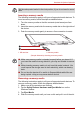


Table Of Contents
- Getting Started & Grand Tour
- Basic Operations
- Utilities & Advanced Usage
- Hardware & Options Operation
- Troubleshooting
- Specifications
- Wireless information
- Regulatory information
- Copyright
- Disclaimer
- Trademarks
- AVC/H.264 License Notice
- FCC information
- CE compliance
- Working environment
- Additional environments not related to EMC
- REACH - Compliance Statement
- Following information is only valid for EU-member States:
- Canadian regulatory information (Canada only)
- Canada – Industry Canada (IC)

User’s Manual 57
Hardware & Options Operation
Inserting a memory media
The following instructions apply to all types of supported media devices. To
insert a memory media, follow the steps as detailed below:
1. Turn the memory media so that the contacts (metal areas) are face
down.
2. Insert the memory media into the memory media slot on the right side of
the device.
3. Push the memory media gently to ensure a firm connection is made.
(Sample Illustration) Inserting a memory media
Removing a memory media
The following instructions apply to all types of supported media devices. To
remove a memory media, follow the steps as detailed below:
1. Make sure all file operations are finished.
2. Tap the Safely Remove Hardware and Eject Media icon on the
Windows Taskbar.
3. Tap Eject Media.
4. Push the memory media until you hear a click and pull it out of the slot.
Set the write-protect switch to the lock position, if you do not want to record
data.
1. SD card slot
2. Memory media
2
1
■ Make sure memory media is oriented properly before you insert it. If
you insert the media in wrong direction, you may not be able to remove
it.
■ When inserting memory media, do not touch the metal contacts. You
could expose the storage area to static electricity, which can destroy
data.
■ Do not turn the device off or switch to Suspend Mode while files are
being copied - doing so may cause data to be lost.