
Use and Care Manual


Table Of Contents
- NO TITLE
- NO TITLE
- NO TITLE
- NO TITLE
- During Operation Safety
- Operating the Mower Blade-Control Switch (PTO)
- Operating the Throttle
- Operating the Choke
- Operating the Ignition Switch
- Starting and Shutting Off the Engine
- Using the Motion-Control Levers
- Driving the Machine
- Stopping the Machine
- Adjusting the Height of Cut
- Adjusting the Anti-Scalp Rollers
- Using the Side Discharge
- NO TITLE
- NO TITLE
- NO TITLE
- NO TITLE
- NO TITLE
- NO TITLE
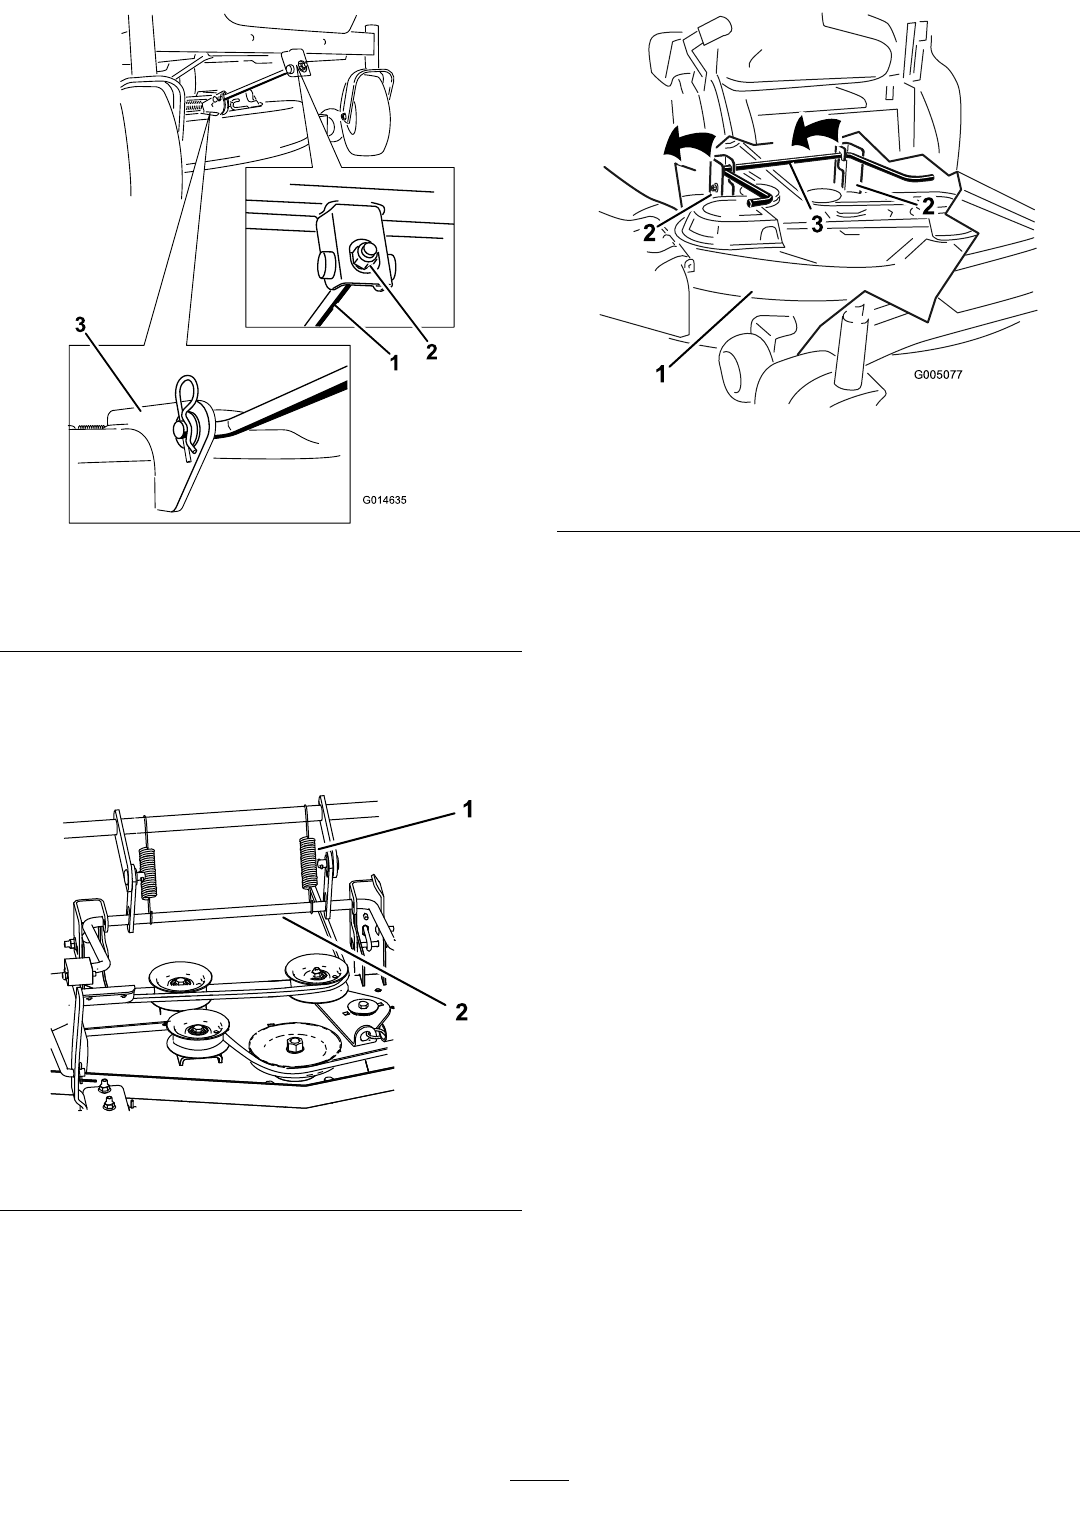
G014635
1
2
3
g014635
Figure64
1.Frontsupportrod3.Deckbracket
2.Lockingnut
5.Carefullylowerthefrontofthemowerdecktothe
ground.
6.For60-inchdecks,removethe2deck-liftsprings
(Figure64).
g188405
Figure65
1.Deck-liftspring(2)2.Rearliftrod
7.Liftthemowerdeckandhangerbracketsclearof
therearliftrodandlowerthemowercarefullytothe
ground(Figure66).
2
2
3
G005077
1
2
2
3
g005077
Figure66
1.Mowerdeck
3.Rearliftrod
2.Hangerbracket
8.Slidethemowerdeckrearwardtoremovethemower
beltfromtheenginepulley.
9.Slidethemowerdeckoutfromunderneaththe
machine.
Note:Retainallpartsforfutureinstallation.
InstallingtheMower
1.Parkthemachineonalevelsurfaceanddisengagethe
blade-controlswitch.
2.Movethemotion-controlleversoutwardtothePARK
position,shutofftheengine,removethekey,and
waitforallmovingpartstostopbeforeleavingthe
operatingposition.
3.Slidethemowerunderthemachine.
4.Lowertheheight-of-cutlevertothelowestposition.
5.Lifttherearofthemowerdeckandguidethehanger
bracketsovertherearliftrod(Figure66).
6.For60-inchdecks,installthe2deck-liftsprings(Figure
65).
7.Attachthefrontsupportrodtothemowerdeckwith
theclevispinandhairpincotter(Figure64).
Note:For60-inchdecks,attachthe2frontsupport
rodstothemowerdeckwiththe2clevispinsand2
hairpincotters.
8.Installthemowerbeltontotheenginepulley.
46