
Operation Manual
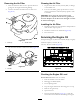
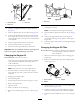
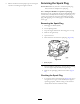
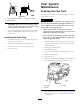

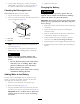
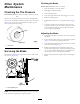
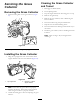
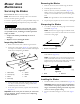

Figure29
1.Centerelectrodeinsulator3.Airgap(nottoscale)
2.Sideelectrode
Important:
Do not clean the spar k plug .
Always
replacethesparkplugwhenithasablackcoating,
wornelectrodes,anoilylm,orcracks.
2.Checkthegapbetweenthecenterandsideelectrodes
(Figure29)andbendthesideelectrodeifthegapis
notcorrect.
InstallingtheSparkPlug
1.Installthesparkplugandmetalwasher.Ensurethat
theairgapissetcorrectly.
2.Tightenthesparkplugto15ft-lb(20.4N-m).
3.Connectthewiretothesparkplug(Figure28).
4.Closethehood.
FuelSystem
Maintenance
DrainingtheFuelTank
Drainthefueltankwhenyouwillnotbeusingthemachine
formorethan30days.
DANGER
Incertainconditions,gasolineandgasolinevapors
areextremelyammableandhighlyexplosive.A
reorexplosionfromgasolinecanburnyouand
othersandcandamageproperty.
•Draingasolinefromthefueltankwhenthe
engineiscold.Dothisoutdoorsinanopenarea.
Wipeupanygasolinethatspills.
•Neversmokewhendraininggasoline,andstay
awayfromanopenameorwhereasparkmay
ignitethegasolinefumes.
1.Parkthemachinesothattheleftfrontsideisslightly
lowerthantherightsidetoensurethatthefueltank
drainscompletely.
2.Disengagetheblades(PTO).
3.Settheparkingbrake.
4.Stoptheengineandwaitforallmovingpartstostop.
5.Removetheignitionkey.
6.Openthehood.
7.Squeezetheendsofthehoseclamptogetherandslide
itupthefuellinetowardthefueltank(Figure30).
Figure30
1.Hoseclamp
3.Fuellter
2.Fuelline
8.Pullthefuellineoffthefuellter(Figure30)andallow
thegasolinetodrainintoanapprovedfuelcontainer
oradrainpan.
24