
User guide


8 TOPCOM Babytalker 1010
TOPCOM Babytalker 1010
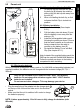
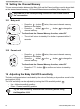
10 Supporting device for wall assembly
The baby unit is wall mountable. The appropriate screw is not supplied. Turn a 3mm screw
into the wall. The screw head must be approx. 3 mm out of the wall so that the screw can be
fixed correctly into the hang hole at the back of the baby unit. Hang the baby unit with its
hang hole
carefully to this screw.
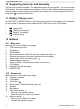
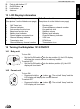
11 Battery Charge Level
The BATTERY CHARGE LEVEL in the Parent Unit, as well as in the Baby Unit is indicated
by the number of squares present inside the BATTERY icon on the LCD Display.
• Battery Full
• Battery 2/3 charged
• Battery 1/3 charged
• Battery empty
12 Buttons
12.1 Baby unit
(See picture 1 on the folded cover page)
1 VOX sensitivity control
2 Microphone
3 On/Off switch
4 Menu down button: Select the previous value in the menu.
5 External microphone connector (microphone not included)
6 Menu button: Enter the setting menu
7 Power adapter connector
8 Menu up button - Select the next value in the menu.
9 LCD display
10 Hang hole for wall mounting
11 ON/OFF LED
12.2 Parent unit
(See picture 2 on the folded cover page)
12 Charger connector
13 LCD display
14 Call button
15 Menu button - Enter the setting menu
16 Speaker
17 Microphone
18 Menu down button
– Decrease the speaker volume
– Select the previous value in the menu.
19 Menu up button
– Select the next value in the menu.
– Increase the speaker volume
10