
User manual Stinson Reliant SR9 (1/5)

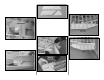


Notes for building former 4
A. Add the laser-cut 1/8" plywood former top F4C to
the upward facing side of the former top (this will be
the front) while it is pinned to the plan.
B. After you remove the top of the for mer from your
building board, add the die-cut 1/8" plywood top
corner braces F4CT to the back.
Notes for building former 5
A. From former 5 onward, all of the cross bracing
is permanent.
B. Glue the die-cut 1/8" balsa former bottom F5B to
the bottom of the former while it’ s still pinned to the plan,
and glue the former top F5T to the top of the former.
Notes for building former 6
A. For formers 6, 7 and 8, there are die-cut 1/8"
plywood corner braces for only one side (the front)
of the for mer.
B. Add the die-cut 1/8" balsa former sides F6S and
bottom F6B to the assembly while it is pinned to
your building board.
C. The former tops on formers 6, 7 and 8, consist of
two die-cut 1/8" plywood halves. After joining the
halves over the plan, reinforce the joint with leftover
3/32" balsa. Note: Do not be alarmed if the die-cut
ply formers will not rest flat on your building board.
You will be able to remove any twists when the
stringers are added later on.
Notes for building formers 7 & 8
Use two 1/8" x 1/2" x 24" balsa sticks and two 1/8" x
1/4" x 24" balsa sticks for the framework of f ormers 7
and 8.
That was a good evening’s work wasn’t it! Clean up
your building board and neatly stack up all your
beautifully constructed formers. You can knock off f or
the evening, or forge ahead and start framing the
fuse bottom.
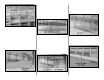
Build the bottom of the fuse
❏ 1. Accurately tape the fuse plans together along
the dotted lines. Place the top view ov er y our b uilding
board and cover it with Great Planes Plan Protector.
Note: Your building board needs to extend only from
for mer 3 to former 9.
❏ 2. Securely pin both 1/8" x 3/8" x 42" balsa main
stringers to the plan. Cut the aft end of the stringers
at the aft edge of for mer 9.
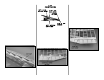
❏ 3. Glue the bottom portions of for mers 3, 4 and 5
to the stringers over their locations on the plan. As
you proceed, use a small builder’s square to be
cer tain the formers are vertical.
❏ 4. Use 1/4" x 1/4" balsa sticks you have left over
from building the formers, and additional 1/4" x 1/4"
x 36" balsa sticks to make the temporary cross
- 28 -