
User manual Stinson Reliant SR9 (1/5)

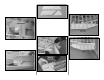


❏❏12. As you did for the cap strips over ribs 7, 8
and 9, taper the 3/32" cap strips on the top of the flap
down to 1/16" at the TE of the flap . Use a 1/16" x 1/4"
x 36" balsa stick f or the flap edging and glue it to the
TE of the flap. Sand the edging even with cap str ips
and the edging on the center TE. Sand all surfaces
so the flap blends to the wing.
❏❏13. Locate both of the die-cut 1/8" plywood flap
hinge drill guides. Use one of the guides to mark
the location of the center flap hinge using the
closer
together
set of embossed lines on the drill guide.
Note that the center line on the guide is positioned
where the flap LE meets the inner TE.
❏❏14. Mar k the location of both outer flap hinges
the same way, only this time using the
far ther apart
set of embossed lines on the flap hinge drill guide.
❏❏15. On one dr ill guide, use a hobby knife to cut
the rest of the way through the par tially die-cut line.
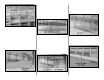
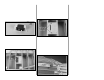
❏❏16. Glue the two separated pieces to the other
drill guide as shown in the following photos. You can
see how the drill guide will be used to align your drill
for the flap hinges. For additional guidance and
accuracy, glue 7/32" O.D. (3/16" I.D.) brass tubes to
the guide.
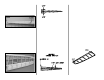
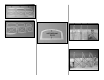
❏❏17. Using the dr ill guide, drill 3/16" holes in the
wing and in the flap at the marks you made earlier.
You can use a 3/16" drill bit, but a 3/16" O.D. brass
tube shar pened at the end cuts much cleaner holes.
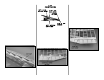
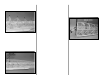
❏❏18. Carefully remove the flap from the wing.
True the ends of the flap with a bar sander and 80-
grit sandpaper for a good fit to the wing. Test fit the
flap to the wing with your hinges.
❏❏19. Shape the LE of the flap as shown in the
cross section on the plan and in the sketch at step 5
on page 24.
- 25 -