
User Manual

45
❏
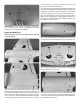
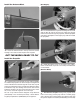
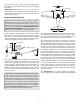
11. Again, check the pilot position before gluing the control
stick in the cockpit oor.
❏
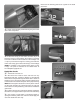
12. Wash the canopy in warm water, and then, dry it off.
Place the canopy on the fuselage. Be certain it is centered
from side-to-side and mark the outline on the fuselage. Use
a T-pin to prick holes through the covering just inside the
outline. Use canopy glue to attach the canopy on the fuselage.
NOTE: If installing a pilot, install it before gluing on the
canopy. The pilot we installed is from Best Pilots at
www.bestpilots.typepad.com
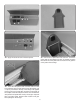
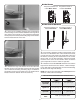
Apply the decals
❏
1. The decals come die-cut.
❏
2. Be certain the model is clean and free from oily
ngerprints and dust. Prepare a dishpan or small bucket
with a mixture of liquid dish soap and warm water—about 1/2
teaspoon [2.5cc] of soap per gallon of water. Submerse one
of the decals in the solution and peel off the paper backing.
NOTE: Even though the decals have a “sticky-back” and are
not the water transfer type, submersing them in soap and
water allows accurate positioning and reduces air bubbles
underneath.
❏
3. Position decal on the model where desired. Holding the
decal down, use a paper towel to wipe most of the water away.
❏
4. Use a piece of soft balsa or something similar to
squeegee remaining water from under the decal. Apply the
rest of the decals the same way.
Please use the following pictures as a guide for the decal
placement.