
User manual
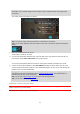
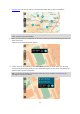
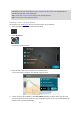
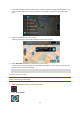
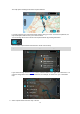
Table Of Contents
- Welcome to navigation with TomTom
- What's new
- Get going
- TomTom services
- Connecting a smartphone
- Wi-Fi connection
- What's on the screen
- Traffic
- Syncing using TomTom MyDrive
- About TomTom MyDrive
- Logging in to MyDrive
- Setting a destination using MyDrive
- Planning a route with stops using MyDrive
- Showing a planned destination in MyDrive
- Clearing a MyDrive destination
- Deleting a MyDrive destination from My Places
- Set a phone contact as your destination using the MyDrive app
- Finding and syncing locations using MyDrive
- Syncing My Places locations with MyDrive
- Importing a community POI list
- Deleting a community POI list
- Importing a track GPX file
- Deleting a track GPX file
- Saving and restoring your personal navigation information
- Quick search
- Choosing which search to use
- Using quick search
- Planning a route using quick search
- Using destination prediction
- Planning a route to an address
- Planning a route to a city centre
- Planning a route to a POI
- Planning a route to a POI using online search
- Planning a route using the map
- Planning a route using My Places
- Planning a route using coordinates
- Planning a route using a mapcode
- Planning a route in advance
- Finding a car park
- Finding a petrol station
- Step by step search
- Choosing which search to use
- Using step by step search
- Planning a route using step by step search
- Using destination prediction
- Planning a route to an address
- Planning a route to a POI
- Planning a route to a city centre
- Planning a route to a POI using online search
- Planning a route using the map
- Planning a route using My Places
- Planning a route using coordinates using step by step search
- Planning a route in advance
- Finding a car park
- Finding a petrol station
- Changing your route
- The Current Route menu
- Avoiding a blocked road
- Avoiding part of a route
- Finding an alternative route
- Types of route
- Avoiding features on a route
- Avoiding an incident or route feature using the route bar
- Adding a stop to your route from the current route menu
- Adding a stop to your route using the map
- Deleting a stop from your route
- Skipping the next stop on your route
- Reordering stops on a route
- My Routes
- About My Routes
- About GPX and ITN files
- Saving a route
- Navigating using a saved route
- Navigating to a stop on a saved route
- Adding a stop to a saved route using the map
- Recording a track
- Navigating using a track
- Deleting a route or a track from My Routes
- Exporting tracks to a memory card
- Importing routes and tracks from a memory card
- Voice control (Speak&Go)
- About voice control
- Starting voice control
- Making your own wake-up phrase
- The voice control screen
- Some tips for using voice control
- What you can use voice control for
- Saying commands in different ways
- Entering an address using voice control
- Going to home using voice control
- Going to a POI using voice control
- Changing a setting using voice control
- Talking to Siri or Google Now™
- Map Share
- Speed Cameras
- Danger Zones
- My Places
- About My Places
- Setting your home or work location
- Changing your home location
- Adding a location from My Places
- Add a location to My Places from the map
- Adding a location to My Places using search
- Adding a location to My Places by marking
- Deleting a recent destination from My Places
- Deleting a location from My Places
- Using community POI lists
- Hands-free calling
- About hands-free calling
- Volume control for hands-free calling
- Accepting an incoming call
- Ending or rejecting an incoming call
- Ignoring an incoming call
- Making a hands-free call
- Making a hands-free call using your contact book
- Replying by SMS to a call
- Receiving an SMS or IM
- Switching off messages
- Talking to Siri or Google Now™
- Settings
- Getting Help
- Product certification
- Using MyDrive Connect
- TomTom account
- Addendum
- Copyright notices

66
Tip: You can switch between seeing the results on the map or in a list by selecting the list/map
button:
5. Select a suggestion for your destination.
6. To plan a route to this destination, select Drive/Ride depending on which device you are using.
A route is planned and then guidance to your destination begins. As soon as you start driving, the
guidance view is shown automatically.
Tip: If your destination is in a different time zone, you see a plus (+) or a minus (-) sign and the
time difference in hours and half hours in the arrival information panel. The estimated time of
arrival is the local time at your destination.
Tip: You can add a stop to a route that you have already planned.
Tip: You can save a route using My Routes.
Planning a route in advance
You can plan a route in advance before you drive it. You can save the route as part of your My Routes
list.
To plan a route in advance, do the following:
1. Search for the location you want to use as a starting point.
2. Select Show on Map.
3. Select the pop-up menu button.
A pop-up menu shows a list of options.
4. Select Use as Starting Point.
5. Search for the location you want to use as your destination.
6. Select Show on Map.
7. Select Drive/Ride in the pop-up menu.
Your route is planned using your chosen starting point and destination. The estimated journey
time is shown at the top of the route bar.
Tip: Stops, POIs and Places can all be selected as starting points using their pop-up menus.
Tip: You can save the route in My Routes.
8. To drive to the starting point, select Drive/Ride at the top of the screen.
The starting point of the route is converted to your first stop and then the route is planned. Guid-
ance to your destination begins from your current location. As soon as you start driving, the
guidance view is shown automatically.