
Installation Instructions

III. GENERAL INSTALLATION REQUIREMENTS
1. See individual product specificaons for approved
installaon methods. 3/8” thick products can be installed
glue down or nail/staple methods only.
2. Cleats are preferred for high-density wood species. Minor
occasional noise (such as squeaking) within the flooring is
inherent to all staple and nail-down applicaons and can
occur as environmental condions change. Mechanically
fastened products are not warranted against squeaking or
popping sounds.
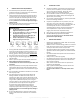
3. Blind nail along the length of strip/plank and near the ends
(1"-3"). Minimum of 2 nails per strip/plank.
IMPORTANT NOTE:
● For 3/8” thick products 1-¼” (18-20 gage), 4d
bright wire casing nail- 3-4” apart
● For 1/2” thick products 1-¼” to 1-½” (18-20 gage),
5d bright wire casing nail-3-4” apart
● For 9/16” thick products 1-½”(18-20 gage), 5d
bright wire casing nail- 4-6” apart
● For 5/8 “ thick products 1-½”(18-20 gage), 5d
bright wire casing nail- 6-8” apart
4. Flooring should be installed from several cartons at the same
me to ensure the best blend of color and shade mix. If a
piece of flooring is debatable due to manufacturing, color,
finishing, grade, or showing a visual defect, do not install .
5. End joints should never be closer than 6” from each other.
6. Tongue and groove should be engaged by tapping block or a
so-head mallet.
7. Allow ½” expansion space around all vercal obstrucons.
8. Always follow the adhesive manufacturer’s
recommendaon for correct trowel notch, open me, and
spread rate.
9. Li a plank periodically to ensure proper adhesive transfer.
Clean adhesive off the surface of the wood with adhesive
manufacturer-approved cleaner and so cloth before it gets
dry.
10. If recommended by the adhesive manufacturer, roll the floor
with the proper roller.
11. Use approved tongue and groove flooring adhesive for
floang installaon. The adhesive must be used on all
side/end joints. Apply 1/8” connuous bead of glue on the
boom edge of the groove and the top of the tongue. If you
see glue come up between the planks, you’re using too
much glue. Aer 4-5 rows check the floor for squareness as
you will sll have me to adjust it before the glue sets.
Ensure the floor is aligned properly and connue as
necessary; using flooring straps to hold the flooring
temporarily in place. Remove excess glue as you go. Float
installed products are not warranted against squeaking or
popping sounds.
12. Do not install floang floors in excess of 30 feet in either
length or width of the room without the use of transion
moldings.
IV. COMPLETING THE JOB
● Glue Down Installaon: roll with 100 to 150 lb roller every 2
to 3 hours, and on compleon, to ensure all planks are flat
and in contact with the adhesive. Please refer to the
adhesive manufacturer's installaon guidelines.
● For all installaon methods: remove the spacing wedges,
and install the base moldings. Always nail moldings to the
adjacent wall, not the flooring.
● For glue down and float applicaons, restrict any foot traffic
for 12 hours following installaon.
● Inspect the completed floor for any scratches, nicks, and
minor gaps. Use a touch-up kit, filler, or wood puy as
needed. Hint: Test filler on a spare piece of plank. Note: The
use of fillers/puy and stain is recommended and
acceptable industry pracce. Full plank replacements are
also acceptable forms of repair and do not affect the
integrity of the floor when completed correctly.
● Clean, sweep, and vacuum installed flooring before use.
● Do NOT adhere any tape to the face of the
floor as it will damage the finish. No claims will be
processed for tape damage.
V. GENERAL MAINTENANCE
✓
Maintain room temperatures of 60ºF - 80ºF and a humidity
range of 35% - 60% year-round.
✓
NEVER use wax or oil-based cleaning products on a urethane
finish. All-purpose cleaners are not recommended as they
can dull your floors finish or leave a hazy residue.
✓
We recommend Bona cleaning products, which are widely
regarded as the best cleaning soluon for urethane finished
flooring.
✓
We recommend Woca brand products for the maintenance
of oil finished floors.
✓
Sweep, vacuum, or dust mop regularly.
✓
Use walk-off mats at entrance doors and in high traffic areas.
✓
Install proper felt protectors under the chair and furniture
legs to prevent scratching.
✓
Close curtains or blinds to limit direct sun exposure and
protect from possible fading.
✓
Wipe up spills immediately. Never let water stand on the
wood floor for any length of me.
✓
Do not use steam cleaners or a wet mop to clean wood
floors.
Version,July 2020 Engineered Hardwood Flooring – Installaon Guide 2 of 2