
Installation Guide
Page 8
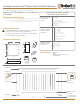
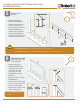
DETERMINE
METAL BALUSTER
LOCATIONS
3
4
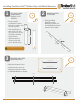
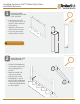
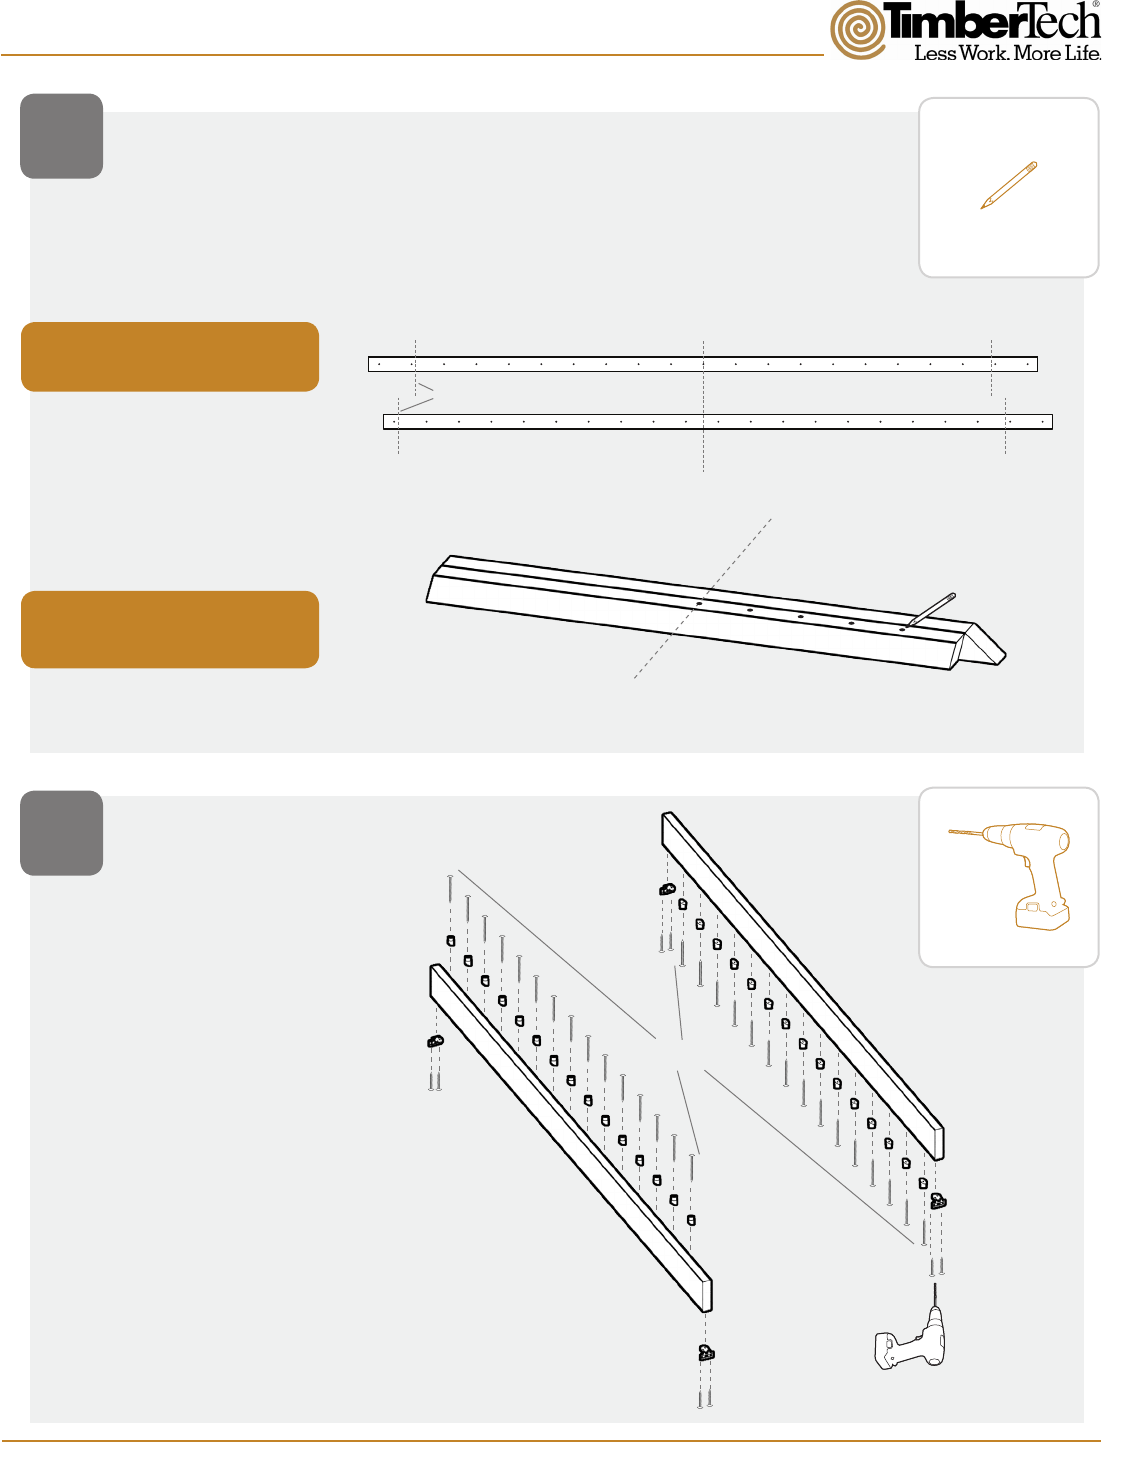
ATTACH BALUSTER
CONNECTORS AND
HINGE BRACKETS
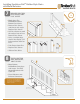
• Pre-Drill holes roughly 2”
deep for angled Baluster
Connectors using a 9/64”
bit and either a Baluster
Connector or piece of
scrap cut to the stair
angle as a drill guide.
• Attach Baluster
Connectors.
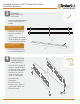
• Pre-Drill holes for
Brackets using them as
guides with a 9/64” bit.
• Attach Brackets.
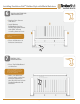
• Lay trimmed BuilderBoards
side by side oriented as
shown.
• Using template provided,
mark the Baluster positions
on the BuilderBoard Rail.
• Transfer Baluster marks
to second BuilderBoard.
Clamping boards together will make
transferring locations much easier.
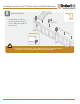
Stair metal Balusters should be
spaced at 5.5”.
Pre-Drill 9/64”
#10 x 7/8”
Coated Screws
Pre-Drill 9/64”
#10 x 2” Coated Screws
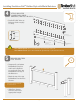
Centerline
Baluster Centered
Space Centered
• Determine if a space or
Baluster should be on
center.
Cut lines from Step 2
Installing Evolutions Rail
TM
Builder Style Stairs
with Metal Balusters