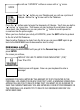
Ages 5 & up Pokédex Deluxe ® x édee Pok ux Del INSTRUCTIONS
Contents YOUR POKÉDEX DELUXE KEYPAD .......................................... 2 1. POKÉMON ARCHIVE ........................................................... 4 2. PERSONAL LOG...................................................................5 3. COMMUNICATOR ................................................................ 7 4. TO DO LIST ......................................................................... 10 5. SECURITY SYSTEM .......................................................... 13 6.
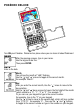
POKÉDEX DELUXE ® x édee x Pok Delu Turn ON your Pokédex. Welcome to a place where you can learn all about Pokémon!. NAME After the opening screens, type in your name. Use the keypad to do this. Then press ENTER. DATE Enter in the date. Month: You will see the month of “JAN” flashing. Use the “ ” and “ ” arrows to toggle to the correct month. For example “March”. Day: After you enter the correct month, Use the “ ” arrow to move to the day selection.
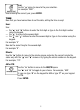
Year: Use the “ ” arrow to move to the year selection. For example “2001”. After entering the correct year, press ENTER. TIME Now that you have learned how to set the date, setting the time is easy! Hour: Use : — the “ ” and “ ” buttons to enter the first digit or type in the first digit number using the keypad. — the “ ” to move to the second digit. — the “ ” and “ ” buttons to enter the second digit or type in the number using the keypad. For example “0” Now do the same thing for the second digit.
ALARM On screen, you’ll see: ALARM: 12:00AM Set the alarm the same way, using the direction arrows or typing in the numbers. Then press ENTER. After setting the alarm, you will see: “WOULD YOU LIKE TO SET THE ALARM FUNCTION? Y/N?” Type in “Y” for yes or “N” for no. If yes, then use “ ” & “ ” to set alarm to be ON or OFF. Then press ENTER. SOUND EFFECTS You can also set the unit to hear sound effects. On screen, you will see the words, “WOULD YOU LIKE TO SET THE SOUND EFFECTS? Y/N.
You will see “CATERPIE” written on screen with a “ ” arrow. Press the “ ” button on your Pokédex and you will see a picture of Caterpie. Notice the “ ” arrow next to the Pokémon. Press the “ ” button again to begin the biography of Caterpie. You’ll also see both a “ ” and an “ ” arrow now. That means you can continue to scroll down to read more about your Pokémon or you can press the “ ” button to scroll upward to re-read and see the picture again.
Saving your messages: When you are done typing, press the ENTER button. On screen you will see, “WOULD YOU LIKE TO SAVE YOUR OWN NOTES? Y/N” Type “Y” for yes. You then go back to the main menu. Entering more messages: You want to enter more messages to your personal log? No problem! Highlight PERSONAL LOG again and press ENTER. You will see your first message. Press EDIT. On screen you will see, “WOULD YOU LIKE TO ENTER YOUR OWN NOTES? Y/N” Press Y. Type in another message and press ENTER.
Press “Y” for yes to start editing (revising) your message. Use the directional arrows to move the cursor to the part of the message you want to change. Then by pressing the DELETE button, you will delete whatever letter is by the cursor. As you delete letters, you can retype whatever revised message you wish to write. When you’re done revising, resave your message by pressing the ENTER button.
Use the “ ” and “ ” buttons to scroll to the item you need and press ENTER to work in that file. Names and Phone Numbers: Let’s begin by highlighting NAMES AND PHONE NUMBERS and pressing ENTER. On screen, you will see, WOULD YOU LIKE TO ADD NAMES & PHONE NUMBERS? Y/N Press Y for yes. Name: Type in the name (up to 17 letters) and press ENTER. Phone Number: Now type in the phone number. Press ENTER. On screen, see the message WOULD YOU LIKE TO ADD NAMES & PHONE NUMBERS? Y/N again.
Adding More Names and Phone Numbers: You can enter a total of 25 names and phone numbers. Press EDIT to add more names. Follow the same procedure as before. Deleting Names and Phone Numbers: Press DELETE instead of edit. See an arrow on screen and use your directional buttons to move the arrow to highlight the entry you want to change. When the entry is highlighted, you have two options: Option 1: Press the DELETE button to delete the entire entry.
Web Addresses: If you want to record web addresses, it’s just as easy! From the file menu, use the “ ” and “ ” buttons to scroll up or down to WEB ADDRESSES and press ENTER. On screen, you will see the message: WOULD YOU LIKE TO ADD WEB ADDRESSES? Y/N Press “Y” for yes. Use the same procedure to add, edit and delete web addresses as you used for “E-Mail” and for “Names and Phone Numbers”. You can save up to 25 web addresses! TO DO LIST From the main menu, press ENTER.
Adding more schedules: Press EDIT to add more scheduling. See the screen: WOULD YOU LIKE TO ENTER REMINDER TO YOURSELF? Y/N Type in “Y” for yes or “N” for no. If YES, enter in an alarm setting just as before for this new schedule. Then press ENTER and type in the additional schedule. If NO, you will go right to a blank screen for typing in the additional schedule. When you’re finished with the added schedule, press ENTER. THE TO DO LIST CAN ONLY HOLD 15 REMINDERS AT ONE TIME.
Press the “ ” button to toggle through your schedules. When you get to the schedule you want to delete, press the DELETE button. On screen, you will see EDIT THIS SCHEDULE? Y/N So you have two options. Option 1: If you type in Y for yes, you can go right into the schedule and delete/change parts of the DAY and TIME, using the “ ” and “ ” arrows to move through the day and time and then type over the letters or numbers you are highlighting to delete the old letters and numbers and replace them with new text.
SECURITY SYSTEM This is where you enter your own private password and lock out intruders from entering your files! Neat! Highlight the SECURITY SYSTEM from the main menu and press ENTER. On screen you will see SECURITY SYSTEM followed by PLEASE ENTER YOUR PASSWORD. Your password can be up to 8 letters long. Type in a password of your choice and press ENTER. On screen you will see, RECONFIRM AND RETYPE YOUR PASSWORD If you type it incorrectly the second time, you will see “PASSWORD INCORRECT”.
On screen you will see, THE FOLLOWING FUNCTIONS ARE NOW LOCKED and then a list of whatever functions you have “password protected”. If you have entered several functions as “password protected”, use the “ ” arrow to see them all. Press QUIT a second time. Now you’re back in the Main Menu. Go to a section that you have password protected. Instead of the function opening, on screen you will see “PLEASE ENTER YOUR PASSWORD.” If you type in the wrong password, you will see “WRONG PASSWORD.
SYSTEM CORE The SYSTEM CORE is all the basic information you entered when you first programmed your Pokédex. Highlight this function from the Main Menu and press ENTER. By either repeatedly pressing the “ ” button or by repeatedly pressing the ENTER button you can toggle through all your basic information: NAME, DAY, TIME, ALARM and SOUND EFFECTS. To change any of this information, go to the screen you wish to change. For example, go to the NAME screen and press EDIT.
SORTER In the SORTER function, you can sort the 250 Pokémon in many different ways including HEIGHT, WEIGHT and TYPE. Highlight SORTER from the main menu and press ENTER. On screen you will see SORT THE POKÉMON BY THE FOLLOWING ATTRIBUTES Press ENTER. You will see HEIGHT WEIGHT TYPE Use the “ ” and “ ” buttons to toggle through these three choices. For instance, with HEIGHT highlighted, press ENTER.
Now this is really cool - you can press the ENTER button here to enjoy all the fantastic information and graphics from the archive folder inside the SORTER! For example, highlight IVYSAUR and press ENTER and you will see the illustration of IVYSAUR. As with the POKÉMON ARCHIVE, you will notice an arrow in the bottom right hand corner. Use the “ ” button to scroll from the illustration through the biography of IVYSAUR.
You will see the types of Pokémon that are of the VINE TYPE. There is only one: 114 TANGELA Press ENTER and scroll through the picture and biography of TANGELA. CATCH ‘EM This is your Pokémon Catch’em function. Here you can capture up to 9 Pokémon at one time. From the MAIN MENU, press ENTER from the CATCH ‘EM icon. On screen you will see: “SELECT WHICH POKÉMON YOU WISH TO CAPTURE.” Press ENTER. You will see the list of all 250 Pokémon. Scroll to a Pokémon you want to capture. For example: 004 CHARMANDER.
PLEASE NOTE YOU CAN ONLY CAPTURE 9 POKÉMON IN THE CATCH’EM FUNCTION. When you press QUIT, you will see: “WOULD YOU LIKE TO SAVE YOUR CAPTURE LIST? Y/N” Press Y to save your list and you will go back to the Main Menu. When you go back into the “CATCH ‘EM” file, you can scroll through your capture list and press ENTER on any of your capture entries. You can then scroll through the pictures and bios just as in the SORTER! From your capture list, you can also press EDIT.
INSERTING OR REPLACING BATTERIES Reset Operations: By pressing the reset button, you can delete all the data previously entered. A screen will ask you, DATA FOUND! KEEP RECORD? Y/N. By pressing Y (yes) all data will be deleted. By pressing N (no), you will return to the initial screen. Be sure to press the reset button before you use Pokédex Deluxe for the first time. Replacing Batteries: This Pokédex Deluxe is powered by two button-cell batteries type LR44 or G13A and four AAA or LR03 batteries.
Important: Incorrect use of batteries can cause them to burst or leak, possibly damaging the interior of the Pokédex Deluxe. Note the following precautions: Never leave dead batteries in the battery compartment. To avoid damage to the unit from leaky batteries, replace both the main battery and the back-up battery every three years. Batteries should be replaced no matter how much you use the diary during that time. Warning: Never try to recharge the batteries supplied with Pokédex Deluxe.
CAUTION: To ensure proper function: • Do not mix old and new batteries. • Do not mix alkaline, standard or rechargeable batteries. • Battery installation should be done by an adult. • Non-rechargeable batteries are not to be recharged. • Rechargeable batteries are to be removed from the toy before being charged (If removable). • Rechargeable batteries are only to be charged under adult supervision (If removable). • Only batteries of the same or equivalent type as recommended are to be used.
90-DAY LIMITED WARRANTY Tiger Electronics. (Tiger) warrants to the original consumer purchaser of this product that the product will be free from defects in materials or workmanship for 90 days from the date of original purchase. This warranty does not cover damages resulting from accident, negligence, improper service or use or other causes not arising out of defects in materials or workmanship.
Warning: Changes or modifications to this unit not expressly approved by the party responsible for compliance could void the user’s authority to operate the equipment. NOTE: This equipment has been tested and found to comply with the limits for a Class B digital device, pursuant to Part 15 of the FCC Rules. These limits are designed to provide reasonable protection against harmful interference in a residential installation.
Official Licensed Product TM © 1995-2001 Nintendo, CREATURES, GAME FREAK. TM & ® are trademarks of Nintendo. © 2001 Nintendo. A division of Hasbro, Inc. ®, TM, & © 2001 Tiger Electronics. All rights reserved. 980 Woodlands Parkway, Vernon Hills, IL 60061, USA www.tigertoys.