25825/26 5.8 GHz Digital Cordless Handsfree Handset /Answering System with Call Waiting Caller ID User’s Guide We bring good things to life.
EQUIPMENT APPROVAL INFORMATION Your telephone equipment is approved for connection to the Public Switched Telephone Network and is in compliance with parts 15 and 68, FCC Rules and Regulations and the Technical Requirements for Telephone Terminal Equipment published by ACTA. 1 Notification to the Local Telephone Company On the bottom of this equipment is a label indicating, among other information, the US number and Ringer Equivalence Number (REN) for the equipment.
TABLE OF CONTENTS EQUIPMENT APPROVAL INFORMATION ........ 2 INTERFERENCE INFORMATION ................... 2 FCC RF RADIATION EXPOSURE STATEMENT .................................. 2 HEARING AID COMPATIBILITY (HAC) ........ 2 TABLE OF CONTENTS ............................. 3 INTRODUCTION ..................................... 5 DIGITAL SECURITY SYSTEM ................. 6 HANDSET AND BASE LAYOUT .................. 7 BEFORE YOU BEGIN .............................. 8 PARTS CHECKLIST .............................
VOLUM E CONTROL ................... INTERCOM ...................................... M AKING AN INTERCOM CALL ............. RECEIVING AN INTERCOM CALL ... RECEIVING AN EXTERNAL TELEPHONE CALL DURING AN INTERCOM CALL ..... U SING INTERCOM OR CONFERENCE WITH EXTERNAL CALLS ................. STORING A REDIAL N UM BER ............. INSERTING A PAUSE IN THE DIALING SEQUENCE ..................................... REVIEWING, CHANGING OR DELETING STORED N UM BERS .......................... TO REVIEW : ...............
INTRODUCTION CAUTION: Wh en usin g teleph on e equipmen t, there are basic safety in struction s th at sh ould always be followed. Refer to the IMPORTANT SAFETY INSTRUCTIONS provided with th is product and save them for future referen ce. Congratulations on purchasing this GE cordless telephone/answ ering system w ith Call Waiting Caller ID. This telephone has been designed to be sim ple to use, how ever, you can reach its full potential m ore quickly by taking a few m inutes to read this instruction book.
IMPORTANT: Because cordless ph on es operate on electricity, you should have at least on e ph on e in your h ome th at isn ’t cordless, in case the power in your h ome goes out.
HANDSET AND BASE LAYOUT display CID/VOL button talk/callback button spk button skip button play/stop button CID/VOL call back review button talk #/pause button spk rew erase button skip 1 pl ay st 2 3 op flash/answer button def abc 4 ghi 6 5 m no 8 w xyz pause 0 w xyz # jkl */exit button 7 pqrs exit form at format/mute button m ut e prog select delete redial prog/select button 9 tuv erase * Charge indicator answ er AC power converter sh fla int/conf button
BEFORE YOU BEGIN PARTS CHECKLIST M ake sure your package includes the item s show n here.
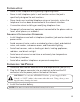
INSTALLATION • Never install telephone w iring during a lightning storm . • Never install telephone jacks in w et locations unless the jack is specifically designed for w et locations. • Never touch non-insulated telephone w ires or term inals, unless the telephone line has been disconnected at the netw ork interface. • Use caution w hen installing or m odifying telephone lines. • Tem porarily disconnect any equipm ent connected to the phone such as faxes, other phones, or m odem s.
• Lift the battery pack and connect it's plug to the jack inside the com partm ent. BATTERY BLACK WIRE PRESS DOWN FIRMLY RED WIRE NOTE: It is importan t to main tain th e polarity ( black and red wires) to the jack in side th e compartmen t as sh own in th e illustration. • Slide the battery com partm ent cover back into place.
CID/VOL call back talk spk rew skip 1 pl ay st 2 3 op def abc 4 ghi 6 5 m no 8 w xyz pause jkl 7 pqrs exit 9 tuv erase * # 0 form at m ut e prog select delete redial w xyz answ er sh fla int conf m em ory Model 25825 CID/VOL call back talk spk rew pl ay st 2 3 op CID/VOL call back skip 1 talk def spk abc 4 ghi rew 6 5 m no 8 w xyz pause 0 # 7 pqrs exit 9 tuv erase * form at m ut pl ay 3 op def 6 5 m no 8 w xyz pause jkl 7 pqr
WALL MOUNTING THE BASE NOTE: For best results, leave th e base on a flat sur face during initial charging before you h an g it on th e wall. 1. Turn the base over. 2. Rem ove the m ounting pedestal. 3. Slip the mounting holes (on the back of the pedestal) over the wall plate posts and slide the unit down into place. (Wall plate not included.
3. Press the CID/VOL ( or ) button to scroll to ADD M EM ORY. MAIN MENU ADD MEMORY LANGUAGE 4. Press the prog/select button. ADD MEMORY ENTER NAME NOTE: If you don ’t wan t to en ter th e n ame, skip step 4. 5. Use the touch-tone pad on your handset to enter a nam e (up to 15 characters). M ore than one letter is stored in each of the num ber keys. For exam ple, to enter Bill Sm ith, press the 2 key tw ice for the letter B. Press the 4 key 3 tim es for the letter I.
LANGUAGE 1. M ake sure your handset is OFF (not in talk m ode). 2. Press the prog/select button w hile in standby m ode to enter the m ain m enu. 3. Press the CID/VOL ( or ) button to scroll to LANGUAGE. MAIN MENU LANGUAGE HANDSET NAME 4. Press the prog/select button. 5. Use touch-tone pad to select 1ENG, 2FRA , 3ESP, or use the CID/VOL ( or ) button to scroll to 1ENG, 2FRA, or 3ESP. ENG (English) is the default setting. LANGUAGE SELECT LANGUAGE 1 ENG 2FRA 3ESP 6.
4. Press the prog/select button. HANDSET NAME ENTER NAME 5. Use the touch-tone pad to enter the handset nam e. More than one letter is stored in each of the number keys. For example, to enter the name Bill Smith, press the 2 key twice for the letter B. Briefly pause and the cursor moves to the next field. Press the 4 key 3 times for the letter I. Briefly pause and the cursor moves to the next field. Press the 5 key 3 times for the letter L. Briefly pause and the cursor moves to the next field.
1. M ake sure your phone is OFF (not in TALK m ode). 2. Press the prog/select button. 3. Press the CID/VOL ( or ) button to scroll to AREA CODE. MAIN MENU HANDSET NAME AREA CODE 4. Press the prog/select. AREA CODE SET AREA CODE --5. Use the handset touch-tone pad to enter your three digit area code. 6. Press prog/select again. The confirm ation screen show s for tw o seconds, and then returns to the m ain m enu. You w ill hear a confirm ation tone. AREA CODE 123 RINGER VOLUME 1.
RINGER VOLUME SET LEVEL 1HI 2LOW 3OFF 5. Press the CID/VOL ( or ) button or use the handset touch-tone pad to enter 1, 2 or 3. 6. Press prog/select again. The confirm ation screen show s for tw o seconds, and then returns to the m ain m enu. You w ill hear a confirm ation tone. NOTE: If RINGER is turn ed OFF, th e h an dset displays RINGER OFF. RINGER VOLUME LEVEL LOW RINGER MELODY You may choose from six different polyphonic melodies plus one ringer tone. 1.
6. Press the prog/select button again to save. The confirm ation screen show s for tw o seconds, and then returns to the m ain m enu. You w ill hear a confirm ation tone. RINGER MELODY MELODY - 4 VIP MELODY This features allow you to assign a specific m elody to som eone you want to get your attention w hen the person calls. When a VIP m elody is assigned and that person calls, the VIP m elody w ill ring instead of the norm al ring.
VIP MELODY VIP 1 * EMPTY * 6. A total of 10 VIP can be stored. Press prog/select button to select the VIP m em ory location. The SELECT M EM ORY screen displays for 2 seconds, and then displays the m em ory records. VIP MELODY SELECT MEMORY VIP MELODY 317-123-4567 JOHN SMITH 7. Press the CID/VOL ( or ) button to scroll to your desired memory record. 8. Press prog/select button to confirm the selection. SET M ELODY screen displays. VIP MELODY SET MELODY 1 2 3 4 5 6 7 9.
TO REVIEW/CHANGE/DELETE: 1. Repeat step 1 ~ 5 as above section. 2. If there is a VIP w hich has already been assigned to this location, it w ill toggle to display that VIP nam e and num ber in 2 second intervals. VIP MELODY VIP 3 MELODY 7 VIP MELODY 317-123-4567 JOHN SMITH 3. You can change, delete or return to previous m enu: a) Press prog/select button to re-assign the VIP record, or b) Press delete/redial button to delete the VIP record, or c) Press exit to return to previous m enu.
4. Press prog/select button. SECURITY CODE SET CODE #123 --5. Default is #123. Enter “ #” and any other 3 digits. 6. Press prog/select button to confirm . The confirm ation screen show s for tw o seconds, and then returns to the m ain m enu. You w ill hear a confirm ation tone. SECURITY CODE # 258 HANDSET REGISTRATION READ THIS NOTE: Your h an dset( s) is pre-registered and ready to use. Registered h an dsets display HANDSET 1, HANDSET 2, and HANDSET 3.
2. Use the touch-tone pad or the CID/VOL ( or ) button to select 1YES. NOTE: If you select 2NO, your handset cannot be registered and will not work. 3. Press the prog/select button and HOLD BASE PAGE WAIT FOR BEEP and PRESS PROG KEY AFTER BASE BEEP show s in the display. REGISTRATION HOLD BASE PAGE WAIT FOR BEEP REGISTRATION PRESS PROG KEY AFTER BASE BEEP 3. Press and hold the page button on the base until you hear a long confirm ation tone. NOTE: Registration sh ou ld on ly take abou t 1 m in u te.
5. Use the touch-tone pad to enter the nam e. M ore than one letter is stored in each of the num ber keys. For exam ple, to enter the nam e Bill Sm ith, press the 2 key tw ice for the letter B. Briefly pause and the cursor m oves to the next field. Press the 4 key 3 tim es for the letter I. Briefly pause and the cursor m oves to the next field. Press the 5 key 3 tim es for the letter L. Briefly pause and the cursor m oves to the next field.
3. Press the CID/VOL ( or ) button to scroll to DE-REGISTRATION . MAIN MENU REGISTRATION DEREGISTRATION 4. Press prog/select and DE-REGISTER? 1YES 2 NO show s in the display. 5. Use the CID/VOL ( or ) button or touche tone pad to select 1YES. DEREGISTRATION DEREGISTER? 1 YES 2 NO NOTE: If you select 2NO, your h an dset is n ot deregistered. 6. Press prog/select again, M OVE NEAR TO BASE displays until you m ove the handset closer to the base. Then CONFIRM ? 1YES 2 NO show s in the display.
DEREGISTRATION HANDSET # DEREGISTERED HANDSET NEEDS REGISTRATION NOTE: If on e or more h an dsets becomes lost, you sh ould de-register all handsets ( globally) to en sure proper system operation. 1. Press an d h old th e base page button on th e base until the charge/ in use indicator flash es. 2. Press an d h old th e base p age bu tton again u n til th e ch arge/ in u se flash es rap id ly. 3. Press an d release th e page button on th e base.
• If you select NO, your program m ed setting are retained. 5. Press the prog/select button to save. The confirm ation screen displays then returns to the m ain m enu. You w ill hear a confirm ation tone. TELEPHONE BASICS RINGER SETTING SHORTCUT NOTE : In addition to settin g th e rin ger level th rough the programmable menu, you may also set it with th e sh ortcut key. 1. M ake sure the phone is OFF (not in TALK m ode). 2. Press the #PAUSE button, and SET RINGER 1ON 2OFF show s on the display. 3.
MAKING A CALL 1. Pick up the handset and press the talk/callback button. Listen for a dial tone. 2. Dial the desired num ber, or pre-dial the num ber first then press the talk/callback button. 3. When finished, press the talk/callback button again to hang up. MAKING A CALL WITH THE HANDSET SPEAKERPHONE 1. Press the spk button on the handset. You w ill hear a dial tone. 2. Dial a num ber. Or, pre-dial the num ber and then press the spk button. 3. When finished, press the talk/callback button to hang up.
AUTO STANDBY Placing the handset in the base cradle w hile the handset is off hook (during a call) autom atically hangs up the handset. CALL WAITING If you subscribe to the combined Call Waiting Caller ID service from your local telephone company, you will receive Caller ID information (if available) on Call Waiting calls. During a phone call you will hear a beep, which indicates another call is waiting on the line, and Caller ID information shows in the handset display.
EXIT Press the exit button on the handset to end an operation, such as TRANSFER or exit the program m able m enu. PAGING This feature helps you locate a m isplaced handset. All handsets m ust be registered to use the page function. If your handsets are not registered, follow the instructions in the Handset Registration section of this m anual. HANDSET AND HANDSET PAGING NOTE: For model 25825, you must register an additional handset ( model 25802) in order to use th is feature.
TRANSFERRING CALLS NOTE : For model 25825, you must register an additional handset ( model 25802) in order to use th is feature. This feature lets you transfer calls betw een handsets in talk m ode. 1. During talk m ode, press the int/conf button to put the call on hold. HOLD TALK 00:30 VOL4 PAGING EXTENSION ? 2. Enter the handset num ber you want to transfer the call to, and the receiving handset is paged. During the page, a page tone is em itted on the receiving handset.
NOTE: 1) If talk/callback button on the sending handset is pressed before int/ conf or talk/callback button is pressed on the receiving handset, the receiving handset emits the ringer tone (not the page tone), and TRANSFER FROM and the handset number or name shows in the display. 2) If the other extension does not take the call w ithin 30 seconds, the call is transferred back to your handset, and CALLBACK is displayed. MUTE To have a private, off-line conversation use the m ute feature.
INTERCOM The intercom feature allow s you to have an unlim ited-duration, tw o-way conversation betw een tw o handsets. NOTE : For model 25825, you must register an additional handset ( model 25802) in order to use th is feature. MAKING AN INTERCOM CALL 1. M ake sure the phone is OFF (not in talk m ode). 2. Press the int/conf button on the handset. PAGING EXTENSION show s in the display. PAGING EXTENSION ? 3. Enter the handset num ber you want to intercom w ith. The receiving party is paged.
5. When finished, press the exit button or the int/conf button or talk/ callback on either handset to deactivate the intercom . RECEIVING AN INTERCOM CALL When an intercom call is received, the handset beeps. To answ er the intercom call, press the int/conf, talk/callback or spk button on the handset. RECEIVING AN EXTERNAL TELEPHONE CALL DURING AN INTERCOM CALL If you receive a telephone call during an intercom call you w ill hear a beep in the earpiece to alert you of the incom ing call.
3. The receiving handset m ust press the int/conf or talk/callback or spk button to answ er the intercom , then both intercom users m ay speak privately. The external caller cannot hear the intercom conversation. HOLD 01:40 VOL1 INTERCOM HANDSET 2 SENDING PARTY INTERCOM HANDSET 1 RECEIVING PARTY 4. Press the int/conf button on the sending handset to initiate a conference betw een handset 1 and handset 2.
REVIEWING, CHANGING OR DELETING STORED NUMBERS TO REVIEW: 1. M ake sure the phone is OFF (not in talk m ode). 2. Press the m em ory button, and the display either show s EM PTY or the num ber of stored records. MEMORY STORED 50 3. Press the CID/VOL ( or ) button to review the m em ories. MEMORY 317 - 123 - 4567 PETER CHAN TO CHANGE: 1. Repeat the steps from 1 to 3 in Review ing Stored M em ory. 2. Press the m em ory button, the display show s ENTER NAM E. 3. Use the touch tone pad to enter a nam e.
2. Press the m em ory button, and the display either show s EM PTY or the num ber of stored records. 3. Press the CID/VOL ( or ) button to scroll to a desired record. 4. When the record show s in the display, press the delete/redial button. The display show s DELETE? MEMORY DELETE ? 5. Press the delete/redial button again to delete the record. DELETED show s in the display.
1. M ake sure the phone is ON. For exam ple: The Num ber M em ory Nam e Long Distance Access Num ber LONG D-1 Authorization Code LONG D-A Long distance num ber DON SM ITH 2. Press m em ory button on the handset, and then press CID/VOL ( or ) to scroll to LONG D-1. Press the talk/call back button to dial the long distance access num ber. 3. When you hear the access tone, press the memory button, and then press CID/VOL ( or ) to scroll to LONG D-A .
RECEIVING AND STORING CID RECORDS When you receive a call, Caller ID inform ation is transm itted by the phone com pany to your Caller ID telephone betw een the first and second ring. The Caller ID inform ation appears on the display w hile the phone rings, giving you a chance to m onitor the inform ation and decide w hether or not to answ er the call.
• Tim e and date the call was received. • NEW appears at the bottom right corner of the display for all calls that have not been review ed. NOTE: Ch eck with your local ph on e compan y regardin g n ame ser vice availability. • NEW and REPT appears at the bottom right corner of the display for all calls received m ore than once w hich have not been review ed. TRANSFERRING CID RECORDS TO MEMORY You m ay transfer a Caller ID record to your phone ’s m em ory.
NOTE: Depen din g on ( a) h ow th e in comin g ph on e number is formatted when th e CID record is received, an d ( b) wh eth er or not you pre-programmed your local area code in th e set up men u, you may n eed to adjust the format of the teleph on e n umber in th e CID record before dialing it back. The mute/ format button lets you ch an ge th e format of a displayed number.
2. Use the CID/VOL ( or ) button to display the desired CID record. CALLER LIST 12 34567890 1 2 34 5 STEVE 9:58 AM 11/24 NEW CALL # 3. Press the delete/redial button. The display show s DELETE ? CALLER LIST DELETE CALL ID ? 4. Press the delete/redial button to erase the record. The display briefly shows DELETED, and then confirms the deletion with a tone. CALLER LIST * * DELETED* * NOTE: Press exit button to return to stan dby mode. DELETING ALL CID RECORDS 1.
3. Press and hold the delete/redial button until the display show s DELETE ALL? CALLER LIST DELETE ALL ? 4. Press the delete/redial button to erase all CID records from m em ory. The display show s NO CALLS. You w ill hear a confirm ation tone. The handset returns to standby m ode. CALLER LIST NO CALLS NOTE: Press exit button to return to stan dby mode. CID ERRORS If there is an error in the transm ission of inform ation to your phone, ERROR or INCOM PLETE DATA show s in the display.
NOTE : Th e an swerin g system displays “- -” wh en it is off. VOICE INSTRUCTIONS If you need additional assistance, press the review (rew ) button in standby m ode and follow the voice instructions. RECORDING THE OUTGOING ANNOUNCEMENT Before using your answ ering system , you should record an outgoing announcem ent (the announcem ent caller hear w hen your answ ering system answ ers a call). A customized outgoing announcem ents can be recorded.
2. Press and hold the announce button. You w ill hear “ RECORD ANNOUNCEM ENT AFTER TONE”. After the tone, say your outgoing announcem ent. 3. Release the announce button w hen you finish. The new recorded outgoing announcem ent plays. NOTE: You can direct callers to leave messages in a specific mailbox by having them press the desired mailbox (1-3) after the outgoing announcement plays. If no mailbox is selected, the incoming messages automatically go into mailbox 1.
3. Your outgoing announcem ent w ill stop and be erased, a confirm ation tone is em itted. 4. You w ill hear ANNOUNCEM ENT ERASED, and the default announcem ent is restored. SETTING THE DAY AND TIME For each m essage received, a day/tim e stam p is added to the m essage. Press the day/check button, the unit w ill announce current tim e and day (Day/ Hour/ M inute/ (AM /PM )). TO SET THE DAY 1. Press and hold the day/check button until the unit announces the correct day. 2.
answering. If you don’t, it will ring four times. This allows you to hang up before the machine answers so that you don’t have to pay toll charges. ADJUSTING THE VOLUME Use the Volum e + and – buttons to increase the volum e up and dow n. The unit beeps w hen the m axim um or m inim um volum e is reached. L8 is the m axim um level and L1 is the m inim um level.
MAILBOX INDICATOR The m ailbox indicators tell you if you have any m essages in each individual m ailbox and if they are new or old. Mailbox indicator is on –There are no new messages, but there are old ones. M ailbox indicator is off – There are either no m essages or the answ erer is turned off. M ailbox indicator is flashing – There are new m essages. MESSAGE PLAYBACK The base m ailboxes play/stop 1, play/stop 2 and play/stop 3 buttons let you know w hen you have new m essages.
To Erase All Previously Played Messages in a Mailbox 1. M ake sure the phone is OFF (not in talk m ode). 2. Press and hold the delete button, the answ erer w ill announce “ TO ERASE M ESSAGES, PRESS M AILBOX ”. 3. Press the m ailbox button (play/stop 1 or play/stop 2 or play/stop 3). 4. The answ erer w ill announce “ ALL M ESSAGES ERASED M AILBOX X ”, follow ed by a confirm ation tone. To Erase a message from the handset: 1. Press the flash/answ erer button on the handset. 2.
3. During call screening, you can press talk/callback button or pick up the extension phone to connect to the external caller and start the conversation. The answerer stops recording once you answer the call. REMOTE ACCESS This section explains how to use the cordless handset, or any touch-tone phone, to access the answ ering system w ith your 4-digit security code. TIPS: If you access the an swerin g system with an y oth er touch-tone phone, a voice men u guides you th rough th e steps.
enter the security code before the pone disconnects. You should erase som e of the old m essages so the system can record new m essages. NOTE: The unit also answers after the 10th ring if it is turned off. To access the answering machine, enter your 4-digit security code after you hear the beep.
4. Insert the new battery pack and reconnect the battery plug. 5. Put the battery com partm ent door back on. 6. Place handset in the base to charge. If you don’t charge the handset battery properly (for 16 hours) when you first set up the phone and/or when you install a new battery pack, the battery’s long-term performance will be compromised.
DISPLAY MESSAGES The follow ing indicators show the status of a m essage or of the unit. INCOMPLETE DATA Caller inform ation has been interrupted during transm ission or the phone line is excessively noisy. ENTER NAME Prom pt telling you to enter the nam e in one of the 50 m em ory locations. (NOTE: The m em ory records in the cordless handsets do not overlap and cannot be shared. Each handset has 50 individual m em ory locations.) DELETE ALL? Prom pt asking if you want to erase all Caller ID records.
PRESS TALK KEY Prom pt telling you that a CID num ber cannot be form atted and you m ay only use the talk button to dial back the CID num ber. NO DATA No Caller ID inform ation was received. NO BATTERY Indicates the battery is not installed in the handset or the battery pack is not properly connected in the com partm ent. LOW BATTERY Indicates the battery needs to be charged. LINE IN USE Displays on handset when the telephone line is in use.
TROUBLESHOOTING GUIDE TELEPHONE SOLUTIONS No dial tone • Check or repeat installation steps. • M ake sure base pow er cord is connected to a w orking electrical outlet. M ake sure the telephone line cord is connected to the base and the m odular phone jack. • Connect another phone to the sam e jack; if there is still no dial tone, the problem m ight be your w iring or local service. • The cordless handset m ay be out of range of the base. M ove closer to the base.
• Relocate the base. M ake sure base is not plugged into an outlet w ith another household appliance. • Charge the battery. Unit beeps • Place the handset in the cradle for 20 seconds. If it still beeps, charge battery for 16 hours. • Clean charging contacts on cordless handset and base/charge cradle w ith a soft cloth or an eraser. • See solutions for “ No dial tone.” • Replace the battery.
CALLER ID SOLUTIONS No Display • Charge or replace the battery. • M ake sure that the unit is connected to a non-sw itched electrical outlet. Disconnect the pow er supply cord from the base/charge cradle and reconnect it. Caller ID Error M essage • The unit displays this m essage if it detects anything other than valid Caller ID inform ation during the silent period after the first ring. This m essage indicates the presence of noise on the line.
GENERAL PRODUCT CARE To keep your unit working and looking good, follow these guidelines: • Avoid putting the phone near heating appliances and devices that generate electrical noise (for exam ple, m otors or fluorescent lam ps). • DO NOT expose to direct sunlight or m oisture. • Avoid dropping the handset, as w ell as other rough treatm ent to the phone. • Clean the phone w ith a soft cloth. • Never use a strong cleaning agent or abrasive pow der because this w ill dam age the finish.
SERVICE If trouble is experienced w ith this equipm ent, for repair or warranty inform ation, please contact custom er service at 1-800-448-0329. If the equipm ent is causing harm to the telephone netw ork, the telephone com pany m ay request that you disconnect the equipm ent until the problem is resolved. This product m ay be serviced only by the m anufacturer or its authorized service agents. Changes or m odifications not expressly approved by ATLINKS USA, Inc.
INDEX A Accessing the Answ ering System from Another Location 49 Accessing the Answ ering System w ith the Cordless Handset 49 Accessory Order Form 61 Adjusting the Volum e 46 Answ ering a Call w ith the Handset 27 Answ ering a Call w ith the Handset Speakerphone 27 Answ ering System Set Up 42 Area Code 15 Assigning, Review ing, Changing or Deleting a VIP M elody 18 Auto Standby 28 Digital Security System 6 Display M essages 52 E Equipm ent Approval Inform ation 2 Erasing M essages 47 Erasing Your Recorde
M M ailbox Indicator 47 M aking a Call 27 M aking a Call w ith the Handset Speakerphone 27 M aking an Intercom Call 32 M em o 48 M em ory 12 M em ory Full 49 M essage Counter 46 M essage Playback 47 M ute 31 P Paging 29 Paging from Base/Group Paging 29 Parts Checklist 8 Program m ing the Telephone 12 R Receiving an External Telephone Call During an Intercom Call 33 Receiving an Intercom Call 33 Receiving and Storing CID Records 38 Recording the Outgoing Announcem ent 43 Redial 28 Rem ote Access 49 Replaci
5-2601 5-2638 5-2628 5-2620 AC power adapter Headset Replacement Handset Battery Copy your com plete account num ber from your VISA card. Your com plete charge card num ber, its expiration date and your signature are necessary to process all charge card orders. For credit card purchases Please make sure that this form has been filled out completely.
LIMITED WARRANTY What your warranty covers: • Defects in m aterials or w orkm anship. For how long after your purchase: • One year, from date of purchase. (The warranty period for rental units begins w ith the first rental or 45 days from date of shipm ent to the rental firm , w hichever com es first.) What we will do: • Provide you w ith a new or, at our option, a refurbished unit. The exchange unit is under warranty for the rem ainder of the original product’s warranty period.