Thermo Recorder TR-73U © Copyright 2006 T&D Corporation. All rights reserved. 2006.
Notice about this User's Manual In order to properly use this product, please carefully read this manual before using. T&D Corporation accept no responsibility for any malfunction of and / or trouble with this product or with your computer that is caused by the improper handling of this product and will deem such trouble or malfunction as falling outside the conditions for free repair outlined in the attached warranty. - All rights of this User's Manual belong to T&D Corporation.
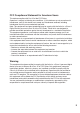
FCC Compliance Statement for American Users This device complies with Part 15 of the FCC Rules. Operation is subject to following two conditions: (1) this device may not cause harmful interference. and (2) this device must accept any interference received, including interference that may cause undesired operation. Note: This equipment has been tested and found to comply with the limits for a Class A Digital Device, pursuant to Part 15 of the FCC Rules.
Safety Precautions and Instructions To ensure safety be sure to obey all of the following warnings. The following items should be strictly obeyed for the safe usage of this unit, and for protecting yourself and other people from bodily harm and / or damage to property. To ensure the proper use of our product, please read the following carefully and fully understand the contents.
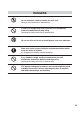
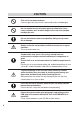
DANGERS Do not take apart, repair or modify the main unit. Doing so may cause fire or electrocution. If water or a foreign body enters into this unit, immediately remove the batteries and stop using. Continued use may cause fire or electrocution. Do not use this unit in wet or humid places, such as a bathroom. Store main units, sensors, batteries and communication cables out of the reach of children. It is dangerous to touch or swallow batteries.
CAUTION This unit is not water-resistant. If the unit gets dirty, wipe it with a clean cloth and a mild detergent. Do not expose the unit to harmful gases or chemicals. It may cause corrosion and / or other danger to the unit and to people handling the unit. Do not use batteries other than specifies. Doing so may cause fire or damage. Battery terminals may provide insufficient contact due to age or vibration. This may lead to data loss.
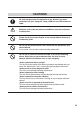
CAUTIONS We shall not guarantee the operation of our device if you have connected it to your computer using a USB hub or a USB extension cable. Batteries used under low pressure conditions may leak and cause a malfunction. Please do not insert your fingers or any foreign objects into any of the devices' jacks. Do not use any other batteries than those that are specified in this User's Manual. It may cause a fire or other trouble including malfunction.
Cautions about using the Sensors Cautions about using the temperature/humidity sensor TR-3100 The sensor can measure temperature within the range of 0 to 50Ɏ and humidity within the range of 10 to 95%RH. Only use the sensor within these ranges. If extremely severe temperature changes occur, the humidity measurements may appear abnormal. Once the sensor's temperature becomes stable, the measurements will return to normal. This sensor is not waterproof. Do not get wet.
Table of Contents Notice about this User's Manual --------------------------------------------------------------------i FCC Compliance Statement for American Users --------------------------------------------- ii Warning -------------------------------------------------------------------------------------------------- ii Safety Precautions and Instructions ------------------------------------------------ iii To ensure safety be sure to obey all of the following warnings.
Cautions about using the Sensors [Handling the temperature/humidity sensor] - The temperature/humidity sensor should probably be changed after a period of about one year. After removing the sensor from its package, please change the temperature/humidity sensor after one year's usage. During use the temperature/humidity sensor will accumulate impurities (dirt) on the surface of the sensor is being used in a bad environment (smoky or dusty places) it may be necessary to change the sensor sooner.
About Thermo Recorder TR-73U Outline TR-73U Thermo Recorder is a data logger capable of measuring, displaying and recording temperature, humidity, and barometric pressure data. TR-73U has a total of three channels: one temperature, one humidity, and one barometric pressure channel. The data recorded into the TR-73U units can then be downloaded quickly via USB cable to your computer whereby with our exclusive software you can easily process the data into graphs, tables, save to files and/or print it out.
-Battery Life Warning Display When the battery power becomes low, a battery life warning signal will appear in the unit's LCD display. If the battery power becomes even lower the unit will automatically go into sleep mode in order to protect the data. -15 Recording Intervals Select from 15 recording intervals (from 1 second to 1 hour) to meet your needs.
Package Contents Thermo Recorder TR-73U x 1 MS-Windows MS-Windows 2000/Xp 98SE/Me Copyright 1995-2006 TandD Corporation. All rights reserved.
Part Names and Functions Part Names and Functions FRONT button DISPLAY INTERVAL REC/STOP button button ȇ Pressing this button will change the LCD Display Mode. ȇ Pressing this button will display the currently set recording interval. ȇ Pressing this button will start or stop recording. ȁ LEFT SIDE Sensor Jack Power Switch RIGHT SIDE USB Cable Jack Serial Cable Jack *1 *1: Not supported in TR-73U.
LCD Display Ԙ ԙ Ԛ ԛ Ԝ ԝ Ԟ ӱ Recording Mark The recording condition will appear. ONȇRecording in progress.ȁBLINKINGȇWaiting for programmed start. Ӳ Data Capacity Scale After every 2000 readings the scale will be marked from left to right. ӳ COM Mark This will appear when data is being sent or received. ONȇUSB cable is connected.ȁ BLINKINGȇIn communication with computer.
Installing the Battery 1. 2. Remove the battery cover form the back of the unit. Insert 1 AA alkaline battery, making sure that the + and – are in the correct direction. *Always use a new battery. 3. Replace and close the battery cover. Changing the Battery 1. When battery power becomes low, a battery life warning signal will appear in the unit's LCD display. If, at this time you change the battery, recording will continue uninterrupted and all data will be saved for downloading. 2.
Installing the USB Device Driver You will need to install this driver in order to use the device with a USB cable and Windows. The USB device driver must be installed for communication via USB between your computer and a TR-73U Thermo Recorder. After installing the USB device driver, your computer will be able to detect and recognize TR-73U devices that have been connected with a USB cable.
4. By connecting a data logger to the USB cable already connected to your computer, the [Found New Hardware Wizard] will automatically open. * Please note that when using Windows XP SP2 or above, the following window will appear. Click [No, not this time] and then click [Next]. 5. 6. By checking [Install the software automatically (Recommended)] and clicking [Next], the software will automatically be installed. After completing installation, click the [Finish] button.
Checking After Connecting 1. Open the [Control Panel] and double click on [System]; the [System Properties] will be displayed. 2. Click the [Hardware] Tab, and click the [Device Manager] button in the Device Manager Area. 3. In the Device Manager Window, check to see if [USB Recorder 1] is listed under [USB Recorder COM].
\Windows® 2000^ 1. 2. 3. Turn on your computer and open Windows. After Windows has been completely started up, connect the supplied USB cable to a USB port on your computer. Insert the attached CD-ROM in the CD-ROM drive. *If the Installation Window opens, close it. 4. By connecting a data logger to the USB cable already connected to your computer, the [Found New Hardware Wizard] will automatically open. 5.
6. Check [Search for a suitable driver for my device (Recommended)] and click the [Next] button. Check 7. Check [CD-ROM] and then click the [Next] button. Check 8. 9. [Next] button \Next^ button Click [Next] to start the installation. After completing installation, click the [Finish] button *Caution: If the Driver is not automatically detected, please search by specifying the place as (CD-ROM [Device Driver]) and install manually from there.
Checking After Connecting 1. Open the [Control Panel] and double click on [System]; the [System Properties] will be displayed. 2. Click the [Hardware] Tab, and click the [Device Manager] button in the Device Manager Area. \Hardware^Tab Device Manager \Device Manager^ button 3. In the Device Manager Window, check to see if [USB Recorder 1] is listed under [USB Recorder COM].
[Windows® Me] 1. 2. 3. Turn on your computer and open Windows. After Windows has been completely started up, connect the supplied USB cable to a USB port on your computer. Insert the attached CD-ROM in the CD-ROM drive. *If the Installation Window opens, close it. 4. By connecting a data logger to the USB cable already connected to your computer, the [Add New Hardware Wizard] will automatically open. 5.
Checking After Connecting 1. Open the [Control Panel] and double click on [System]; the [System Properties] will be displayed. 2. Click the [Device Manager] Tab, and the [Device Manager] Window will appear. \Device Manager^Tab USB Recorder1 3. Check to see if [USB Recorder 1] is listed under [USB Recorder COM].
[Windows® 98] 1. 2. 3. Turn on your computer and open Windows. After Windows has been completely started up, connect the supplied USB cable to a USB port on your computer. Insert the attached CD-ROM in the CD-ROM drive. *If the Installation Window opens, close it. 4. By connecting a data logger to the USB cable already connected to your computer, the [Add New Hardware Wizard ] will automatically open. 5.
6. Check [Search for the best driver for your device (Recommended)] and click the [Next] button. Check \Next^ button 7. Check [Specify a location] and click the [Browse] button. Select the [Device Driver] in the CD-ROM drive and click [Next]. Check \Browse^ button 8. 9. Click [Next] to start the installation. \Next^ button After completing installation, click the [Finish] button.
Checking After Connecting 1. Open the [Control Panel] and double click on [System]; the [System Properties] will be displayed. 2. Click the [Device Manager] Tab, and the [Device Manager] Window will appear. \Device Manager^Tab USB Recorder1 3. Check to see if [USB Recorder 1] is listed under [USB Recorder COM].
If Installation Fails If, during USB device driver installation, some trouble occurs that results in a failure to install properly, the following display will appear in the Device Manager. If this occurs, please re-install from the [USB Device] properties. How to Re-install 1. In the Device Manager Window, right click on [USB Device] under [Other Devices] to display the USB Device Properties. 2.
Connecting the Sensors Connect the Sensor *To avoid poor connections, be sure to push the sensor connector securely into the jack. NOTE: If a sensor extension cable is being used with the data logger connected by USB to your computer, electromagnetic waves may cause large errors in measurements. Handling the temperature/humidity sensor - The temperature/humidity sensor should probably be changed after a period of about one year.
Starting Recording from Main Unit Button By pressing the button on the main unit you can start a recording session immediately. *If you wish to make changes to the device name, channel name, recording mode or to any other recording conditions, you must make those settings by connecting the device to your computer. button Start Recording Press in the button on the front of the unit until the [REC] mark appears in the display. When displayed, recording has begun.
Setting Recording Interval from Main Unit Button You can make or change recording interval settings from the button on the front of the TR-73U main unit. *During recording or while waiting for a programmed recording to start via the provided software, there are not settings to be made. button 1. Press in the button on the front of the device until the recording interval appears in the display. 2.
Changing the LCD Display Mode from Main Unit Button You can make or change the LCD display settings from the button on the front of the TR-73U main unit. button 1. By pressing the button on the front of the unit, you can change the screen display. 2. If the LCD display shows three channels' readings alternatively, it will show one channel as a fixed display by pressing the button.
Specifications Device Type TR-73U Measurement Items Barometric Pressure Temperature Humidity Number of Measurement Channels 1 Channel 1 Channel 1 Channel with Internal Sensor 750 ȡ 1100hPa -10 ȡ 60Ɏ Ƚ with External Sensor 750 ȡ 1100hPa 0 ȡ 50Ɏ 10 ȡ 95% Responsiveness: 4 seconds or 40 seconds (At a recording interval of 1minute or more: 40 seconds) 12 minutes Ƚ Measuring Accuracy (with Attached Sensor) Ⱦ 1.5hPa Average Ⱦ 0.3Ɏ Ⱦ 5%RH ȪAt 25ɎȆ50%RHȫ Measuring / Display Resolution 0.
Optional Accessories TR-07K2 Wall Attachment Wall Attachment Included: screws x 2Ȇdouble-sided tape x 1 86 63 4 US-15C USB Communication Cable Cable Length about 1.
h ttp ://www.tandd.co.jp/ 5652-169, Sasaga, Matsumoto City, Nagano, 399-0033 Japan Tel: +81-263-27-2131 Fax: +81-263-26-4281 E-mail: overseas@tandd.co.jp Office Hours: Monday to Friday 9:00-12:00 / 13:00-17:00 Thermo Recorder TR-73U User's Manual Published by T&D CORPORATION © copyright 2006 T&D Corporation. All rights reserved. This is printed on 100% recycled paper.
Thermo Recorder TR-73U Warranty Customer's name: Address: Phone No.: Dealer's name: Address: Phone No.: Guarantee period Date of purchase 12 months from date of purchase Statement of Limited Warranty 1.This product is warranted to be free from defects in materials and workmanship for a period of one (1) year following the date of purchase. Should the product fail to operate per specification in normal use during this period T&D will repair the unit or provide a replacement free of charge.